Can You Take Refrigerator Doors Off? A Homeowner’s Step-by-Step Guide
Learn how to safely remove refrigerator doors for cleaning, moving, or maintenance with actionable steps, tools, and tips from How To Refrigerator.

Yes. In many refrigerator models, doors can be removed for cleaning, relocation, or hinge replacement. Plan with a helper, unplug the unit, and disconnect any water lines if present. Start by removing hinge covers, then carefully lift the door off the top hinge and set it on a padded surface. Label parts for easy reassembly.
Can You Take Refrigerator Doors Off? A Practical Overview
According to How To Refrigerator, removing fridge doors is a common task homeowners face when cleaning behind the unit, relocating it for painting or flooring work, or replacing worn hinges. The short answer to the question can you take refrigerator doors off is typically yes, but success depends on your model and following careful steps. Doors are heavy and mounted with hinges that support a lot of weight, so the process should be collaborative and deliberate. This guide walks you through what to inspect, which tools you’ll need, and how to reattach the doors properly to maintain a good seal and alignment.
Why and When People Remove Refrigerator Doors
Removing doors is usually a last-resort step when access is obstructed by the cabinet, when a hinge or seal is damaged, or when the fridge needs to fit through a tight doorway. It’s not typically required for routine cleaning, and you should avoid removing doors if you’re unsure about your model’s hinge configuration. The How To Refrigerator team finds that most homeowners successfully remove doors when they proceed with a clear plan, proper tools, and a helper to manage the weight and alignment.
Understanding Hinges and Door Mechanics
Most standard refrigerators use top and bottom hinges with a fixed door that remains aligned by hinge pins or bolts. Some models attach doors with a single through-bolt hinge, others use a two-piece hinge system with a bracket and cover caps. Before you start, identify whether your fridge has an ice maker or water dispenser routed to the door; those lines can complicate removal and require additional disconnect steps. Knowing your hinge type helps you anticipate the order of removal and reduces the risk of damage to gaskets or door edges.
Planning and Safety Prerequisites
Safety comes first. Always unplug the unit before touching electrical components, and shut off the water supply if your fridge door carries a water line or ice-maker line. Clear space around the fridge, and lay down thick blankets or foam padding to prevent scratches on the door fronts. If your fridge is heavy or located on a slick floor, consider placing a sheet of plywood or a moving mat underneath to distribute weight evenly. The goal is to create a stable, protected workspace where the doors can be handled without slipping or banging into walls.
Tools and Prep: What You’ll Need
Gather the essential tools before you begin to minimize time spent with an awkward, heavy object in your hands:
- Phillips head and flathead screwdrivers (sizes that fit your hinge screws)
- Hex/Allen wrench set (for some models)
- Adjustable wrench or pliers
- Tape, markers, and labels to track screws and hinges
- A helper to hold or guide doors during removal
- Soft blankets or foam padding to protect surfaces
- Owner manual or model-specific instructions (highly recommended to confirm hinge order and any special disconnect steps) Having the right tools reduces the risk of stripping screws and helps you work more efficiently.
Step-By-Step Overview: What to Expect During Removal
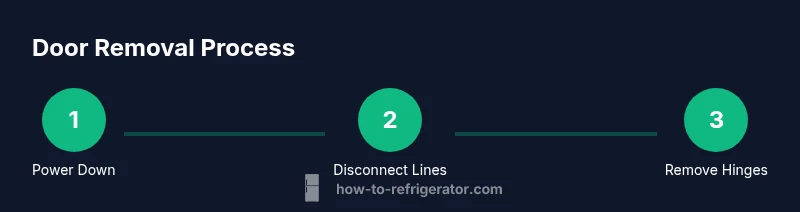
This overview prepares you for the live steps. Each fridge model may differ, but the general flow is consistent: disconnect power and water, remove hinge covers, unbolt or unscrew the top hinge while a helper supports the door, lift the door off the top hinge, then repeat for the bottom hinge. Keep track of hardware using labeled bags or containers. If you encounter resistance, pause and consult your owner manual to avoid bending metal or tearing gaskets.
Reattaching Doors: Alignment, Seals, and Fine Tuning
Reattaching doors is the reverse of removal. Start with the bottom hinge if your model uses a step-down approach, then reattach the top hinge with the door aligned to the cabinet face. Check that the door edges seal evenly against the gaskets all around. Close the door slowly to verify alignment and ensure it doesn't rub on the frame or floor. If there’s a slight misalignment, you may need to adjust hinge shims or tighten screws incrementally.
Model-Specific Considerations: Ice Makers, Dispensers, and Warranty
If your fridge has a door-mounted ice maker or water dispenser, there can be delicate tubing or electronics that require careful disconnects. Some manufacturers advise notifying service or preserving warranty terms if you remove doors yourself; other brands permit homeowner removal with proper reassembly. Always review your model’s warranty language and consult the manufacturer’s guidance when in doubt. The How To Refrigerator team emphasizes that following model-specific instructions is safer than forcing components apart.
Final Checklist and Maintenance After Reassembly
Once doors are reattached, perform a final inspection: verify the seals sit flush against the cabinet, confirm there’s no air leakage around gaskets, and test closing action from multiple angles. If you notice any binding, readjust hinges slightly and recheck alignment. Clean any fingerprints, wipe down edges, and ensure the doors open wide without obstruction. Routine maintenance, including hinge lubrication and gasket inspection, can extend door life and prevent future removal.
Tools & Materials
- Screwdriver set (Phillips and flathead)(Have multiple sizes; hinge screws vary by model)
- Hex/Allen wrench set(Some models use hex bolts on hinges)
- Adjustable wrench( Helpful for stubborn nuts)
- Tape and labels(Label screws/hinges to match during reassembly)
- Helper or assistant(Doors are heavy; you need a second pair of hands)
- Thick blankets or foam padding(Protect paint and stainless from dings)
- Owner manual or model-specific guide(Verify hinge order and water line disconnections)
Steps
Estimated time: 30-60 minutes
- 1
Power down and prepare space
Unplug the refrigerator and shut off the water supply if a water line is connected to the door. Clear the area, remove objects nearby, and lay down padding to protect the floor and doors.
Tip: Have your helper stand ready to support the door as soon as screws loosen. - 2
Disconnect any water line or ice maker
If a line runs to the door, disconnect at the valve or the quick-connect fitting as per your manual. Cap or isolate the line to prevent drips.
Tip: Label the line if you have multiple tubes to avoid mix-ups. - 3
Remove hinge covers and top hinge screws
Use the appropriate screwdriver to remove hinge covers, then loosen the top hinge screws while your helper supports the door weight.
Tip: Keep all screws in a labeled bag to prevent loss. - 4
Lift door off the top hinge
With one person stabilizing the door, tilt it slightly and lift straight up off the top hinge pins. Place it on padding and keep it aligned.
Tip: Do not twist the door; keep it vertical to avoid bending the frame. - 5
Remove bottom hinge and release door
If applicable, remove bottom hinge screws and slide the bottom pin out as you guide the door away from the cabinet.
Tip: Have the helper support the door edge to prevent impact with the floor. - 6
Label, protect, and store doors
Mark the hinges and doors for easy reattachment, place on a soft surface, and cover exposed edges to prevent nicks.
Tip: Store screws and plates in labeled containers for quick reassembly.
FAQ
Can I remove refrigerator doors myself, or should I hire a pro?
Many homeowners can remove doors safely with proper planning and the right tools. If your fridge has a complex water line or you lack a second helper, consider professional assistance. Always consult your model’s manual for model-specific steps.
With the right tools and a helper, DIY removal is common. If you’re unsure about lines or hinges, a pro can help.
Will removing doors void my warranty?
Warranty terms vary by manufacturer and model. Some permits door removal under specific conditions, while others may view it as user-induced. Check your warranty documentation or contact the manufacturer for model-specific guidance.
Warranty depends on your model; check the manual or contact the maker to be sure.
Do I need to defrost or empty the fridge before removal?
Defrosting is not required for door removal itself, but you may want to empty shelves and contents to reduce weight and prevent spills. If doors block access to food, temporarily relocate items to a cooler or another fridge.
No need to defrost for the removal, but clear the contents to avoid spills.
What if my fridge has a water line running to the door?
If a water line is connected, disconnect at the valve or fitting per the model’s instructions, then cap the line and prevent leaks. Reconnect carefully during reassembly and test for leaks.
Disconnect the door line at the valve, cap it, and reconnect during reassembly.
How should I reattach the doors to ensure proper alignment?
Reattach bottom hinges first (if applicable), then top hinges, ensuring the doors sit flush with the cabinet. Check door swing, gasket seal, and alignment using even pressure and slight adjustments as needed.
Attach hinges in reverse order of removal, check alignment, and adjust as needed.
Are there hazards or common mistakes to avoid?
Avoid forcing hinges, bending door edges, or skipping padding. Use a helper; never work on a wet surface or with damaged screws. Rushing can damage gaskets and cause misalignment.
Don’t rush; use padding and help, and don’t force any hinge parts.
Watch Video
Top Takeaways
- Preparation and a helper reduce risk of injury.
- Model-specific guidance is essential for safe removal.
- Labeling hardware simplifies reattachment.
- Protect surfaces to prevent damage during removal.