What to Do If Your Refrigerator Is Leaking
Learn how to diagnose, fix, and prevent refrigerator leaks with step-by-step instructions, safety tips, and a practical diagnostic flow for homeowners.

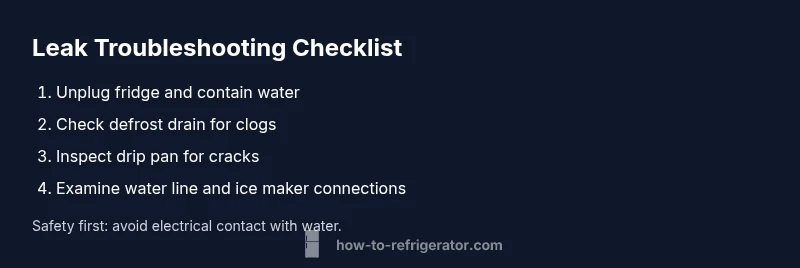
Most leaks come from a clogged defrost drain or a shifted drip pan. Start by unplugging the fridge, moving perishables, and locating the drain tube to flush with warm water. If water continues to pool, check the drip pan and water line for cracks, then call a pro if needed.
Immediate Safety Steps
This guide covers what to do if refrigerator is leaking and how to respond safely. What to do first if you notice a leak from your refrigerator is to act safely to protect yourself and your home. According to How To Refrigerator, quick, calm action reduces damage and shortens repair time. Before touching any electrical components, unplug the unit and remove perishable foods that could spoil. Use towels or a shallow tray to contain the splash and prevent water from reaching outlets or wood flooring. If there is standing water near an electrical outlet or cord, do not touch the outlet; switch off the circuit breaker to the fridge's outlet if it is safe to do so. Check that the fridge is level and that the door seals are intact, as improper sealing can contribute to excess condensation. Next, locate where the water is coming from—common culprits include the defrost drain, a blocked drip pan, or a leaking water line. Clean up the area and note the location of clues for the follow-up checks.
Common Causes of Refrigerator Leaks
Leaks typically stem from a handful of issues that homeowners can identify with a little attention. A clogged defrost drain is the top culprit, followed by an overflowing drip pan or a leaking water line to an ice maker. Condensation from worn door seals or improper leveling can also lead to water pooling inside or on the floor. How To Refrigerator analysis shows that many leaks originate from drainage problems (How To Refrigerator Analysis, 2026). Understanding these causes helps you target the fix quickly and avoid unnecessary replacements. Always verify that the drain tube and drip pan are correctly positioned and free of debris.
First Checks You Should Perform
Begin with safety and accessibility checks before dismantling components. Confirm the fridge is powered off or unplugged and that you can access the back panel or freezer compartment. Inspect the drip pan for cracks or overflow, and look for signs of moisture along the defrost drain path. If your ice maker is active, inspect the supply line for kinks or leaks. Finally, check the door gaskets for warping or gaps that could cause excess moisture condensation. These simple checks often reveal the source without tools or professional help.
Defrost Drain: How Clogs Cause Floor Wetness
The defrost drain is designed to carry meltwater from the freezer to a collection pan underneath. When it becomes clogged with ice or debris, water can back up and overflow into the fridge or onto the floor. Seasonal changes, dust buildup, or improper defrost cycles contribute to clogs. Clearing the drain usually involves flushing with warm water and a gentle brush to remove ice remnants. If you don’t see improvement after a thorough flush, the issue may be more complex, requiring further inspection of the defrost heater and tube alignment.
Inspecting the Water Line and Ice Maker
Leaks can originate from the water supply line feeding the ice maker or the line itself. Look for visible cracks, loose fittings, or kinks in the hose behind the refrigerator. Tighten fittings gently with the appropriate wrench, and replace damaged hoses as needed. If you notice condensation around the ice maker, ensure the cabinet is level and the water inlet valve is functioning. A slow drip from the line may indicate a loose connection that can be resealed. Always turn off water supply before handling lines to prevent sudden sprays.
Quick Fixes to Try Before Calling a Technician
Try these non-invasive steps first: flush the defrost drain with warm water, wipe up any pooling water, and re-seat the drip pan and drain tube. Ensure the refrigerator is level and adjust the front feet if necessary. If you used an ice maker, temporarily disable it to ensure the leak isn’t related to an active line. After performing these steps, monitor for new leaks for at least 24 hours. If water reappears, it’s time to seek professional help.
When to Call a Professional and What to Expect
If basic checks and quick fixes don’t stop the leak, or if you notice signs of electrical traces or burning smells, contact a professional. A tech will typically diagnose drainage, float switches, and line connections, and inspect the compressor and seals if needed. Expect the technician to verify power safety, check refrigerant integrity, and test the defrost system. Early, clear notes about symptoms help the technician diagnose faster and reduce cost.
Prevention Tips to Keep Leaks from Returning
Regular maintenance reduces future leaks. Clean the defrost drain periodically, check door seals for wear, and keep the back of the fridge clear for proper airflow. Use a small drain pan under the appliance if you have a water line or ice maker, and schedule a seasonal inspection to catch wear before it becomes a leak. Practicing safer usage habits, such as not overloading shelves and keeping the drain area dry, also helps prevent moisture buildup.
Steps
Estimated time: 30-45 minutes
- 1
Power down and prepare the area
Unplug the fridge and move nearby items to prevent water damage. Put on gloves and use towels to catch any spills. Ensure pets and children are clear of the workspace.
Tip: Safety first: Never work on electrical components with the fridge plugged in. - 2
Locate the leak source
Inspect the back of the fridge, the freezer drain area, and the drip pan under the unit. Look for cracks, loose fittings, or a clogged drain tube.
Tip: Take photos of connections before loosening fittings for reference. - 3
Clear the defrost drain
If you find ice or debris in the defrost drain, flush it with warm water. Use a pipe cleaner or flexible brush to remove stubborn buildup.
Tip: Do not use sharp tools that can damage the drain tube. - 4
Check the drip pan and water line
Inspect the drip pan for cracks; reseat it. If there is an external water line, check for pinholes or loose clamps and secure or replace as needed.
Tip: Keep the area dry to prevent slip hazards. - 5
Test and monitor
Plug the fridge back in and run a brief cycle to see if water still leaks. Observe for several hours to confirm stability.
Tip: Record observations to share with a technician if needed. - 6
Call a professional if needed
If leaks persist after these steps, schedule a service visit. A pro can check refrigerant lines, seals, and the evaporator coil for deeper issues.
Tip: Note symptoms, model, and recent maintenance to speed up diagnosis.
Diagnosis: Water pooling on the kitchen floor or under the refrigerator
Possible Causes
- highDefrost drain clogged or blocked
- mediumOverflowing drip pan due to misalignment or cracks
- mediumLeaking water line to ice maker or dispenser
- lowCracked condenser pan or improper leveling causing condensation runoff
Fixes
- easyUnclog defrost drain by flushing with warm water and inspecting for ice buildup
- easyInspect drip pan for cracks or misalignment and reseat securely
- easyInspect water supply line and ice maker connections for leaks; tighten or replace as needed
FAQ
What is the most common reason a fridge leaks water?
The most common cause is a clogged defrost drain. When the drain is blocked, meltwater cannot reach the pan and ends up leaking onto the floor or into the fridge.
The most common cause is a clogged defrost drain, which can cause water to leak from the fridge.
Is it safe to ignore a leak?
No. Leaks can indicate drainage or seal issues that may worsen over time and lead to mold or electrical hazards if not addressed.
No, leaks should not be ignored; they can signal drainage or seal problems that worsen and may cause mold or safety hazards.
Where is the defrost drain located and how do I access it?
The defrost drain is usually located in the back wall of the freezer area or at the base of the fridge. Access may require removing a panel; follow your model's manual for safe access.
It's usually behind a panel in the freezer wall or at the bottom of the fridge; check your manual for exact access steps.
Can I fix a leak myself or should I call a professional?
Many leaks can be fixed with basic checks and drain clearing, but stubborn leaks or refrigerant issues require a licensed technician.
You can try simple checks first, but for stubborn leaks or refrigerant problems, call a pro.
Why is there water on the bottom but not in the shelves?</question>
Water may be draining improperly or pooling beneath shelves due to a defrost drain issue or a mispositioned drip pan.
Water beneath the shelves usually means a drain or pan issue rather than a problem with the shelves themselves.
How often should I perform maintenance to prevent leaks?
Perform a quick leak and gasket check seasonally, and clear the defrost drain annually to reduce buildup.
Do a seasonal check of gaskets and a yearly defrost drain cleaning to prevent leaks.
Watch Video
Top Takeaways
- Prioritize safety: unplug before inspecting any components
- Most leaks originate from the defrost drain or drip pan
- Reset or replace damaged drain lines and ice maker connections
- Call a professional if basic fixes fail to stop the leak