How to Fix Refrigerator Leaks Water Onto Floor: A Troubleshooting Guide
Learn to diagnose and fix refrigerator leaks onto the floor with a practical, step-by-step guide for homeowners. Quick checks, safe fixes, and prevention tips.

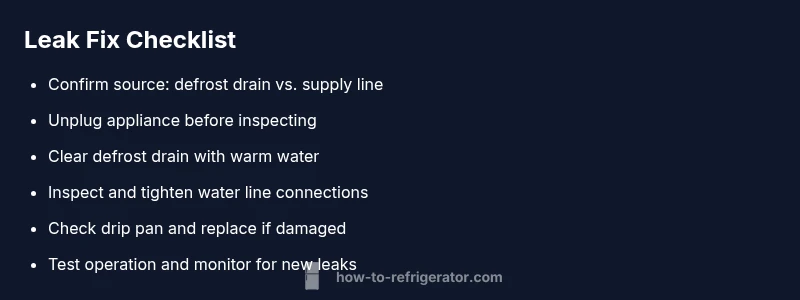
Unplug the fridge, check the defrost drain for ice or blockage, and inspect the water supply line for a loose connection. The quickest fix is to clear the drain and re-seat the hose. If leaks continue, follow the diagnostic flow for deeper checks and consider professional help.
Why refrigerator leaks water onto floor
When you notice a puddle around the base of your fridge, it’s a clear sign that something isn’t draining or sealing correctly. The situation is common, especially in homes with older units or recent temperature changes. Refrigerator leaks water onto floor for several reasons, but most home issues fall into a few predictable categories. According to How To Refrigerator, the top culprits are a blocked defrost drain, a kinked or loose drain hose, a full or damaged drip pan, or a leaking water line to the ice maker. Understanding these possibilities helps you act quickly to prevent floor damage and mold growth. By following a methodical, safe approach, homeowners can usually stem the flow without costly repairs.
Start with the simplest checks: look for condensation on the back panel, verify the drain pan under the fridge, and inspect the ice maker supply line. A clear path for meltwater to reach the drain will stop most leaks at the source. If you catch the leak early, you can avoid permanent staining and potential electrical hazards near water.
According to How To Refrigerator, tackling the issue early reduces the risk of mold and costly damage to flooring and cabinetry. Keeping a small routine of visual checks around the back and bottom of the unit can help you catch problems before they escalate.
Common causes of refrigerator leaks
Leaks around a fridge are rarely mysterious. The most frequent reasons a refrigerator leaks water onto the floor are drain issues, seal problems, and occasional condensation from temperature fluctuations. The defrost drain in modern units carries melted frost to a pan outside the cooling chamber; if that drain is blocked by ice or debris, water will back up and spill. A loose or kinked drain hose can also direct meltwater away from the drain and onto the floor. Additionally, a failing drip pan or misaligned drip pan cover can overflow during a defrost cycle. Finally, a leaky water supply line to the ice maker or water dispenser can spray water near the base if the line leaks at a fitting.
Beyond these, door gaskets that are cracked or misaligned can allow warm room air to enter, increasing condensation around the seals. In some cases, improper leveling can cause the door to seal imperfectly, letting moisture collect and drip. Regularly inspecting seals, hoses, and the drip pan is part of proactive fridge maintenance.
Safety first: quick checks you can do before unplugging
Before you touch any components, power down the unit to reduce the risk of shock and injury. Always unplug the refrigerator from the wall outlet and move any nearby objects to clear a safe work area. If you suspect a water heater nearby or a flooded floor, avoid stepping into pooled water—slips are common safety hazards. Use a dry towel or bucket to catch drip water as you work, and wear rubber-soled shoes. Never use sharp tools on ice near the defrost drain; use warm water and a flexible brush if you need to remove small ice dams. If there is any sign of damaged wiring, melted insulation, or buzzing sounds, stop and call a professional.
Note: Having a flashlight handy helps you spot small leaks you might otherwise miss. Keep the area ventilated to prevent mold growth while you work.
How to diagnose leaks: symptom → diagnosis → solutions
Symptom: visible water pooling near the fridge base or on the floor. Diagnosis: most leaks stem from defrost drain blockage, hose misalignment, or a full drip pan. Secondary culprits include a leaking water line or damaged door gasket. Solutions: start with defrost drain clearance, then inspect supply lines and drip pans. If you still see leaks after these checks, re-examine door seals and consider professional service for refrigerant or major component issues.
Flow tips:
- Always begin with unplugging the unit before inspecting the back or bottom panels.
- Use warm water to flush the defrost drain; never dump harsh cleaners into the drain.
- After any fix, run the fridge in a normal cycle for 24 hours and monitor for new leaks.
Step-by-step fix for the defrost drain blockage
If you suspect the defrost drain is blocked, a common and effective fix is to clear ice and debris from the drain line. Begin by unplugging the fridge and pulling it away from the wall to access the back. Locate the defrost drain hole near the evaporator; you may need to remove a back panel. Flush the drain with warm water, using a flexible pipe cleaner or a thin, bottle-brush to pull out any clogs. If necessary, use a turkey baster to push water through the drain to confirm flow. Reconnect the drain line and re-seat any hoses. Plug the unit back in and verify that meltwater is draining into the pan rather than leaking onto the floor.
Tip: Do not use harsh chemicals; they can damage the drain and lead to fumes or corrosion. If ice buildup recurs, you may have a deeper issue with the defrost heater or timer, which requires professional inspection.
If the drain continues to block or the leak persists after clearing the drain, proceed to inspect the drain pan, hose connections, and water line.
- Safety reminder: always unplug before handling electrical components.
- Re-check after a defrost cycle to confirm effective drainage.
Prevention: maintenance tips to keep leaks from returning
Prevention is largely about regular inspection and timely maintenance. Clean the condenser coils every six months and replace or reseal door gaskets if you notice seepage or foggy vision around the door edges. Use a shallow pan beneath the fridge to catch any incidental drips and ensure the pan’s drain is clear. Keep the defrost drain line clear with seasonal flushing, especially after warm weather when condensation is higher. Make sure the ice maker’s water line connections are tight and that the water supply valve is not partially closed. Finally, ensure the fridge is level; an imbalanced unit can cause condensation to pool and spill.
If you perform routine checks, you’ll likely reduce the risk of water pooling dramatically and extend the life of your flooring and cabinetry.
When to call a professional and warranty considerations
If leaks persist after you have completed basic checks and fixes, or if you notice ice buildup behind the appliance, it may indicate a deeper problem such as a faulty defrost heater or a refrigerant leak. In these cases, contacting a licensed appliance repair technician is the safest option. If your unit is under warranty, check the terms carefully; some DIY fixes can void coverage if not performed by authorized technicians. Record the date and nature of any repairs and keep receipts in case you need to claim warranty service later.
Professional plumbers or appliance technicians can diagnose drainage or refrigerant issues accurately and perform parts replacement with minimal risk to the appliance and your home.
Common mistakes to avoid during DIY leaks fixes
Common DIY mistakes include using the wrong tools on electrical components, ignoring safety precautions around water and electricity, and failing to unplug the unit before inspection. Another frequent error is forcing a blocked drain with excessive force, which can crack fittings or push debris further into the line. Avoid shortcuts like using household cleaners in the drain—these can corrode pipes or emit fumes that affect indoor air quality. Finally, neglecting to test the appliance after a fix can allow undetected leaks to re-emerge. Take a methodical approach, document what you do, and don’t rush through the flow.
Quick recap: what to remember about refrigerator leaks and prevention
- Most leaks originate from drainage failures rather than refrigerant issues.
- A blocked defrost drain is the leading cause and is typically fixable with careful flushing.
- Always unplug before working and avoid water on electrical components.
- Regular maintenance and timely part replacements prevent future leaks.
Steps
Estimated time: 30-60 minutes
- 1
Power off and unplug
Unplug the fridge and move it gently away from the wall to access rear components. This avoids any risk of shock while inspecting the drain and hoses.
Tip: Use a towel to catch any drips as you pull the fridge away. - 2
Locate the defrost drain
Find the defrost drain hole near the evaporator or the back of the fridge. Clear any visible ice or debris blocking the drain opening.
Tip: Do not use force; use warm water and a flexible brush. - 3
Flush the drain
Flush the drain with warm water using a turkey baster or syringe. Confirm the water flows into the drain pan beneath the unit.
Tip: If you see ice forming again, there may be a faulty defrost heater. - 4
Inspect the drain hose and pan
Check the hose from the drain to the pan for kinks or cracks. Ensure the pan is in the correct position and not overflowing.
Tip: Replace damaged hose sections; avoid reusing brittle components. - 5
Check water line connections
If you have an ice maker, inspect the water supply line and fittings for tightness and leaks. Re-seal or replace as needed.
Tip: Turn off the water valve before disconnecting lines. - 6
Test the defrost cycle
Plug back in and run a defrost cycle or wait for a normal defrost cycle to occur. Look for leaks during and after the cycle.
Tip: Observe for at least one defrost cycle to ensure proper drainage. - 7
Observe and monitor
Return the fridge to position, re-check after 24 hours for any signs of leaking, and keep a log of observations.
Tip: Take a photo log if leaks reappear to show a technician later.
Diagnosis: Refrigerator leaks water onto floor
Possible Causes
- highDefrost drain blockage or ice buildup
- mediumLeaking water supply line to ice maker
- lowOverflowing or damaged drip pan
- lowDamaged door gasket causing excess condensation
Fixes
- easyClear defrost drain with warm water and a flexible tool; ensure proper flow to the drip pan
- mediumInspect and tighten or replace water supply line connections to ice maker
- easyInspect drip pan; clean or replace if damaged; ensure pan sits correctly under the fridge
- mediumCheck door seals; replace cracked gaskets and reseal doors to reduce condensation
FAQ
Why is my refrigerator leaking water onto the floor?
Most leaks stem from drainage problems, such as a blocked defrost drain, or from a loose water line. Inspect these first, then check the drip pan and gasket condition. If leaks persist, proceed with the diagnostic flow or call a pro.
Most leaks come from drainage problems like a blocked defrost drain or a loose water line. Start there and check the drip pan and seals if needed.
Is a small puddle always a sign of a serious problem?
Not always. A small puddle can result from recent defrost cycles or condensation. If it recurs, investigate the drain and seals to prevent bigger issues.
A small puddle isn't always serious, but recurring leaks mean you should check the drain and seals.
How do I unclog the defrost drain?
Unplug the fridge, find the defrost drain, and flush with warm water. Use a flexible brush or pipe cleaner to remove any ice or debris. Do not use harsh chemicals.
Unplug, locate the drain, flush with warm water, and use a flexible brush to clear debris.
When should I call a professional?
If leaks persist after basic checks or if you notice ice buildup behind the fridge, there might be a fault beyond simple drainage. A licensed technician can diagnose refrigerant or major component issues.
If leaks continue after checks or you see ice buildup behind the fridge, call a professional.
Can door seals cause leaks?
Damaged gaskets can cause condensation and mis-sealing, which looks like a leak. Replace cracked seals and ensure doors close tightly.
Yes, bad door seals can cause condensation that seems like a leak.
Will DIY fixes void my warranty?
DIY fixes can affect warranty coverage in some cases. Check your warranty terms and use authorized repair services if required.
Check your warranty terms before DIY—some repairs require a pro to keep coverage.
What safety precautions are essential?
Always unplug before inspecting, avoid water around electrical components, and wear rubber-soled shoes. If you see exposed wires, stop and call a pro.
Always unplug first and avoid wet areas near electrical parts.
Watch Video
Top Takeaways
- Identify the drainage path and test for flow.
- Prioritize defrost drain blockage as the leading cause.
- Unplug and follow a safe, layered troubleshooting flow.
- Know when to call a professional and protect warranties.
- Prevent leaks with regular maintenance and checks.