Whirlpool Refrigerator Ice Maker: Diagnosis, Repair, and Maintenance
Learn how to diagnose, repair, and maintain your Whirlpool refrigerator ice maker with practical steps, safety tips, and maintenance guidance to restore reliable ice production in 2026.

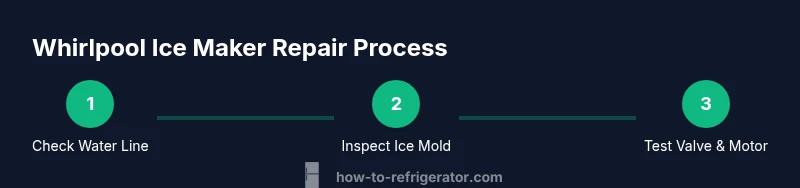
You can diagnose and fix most Whirlpool refrigerator ice maker problems by inspecting the water supply line for kinks, checking for ice jams in the mold, thawing any frozen lines, and testing the fill valve and ice maker motor. Start with simple, model-agnostic steps before replacing parts in the field or at home.
Understanding Whirlpool refrigerator ice maker basics
The Whirlpool refrigerator ice maker is a compact production line inside your freezer that turns water into ice cubes using an ice mold, a water inlet valve, and an ejector mechanism. When everything is working, a steady supply of clean water fills the mold, freezes, and the ejector arm releases the cubes into the storage bin. Common symptoms of ice maker trouble include no ice production, slow ice output, or ice that looks misshapen or hollow. For homeowners troubleshooting the ice maker, it helps to know the key components so you can identify where a failure might originate. In 2026, many Whirlpool models share similar core parts, but model-specific differences exist. The How To Refrigerator team emphasizes starting with simple checks that don’t require disassembly, then moving to targeted part testing if needed.
How the ice making system works in Whirlpool models
Most Whirlpool ice makers rely on four core subsystems: (1) water supply and filtration, (2) the ice mold and freezing cycle, (3) the ejector mechanism and motor, and (4) the control module or microswitch that times the cycle. The water inlet valve opens to fill the mold and closes to prevent overflow. A frozen line or clogged filter can starve the mold of water, halting production. The ice mold chills, the motor raises the ejector hub, and the cubes are pushed out into the bin. A faulty sensor or timer can prematurely stop cycles. Understanding these parts helps you diagnose whether the issue is mechanical, electrical, or a water- related problem.
Common symptoms and what they mean
- No ice: Could be water supply blocked, ice mold jam, or a failed inlet valve. Start by checking the water line for kinks or leaks.
- Slow ice production: A partial clog, dirty filter, or a weak water supply can throttle output. Inspect lines and replace the filter if needed.
- Ice cubes are hollow or misshapen: You may be dealing with a partial fill or air trapped in the mold, often caused by low water pressure or a clogged supply line.
- Water leakage around the ice maker: Look for a loose connection, a cracked line, or a faulty inlet valve that lets water escape during the fill.
- Ice cubes sticking to the mold: A wear‑related issue with the ejector or a dirty mold can cause sticking. Regular cleaning helps prevent this.
Safety first: precautions before you begin repairs
Working on an ice maker involves electrical components and water lines, so safety is essential. Always unplug the refrigerator before opening panels, and shut off the household water supply to prevent leaks. Use protective gloves and lay down towels to catch any spills. If you notice damaged wiring, refrigerant smells, or flooding, stop and call a professional. Safety guidelines emphasize working in a dry environment and following manufacturer instructions specific to your Whirlpool model.
Troubleshooting flow: quick checks you can do at home
- Confirm the water supply line is connected and free of kinks; straighten and secure any bends.
- Inspect the ice mold for jams; remove any ice obstructions with a non‑metal tool.
- Defrost a frozen line by turning off the ice maker for 15–20 minutes and then running a test cycle.
- Check the ice maker housing for water leaks and ensure the bin is seated properly.
- If your model has a replaceable water filter, replace it according to the manufacturer’s schedule. A clogged filter reduces water flow and ice production.
- Use a multimeter only if you’re comfortable with electrical testing to verify the inlet valve and motor continuity. Always unplug the unit before testing.
Maintenance and prevention for Whirlpool ice makers
Regular maintenance reduces future failures. Clean the ice mold and housing every 3–6 months with warm, soapy water and a soft brush, and rinse thoroughly. Replace the water filter every 6–12 months or per your owner’s manual, especially if your water supply is hard or has a high mineral content. Check the water line connections for leaks and secure any loose fittings. If ice production is stable, schedule simple checks every few months to catch issues early.
When to replace vs repair: cost considerations and model compatibility
Ice maker components wear with use, and some failures (like a faulty motor or cracked housing) may require replacement rather than repair. Compare the cost of a new ice maker assembly against the price of repair parts and labor. Model compatibility matters: Whirlpool often shares parts across similar refrigerator families, but always verify part numbers for your specific model. If your unit is still under warranty, check coverage for ice maker repairs before ordering replacement parts.
Tools & Materials
- Flathead screwdriver(For panel screws on the ice maker housing)
- Phillips screwdriver(For general screws on the ice maker assembly)
- Multimeter(Useful for checking electrical continuity on the inlet valve/motor if you’re comfortable)
- Wrench set(For disconnecting water lines and fittings)
- Pliers(Grip hoses, remove clamps, or handle small fittings)
- Towels or absorbent rags(Catch water and protect countertops)
- Bucket or small container(Contain any water when disconnecting lines)
- Soft brush or old toothbrush(Clean mold and debris from the ice mold and housing)
- Safety gloves(Protect hands from sharp edges and cold surfaces)
- Replacement ice maker assembly or service kit(Only if the diagnosis indicates a failed component)
Steps
Estimated time: Total time: 60-90 minutes
- 1
Power down and prepare
Unplug the refrigerator and shut off the water supply. Place towels around the work area to catch any spills. This initial step prevents electrical shock and water damage during inspection.
Tip: Keep the nearby area dry and have a reachable disposal space for removed parts. - 2
Inspect water supply and fittings
Trace the water line from the house supply to the ice maker. Look for kinks, pinches, or leaks. If you find a loose connector, tighten with the appropriate tool and rerun the water.
Tip: A small leak can significantly reduce ice production over time; fix it before testing the rest. - 3
Check the ice mold and mold door
Open the ice mold housing and inspect for jams or stuck cubes. If needed, gently loosen with a non‑metal tool and clean the mold well to remove mineral buildup.
Tip: Never strike ice with metal tools; use plastic or nylon tools to avoid scratching. - 4
Defrost frozen lines if needed
If you observe ice buildup around the inlet or line, allow a short defrost period (15–20 minutes) with the unit off. Then restart the ice maker and observe the cycle.
Tip: Avoid applying direct heat to the ice maker; use room‑temperature defrost methods. - 5
Test the inlet valve and motor (advanced)
If you’re comfortable, disconnect the wiring harness and test valve continuity with a multimeter. Check the motor for smooth operation when the cycle is triggered.
Tip: If you’re uncertain about electrical testing, skip this step and proceed to professional help to avoid damage. - 6
Reassemble and run a cycle
Reconnect all components, restore water supply, and plug the unit back in. Run a full ice-making cycle and monitor for proper filling, freezing, and ejection.
Tip: Keep the ice bin in place during the first few cycles to verify reliable release.
FAQ
Why has my Whirlpool refrigerator ice maker stopped producing ice?
Common causes include a clogged water line, a frozen ice mold, a faulty inlet valve, or a jammed ejector. Start by inspecting the water line and mold, then test the valve if needed. If these steps don’t resolve the issue, the problem may be electrical or related to the control board.
Typically, it’s either the water line or the ice mold, but it could also be the valve or control module. Start with the basics and then test the valve if you’re comfortable.
What should I check first if water isn’t filling the ice molds?
First verify the water supply is connected and the valve isn’t blocked. Check for kinks in the line and ensure the filter isn’t clogged. If the line is clear and the valve tests ok, the issue may be with water pressure or the valve coil.
Check the water line for kinks and test the valve; if those are fine, check water pressure and possible coil issues.
Is it safe to use the ice maker after thawing a frozen line?
Yes, thawing a frozen line is safe when done gently and with the unit unplugged. Let it defrost naturally and avoid applying heat directly to the ice maker. After defrosting, test the cycle to ensure water flows correctly.
It’s safe if you defrost gently, don’t apply heat, and recheck the cycle afterward.
When should I replace the ice maker rather than repair?
If the ice maker housing or motor is cracked, wiring is damaged, or the replacement parts are no longer available, replacement may be more cost-efficient. Compare part costs and labor with the price of a new ice maker assembly.
If parts are broken or not available, replacement is often the better option compared to costly repairs.
Do Whirlpool ice makers require professional service for every issue?
Not every issue requires a professional. Start with basic checks, cleaning, and simple part tests if you’re comfortable. Complex electrical diagnostics or refrigerant concerns should be handled by a qualified technician.
Many common fixes can be done at home, but leave electrical and refrigerant tasks to pros.
Watch Video
Top Takeaways
- Identify root cause with a simple water-line check
- Clean and inspect ice mold to prevent jams
- Test the water inlet valve and motor if you’re comfortable
- Replace filters regularly to maintain water flow
- Know when to call a professional for complex repairs