Side by Side Refrigerator Ice Maker: Fix & Maintenance Guide
Learn how to diagnose and repair a side by side refrigerator ice maker with clear, safe steps. From checking water supply to resetting the unit, this guide helps homeowners restore reliable ice production without unnecessary part replacements.

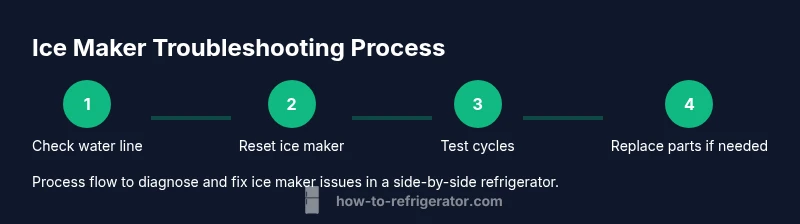
This guide helps homeowners diagnose and fix common issues with a side by side refrigerator ice maker. You’ll learn to identify symptoms, perform safe resets, clear ice jams, inspect the water line, test the fill valves, and replace worn parts. Practical steps, safety notes, and when to call a professional are included.
How a side-by-side ice maker works
Most side-by-side refrigerator ice makers are integrated into the freezer door and rely on a simple cold-water feed, a mold, and a mechanical ejector. Water from the supply line flows through a solenoid valve when the ice maker signals it to fill. The ice tray fills with water, freezes, and then the ejector arm or a motorized blade pushes the ice cubes into the bin. A thermostat or sensor helps determine when the chunk is fully frozen. If any part lags, you may see fewer cubes or no ice at all. Understanding this basic flow helps you diagnose problems quickly and avoid unnecessary parts replacements. Common failure points include a blocked water line, a worn fill valve, a faulty ice maker module, or a jam in the ice mold.
Common symptoms you might see and what they mean
No ice or slow production often points to water supply issues or a clogged fill tube. Cloudy ice can indicate mineral buildup or a frost issue, while ice that's too small may come from a miscalibrated fill volume. If you hear grinding or buzzing, the ejector mechanism or motor may be failing. For side-by-side configurations, the ice maker is typically somewhere in the freezer door, so nearby frost or a blocked evaporator coil can indirectly affect ice production. By correlating symptoms with obvious culprits (water line, valve, mold, or sensor), you can target repairs without unnecessary replacements.
Safety first: before you start any work
Unplug the refrigerator and shut off the water supply to the ice maker. Wear safety glasses and keep towels handy for any water spills. Work in a well-lit area and avoid bending or twisting the water line excessively. If you notice refrigerant smells or frayed electrical wires, stop and call a professional. Always consult your model’s owner manual for model-specific instructions and warnings. Safety cannot be overstated when dealing with electrical and plumbing components.
Diagnosing root causes: water supply, ice production, and temperature
Begin with the simplest checks: confirm the water valve is fully open and there are no kinks in the supply line. Inspect the water filter for clogs and replace if needed, then look at the ice mold for frost buildup. A frozen defrost drain can redirect meltwater into the freezer instead of the ice mold, causing inconsistent ice. Temperature imbalances in the freezer can also affect ice formation; ensure the freezer is not set too high or too low. If multiple symptoms align with a single component (for example, valve and line issues), replace or service that part first to maximize results.
Resetting and recalibrating to restore proper ice production
Many side-by-side ice makers respond to a simple reset: locate the reset button or cycle switch on the ice maker module, hold it for several seconds, and listen for a confirmation chime. After resetting, wait a full ice-making cycle (usually several hours) to see if production returns to normal. If your model supports recalibration, follow the manufacturer’s instructions to set the proper fill volume and cycle timing. Keep expectations realistic—resetting does not fix a hardware failure and won’t correct clogged lines or a faulty valve.
Replacing parts and installation tips
If you identify a defective fill valve, ice maker module, or motor, replace with compatible parts from the manufacturer or a reputable parts supplier. When replacing components, disconnect power and water lines before removing panels. Take photos during disassembly to help with reassembly. Always test the unit after install by running multiple ice cycles and verifying that the mold fills evenly, the ice releases cleanly, and the ice bin fills without overflowing.
Maintenance to prevent future ice-maker problems
Regular maintenance is the best defense against recurring ice-maker issues. Schedule periodic water-line inspections for leaks, replace the water filter as recommended by the manufacturer, and keep the ice mold free of frost through gentle monthly defrosts if your model requires it. Clean the mold with a mild solution of water and a small amount of white vinegar to remove mineral buildup. Finally, monitor ice production over several days and note any patterns (e.g., only morning cycles or after long door openings) to catch issues early.
Tools & Materials
- Phillips head screwdriver(Essential for removing ice-maker panels and securing screws.)
- Flathead screwdriver(Only needed if your model uses flat-head screws on access panels.)
- Needle-nose pliers(Helpful for clamps and small fittings on water lines.)
- Adjustable wrench(Use if you need to loosen large fittings on the supply line.)
- Towel or small bucket(Catches water spills during disassembly.)
- Multimeter (optional)(Useful for diagnosing electrical components if you’re comfortable.)
- Replacement ice-maker valve or module (optional)(Only if you’ve diagnosed a faulty part and have a compatible replacement.)
- Owner’s manual for model(Model-specific guidance and part compatibility.)
Steps
Estimated time: Estimated total time: 60 minutes
- 1
Power down and access the ice maker
Unplug the refrigerator and shut off the water supply to the ice maker. Remove any front panels with a screwdriver to reach the ice-maker housing. Keep towels handy for any residual water and check for obvious frost buildup around the mold.
Tip: Label screws and take photos during disassembly to simplify reassembly. - 2
Inspect the water line and valve
Follow the supply line from the wall valve to the ice-maker inlet. Look for kinks, leaks, or loose connections. If the valve is stiff or partially closed, gently open it fully and test for water flow.
Tip: Run a quick test by triggering an ice cycle and watching for water entering the mold. - 3
Clear jams and inspect the ice mold
Check for any ice bridging or jams in the mold. Remove blockages with a plastic tool; be careful not to damage mold fins. If frost blocks the mold, allow a short defrost before retrying.
Tip: Avoid metal tools that can scratch or crack the mold. - 4
Reset the ice maker
Locate the reset button or switch on the module. Hold it for 5-10 seconds until you hear a confirm tone. Reassemble the cover and plug the fridge back in.
Tip: If your model lacks a reset button, power cycle the entire unit for a minute before testing again. - 5
Test the ice-making cycle
Turn the ice maker back on and run a few cycles to observe filling, freezing, and ejection. Note whether the cubes release cleanly into the bin and whether the bin fills to the expected level.
Tip: Give each cycle a little time to complete before judging success. - 6
Inspect defrost and frost issues
If frost is present around the defrost drain, check for clogs and ensure meltwater flows properly. Frost buildup can block airflow and affect ice production.
Tip: A gentle defrost with a warm cloth can help melt minor frost without damage. - 7
Evaluate parts and decide on replacement
If cycles continue to fail after resets and line checks, consider replacing the water valve, ice-maker module, or related sensors. Verify compatibility with your model before purchasing.
Tip: Keep a parts list and model number handy to avoid buying the wrong item.
FAQ
Why is there no ice from my side-by-side ice maker?
No ice usually points to a water supply issue, a clogged fill tube, or a failed valve. Start with the water line, valve, and filter. If these are clear, test the ice maker cycle and reset if needed.
No ice is typically caused by water supply or clogged lines. Check the line, valve, and filter first, then reset if needed.
Can I fix an ice maker without turning off the water supply?
For safety, turn off the water supply before working on the ice maker. This prevents leaks and reduces the risk of accidental water spray during disassembly.
It's safer to shut off the water supply before you start any work on the ice maker.
Is a clogged defrost drain related to ice production problems?
Yes. A clogged defrost drain can cause frost buildup that affects ice mold fill and drainage. Inspect and clear the drain if you see frost or standing water in the freezer.
A blocked defrost drain can lead to frost and mold issues that disrupt ice production.
How often should I replace the water filter for the ice maker?
Follow your manufacturer’s guidelines, but periodic filter changes help maintain water quality and prevent clogs in the fill line.
Replace the water filter as recommended by your model to keep ice clean and flowing.
When should I call a professional for ice-maker issues?
If you’ve rebuilt the basic components, checked water supply, and reset the unit without success, professional diagnosis can prevent further damage and ensure proper refrigerant handling.
If basic steps don’t fix the problem, it’s time to call a professional.
Do temperature settings affect ice production accuracy?
Yes. If the freezer temperature is too warm or inconsistent, ice production can slow or stop. Maintain stable temperatures per your model’s guidelines.
Temperature stability matters for consistent ice production.
Watch Video
Top Takeaways
- Identify the root cause before replacing parts.
- Resetting and checking the water supply fixes many issues.
- Regular maintenance prevents future failures.
- Use model-specific parts for reliable operation.