Top Freezer Ice Maker Repair Guide for Homeowners 2026
Learn to troubleshoot, maintain, and repair a refrigerator top freezer with an ice maker. Practical, safe, step-by-step guidance for homeowners today.

Want to fix a refrigerator top freezer with ice maker? This guide walks homeowners through diagnosing common ice-maker problems, from water supply and dispenser issues to ice bin jams and defrost drains. You’ll find step-by-step checks, safety reminders, and DIY fixes you can complete with basic tools. This approach emphasizes safe, practical techniques and avoids costly service calls when a repair is straightforward.
Why a Top-Freezer with Ice Maker Matters
A refrigerator with a top freezer and a built-in ice maker offers a balanced blend of reliability, cost efficiency, and simple layout for many kitchens. For homeowners, this configuration often means quicker access to ice without occupying a lot of door space or breaking the budget on a fancy side-by-side unit. The How To Refrigerator team highlights that regular, simple maintenance can prevent many common ice-maker failures, keeping your family stocked with ice and your fridge running smoothly. From the perspective of daily kitchen workflow, a dependable ice maker minimizes interruptions during meal prep or entertaining. In this guide, you’ll learn how to identify the most frequent trouble spots and perform safe, hands-on fixes yourself, saving time and money while preserving appliance longevity.
Common Layouts and Models
Top-freezer designs with ice makers vary by brand and model, but most share a few core components: a water inlet valve, a supply line, an ice mold (tray), an ejector arm, a control switch, and a defrost drain that keeps ice from clogging. Some models use a manual ice-dispense lever, while others rely on an automatic fill cycle. Understanding these parts helps you diagnose where the issue originates. When reviewing models, check whether the ice maker is a pure ice maker or part of a compact ice-and-water dispenser assembly. The layout influences where leaks appear, how to access the valve, and what small parts you may need to replace.
How Ice Makers Work in Top-Freezer Refrigerators
In a typical top-freezer ice maker, a water inlet valve feeds water into the mold. The heater in the mold then releases the ice into the storage bin. The ejector arm pushes completed ice cubes out of the mold, and a sensor signals when the bin is full. If any of these steps fail—no water, no cycle, jammed ejector, or a blocked drain—the ice maker stops producing or leaks. Temperature and timing controls regulate when ice drops, while the defrost drain prevents meltwater from refreezing in the bin. Understanding this sequence helps you pinpoint the stopping point when troubleshooting.
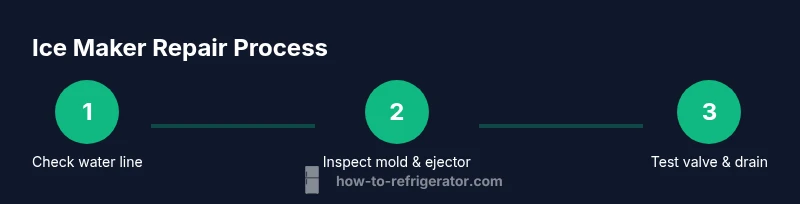
Diagnosing Common Problems with a Top-Freezer Ice Maker
Start with the simplest checks: is the water supply turned on, is the line kinked, and is the ice bin properly seated? A stuck ejector or jammed mold is a frequent culprit, especially after holidays or heavy use. If the unit fills with water but doesn’t freeze, the line could be frozen or the fill valve may be weak. In some cases, mineral buildup reduces flow; in others, a faulty switch or control module prevents cycling. How To Refrigerator analysis shows that most ice-maker failures stem from water supply issues or simple mechanical jams, so systematic checks usually resolve the majority of problems without a full replacement.
Maintenance and DIY Fixes You Can Perform
Regular cleaning of the ice mold and bin helps prevent clogs and flavor transfer. Disconnect power and water before performing any work. Remove the ice bin, inspect the mold for cracks or mineral buildup, and clear ejector blades. If the line feels stiff or frozen, carefully thaw with a hairdryer on a low setting while shielding the tubing. Re-seat the bin, test the cycle, and listen for the normal mechanical sounds. For ongoing issues, replacing a worn inlet valve or defective sensor is a common, cost-effective DIY upgrade, especially on older top-freezer models.
When to Call a Professional and What to Expect
If you’ve checked the water supply, inspected the mold and ejector, and still have no ice, it may be time to call a pro. Faulty wiring, a failing control module, or refrigerant-related issues require specialized tools and training. A technician will typically scope the ice maker, test valves and sensors, verify the door switch, and check for leaks in the supply line. The How To Refrigerator team recommends having a rough repair plan and model information ready to speed up the service call. Professional service can prevent further damage and preserve warranty eligibility when applicable.
Tools & Materials
- Screwdrivers (Phillips and flat-head)(Size #0 to #2 Phillips; 1/8 to 1/4 inch flat-head)
- Volt/ohm meter (multimeter)(To test electrical components and continuity)
- Needle-nose pliers(For disconnecting small fittings safely)
- Wrench set (adjustable)(For water line fittings)
- Towels or absorbent rags(Keep spills during testing contained)
- Bucket or tray(Catch water during drainage checks)
- Flashlight or headlamp(Inspect dark corners and behind panels)
- Gloves(Protect hands during sharp-edge work)
- Mild cleaning solution and cloths(Clean mold and bins safely)
- Replacement components (optional)(Inlet valve, ejector, or heater if needed)
- Owner's manual for model-specific specs(Find wiring diagrams and part numbers)
Steps
Estimated time: 60-90 minutes
- 1
Power down and unplug the unit
Before touching any internal parts, unplug the refrigerator and switch off the circuit if accessible. This prevents shock and accidental operation during disassembly. Have a dry towel handy and keep the area clear of water or metal objects.
Tip: Use a flashlight to locate the power cord and avoid tugging on wires. - 2
Shut off water supply and locate ice maker connection
Turn off the water valve upstream of the refrigerator to stop water flow. If the valve is hard to reach, refer to the model manual for the exact location. Disconnect the supply line using a wrench, placing a towel to catch any remaining water.
Tip: Label the line for reconnection to prevent cross-threading or leaks. - 3
Inspect water line for kinks or leaks
Check the length of the line for sharp bends, kinks, or corrosion. If you see any damage, replace the short section or entire run. Leaks at fittings are common sources of ice-maker problems.
Tip: Avoid over-bending; keep line with a gentle arc to prevent future kinks. - 4
Check ice maker housing and ejector for jams
Remove the ice bin and inspect the mold and ejector arm for ice blockages. Clear any ice or debris with a plastic tool. Make sure the ejector moves freely and re-seat the bin correctly.
Tip: Do not use metal tools that could damage the mold or ejector. - 5
Test fill valve and arm switch
Reconnect the water supply and manually trigger the cycle if possible. Use the multimeter to test the valve for continuity and the arm switch for proper operation. Replace any faulty components if readings are outside the spec.
Tip: If no power is reaching the valve, check the control board wiring first. - 6
Clear ice mold and freeze the ice
If ice is present but not releasing, allow the mold to thaw and attempt another cycle. If mineral buildup blocks the mold, soak with a mild solution and scrub gently. Run at least one full cycle to confirm proper freezing.
Tip: Avoid using hot water; rapid temperature changes can crack the mold. - 7
Inspect defrost drain and ice bin for drainage
A blocked defrost drain can cause water to pool and re-freeze in the ice maker. Clean the drain path with a flexible brush or pipe cleaner and ensure the bin sits properly to prevent spills.
Tip: Pour a small amount of warm water to test drainage and listen for clear flow. - 8
Reassemble, power up, and run a full test cycle
Reconnect the water line, plug in the unit, and run a 2-3 cycle test to confirm ice production and ejector motion. Monitor for leaks and listen for normal cycling noises. If any issue recurs, escalate to a professional.
Tip: Document steps taken and results to help future service calls.
FAQ
What are the most common ice maker problems in top freezers?
Most issues stem from water supply problems, clogged drains, or jams in the ice mold or ejector. Start with the water valve, line, and bin alignment before deeper electrical checks.
Most ice maker problems come from water supply, jams, or drain clogs. Start with the basics like the valve and bin alignment.
How can I tell if the water supply is the issue?
Check if the water line is connected, not kinked, and that the shutoff valve is fully open. If no water reaches the mold, the issue likely lies in the supply path.
If water isn’t reaching the mold, inspect the line and shutoff valve. The problem is usually in the supply path.
Can I fix an ice maker without tools?
Many basic fixes involve cleaning the mold, bin, and drain, and re-seating the ice maker. For electrical or valve replacements, basic tools are necessary.
You can often fix simple jams or buildup without tools, but electrical or valve work usually needs tools.
How long should an ice maker cycle take?
A normal cycle produces ice within a few hours, depending on room temperature and water pressure. If it takes significantly longer, there may be a clog or valve issue.
Typically, cycles take a few hours; if it’s much longer, there’s likely a clog or valve problem.
Is it safe to use heat to thaw a frozen ice mold?
Avoid direct high heat; if needed, use a low, controlled heat source to thaw the mold while monitoring to prevent damage.
Don’t blast with heat—use a gentle approach if thawing is required.
When should I replace rather than repair the ice maker?
If multiple components fail or the unit is old and inefficient, replacement may be more cost-effective than repeated repairs.
If several parts fail or the fridge is old, replacing the ice maker could be more economical.
Watch Video
Top Takeaways
- Inspect the water supply first to fix ice maker issues.
- Check ice mold, ejector, and bin for jams or wear.
- Test the full cycle and confirm ice production after any fix.
- Maintain the defrost drain to prevent freeze-ups.
- The How To Refrigerator team recommends safe DIY fixes and professional help when needed.