How to Fix a Refrigerator Ice Maker That Won’t Make Ice
Urgent guide to diagnose and fix a refrigerator that quit making ice. From simple switches to water lines, learn step-by-step fixes and prevention tips from How To Refrigerator.

Most likely the ice maker isn’t producing ice due to a simple setup or supply issue: the ice maker arm may be off, the water supply valve could be shut, or the freezer isn’t cold enough to form ice. Start by turning the ice maker on, verifying the water line is open, and checking that the freezer temperature remains at or below 0°F. If the issue persists, proceed with the diagnostic flow.
Why ice makers fail: common culprits and quick rationale
When a refrigerator stops making ice, homeowners often assume a major repair is needed. In reality, the majority of outages are caused by simple setup mistakes or routine wear that any homeowner can fix with the right steps. The How To Refrigerator team finds that many ice-maker failures trace back to three areas: the ice maker switch/arm position, the water supply, and the freezer temperature. Safety first: disconnect power before inspecting any internal components. In most homes, resolving these items restores ice production quickly and avoids costly service calls. This section explains how to prioritize fixes and reduces unnecessary disassembly by focusing on what most commonly goes wrong.
Quick checks you can perform without tools
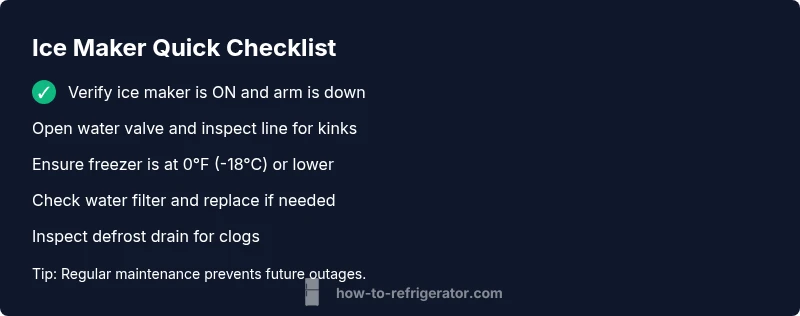
- Confirm the ice maker switch is ON and the ice arm is in the DOWN position. A paused ice maker is the most frequent reason for silence or no ice.
- Inspect the water supply line for kinks or a closed valve. A blocked or closed valve can stop ice production in its tracks.
- Check the freezer temperature. If it’s warmer than 0°F (-18°C), ice won’t form. Allow a few hours for the temperature to stabilize after adjustments.
- Look for frost buildup around the ice maker. Excessive frost can block the mold and prevent ice from forming.
- Make sure the water filter is not clogged or overdue for replacement. A clogged filter reduces water flow to the ice maker.
- If you recently replaced components, re-seat connectors and seals to ensure a snug, leak-free fit.
According to How To Refrigerator, these basic checks solve the majority of ice-maker issues that homeowners encounter during routine maintenance and troubleshooting. By starting with these items, you can often restore ice production in less than an hour without specialized tools.
Diagnostic flow: from symptom to root cause
The diagnostic flow helps you map a symptom to a likely cause and a corresponding fix. Start with the easiest checks (arm position, valve status, temperature) and narrow down to more involved steps (defrost drain, ice mold, or ice-maker module) only if needed. This flow prioritizes safety, keeps the process organized, and minimizes time spent on avoidable tasks.
- Symptom identification: ice maker not producing ice, or producing weak/slow ice.
- Primary suspects: water supply, arm position, temperature.
- Next steps: inspect wiring and module only after ruling out supply and temperature issues.
Follow the flow in order and document what you find at each step to avoid repeating checks on future attempts. If you see signs of damage, such as a frayed line or a cracked ice mold, stop and escalate to a professional.
Step-by-step: fix the most common cause (easy to medium)
- Power down and locate: Unplug the fridge or switch off the circuit to avoid any electrical hazard. Open the freezer and locate the ice-maker assembly. Remove any obvious frost or ice buildup around the mold.
- Check the arm and switch: Ensure the ice-making arm is down and the auto-fill mechanism is not impeded. If the arm sticks, gently move it through its full range a few times to loosen it.
- Inspect the water supply: Find the valve behind the refrigerator or under the sink. Make sure it is fully open. Check for kinks or bends in the supply line. If you notice a leak, replace the line and reseal.
- Test water flow: Disconnect the water line from the ice maker and place a small cup under the outlet to confirm water flows when the valve is open. If nothing comes out, the issue is upstream.
- Check freezer temperature: Use the appliance controls to set the freezer to 0°F (-18°C) or lower. Allow 4-6 hours for stabilization and re-test.
- Clean the defrost drain and mold: If you see frost in the mold or a slow drip, clear the defrost drain and remove any ice blockages in the mold with a plastic instrument.
- Reset and re-test: Reconnect power, reset the ice maker if your model supports it, and wait 24-48 hours for ice production to resume. If it does not resume, the ice maker module may be faulty and require replacement.
Estimated time: 30-60 minutes for basic checks; longer if you must defrost or replace components.
Safety tips, warnings, and common mistakes
- Always unplug before working on electrical components or accessing internal parts. Water and electricity are a dangerous combo.
- Never pour hot water into the ice maker or freeze water directly into the mold; use clean cold water only.
- Avoid forcing parts; if an arm sticks, do not force it beyond its normal travel.
- Replacing parts without the correct model number can result in compatibility issues.
- If you’re not comfortable working behind the appliance, seek professional help sooner rather than later.
Prevention and maintenance to avoid future outages
- Schedule periodic ice maker and water-line inspections to catch wear before it becomes a failure.
- Replace water filters on the manufacturer’s recommended timeline. A clogged filter reduces water flow and ice production.
- Keep the freezer closed and minimize door openings during ice production to maintain stable temperatures.
- Check seals around the door; a leaky seal can raise temperatures inside the freezer and disrupt ice formation.
- Run a defrost cycle if you notice heavy frost buildup; a blocked drain can lead to water pooling and defective ice molds. These simple steps help maintain ice production and extend the life of the ice maker.
When to call a professional and what to expect
If you’ve completed the above steps and ice still isn’t forming, it’s time to call a professional. A repair technician can diagnose a faulty ice-maker module or motor, refrigerant-related issues, or a compromised cold control board. Expect to pay for parts and labor, and ask for a written estimate before any replacement work. How To Refrigerator recommends requesting an in-home diagnostic to confirm the ice maker’s fault and determine the most cost-effective repair strategy.
Steps
Estimated time: 30-60 minutes
- 1
Power down and access ice maker
Unplug the refrigerator or switch off the circuit breaker. Open the freezer and locate the ice-maker housing. Remove frost so you can access the mechanism safely.
Tip: Lock out power at the breaker to ensure full on/off control. - 2
Verify arm position
Check that the ice-maker arm is in the DOWN position. If it sticks, gently move it through its range to loosen any frost or debris.
Tip: Do not force movement; freeze-thaw cycles can help loosen jams. - 3
Inspect water supply
Locate the water valve behind the fridge or under the sink. Ensure it’s fully open and inspect for kinks, leaks, or damaged tubing.
Tip: If you hear a hiss or see water leaking, shut the valve and replace the line. - 4
Test water flow
Disconnect the line from the ice maker and run the valve briefly to see if water streams out. If no water flows, the issue is upstream.
Tip: Have a towel ready for any minor spills. - 5
Check freezer temperature
Set the freezer to 0°F (-18°C) or lower and wait several hours for stabilization before re-testing.
Tip: Avoid frequent temperature changes; excessive cycling can impact ice quality. - 6
Clean defrost drain and mold
If there’s frost buildup around the mold or a blocked drain, clear it with a non-metallic tool and re-test.
Tip: Never use metal objects that could puncture tubing. - 7
Reset and re-test ice maker
Reconnect power, reset ice maker if your model supports it, and monitor for ice production over 24–48 hours.
Tip: Note the model’s reset procedure in your owner’s manual.
Diagnosis: Ice maker not producing ice
Possible Causes
- highIce maker is turned off or arm is not in the down position
- highWater supply valve is closed or line is kinked
- mediumFreezer temperature is too warm
- mediumDefrost drain clogged or ice mold blocked
- lowFaulty ice maker module or motor
Fixes
- easyTurn on ice maker and lower the arm; reset if needed
- easyOpen the water valve fully and inspect/replace damaged line
- easySet freezer to 0°F (-18°C) and allow stabilization
- mediumUnblock the defrost drain and clear ice mold blockages
- hardTest or replace the ice maker module if motor/solenoid fails
FAQ
Why won’t my ice maker make ice even when the freezer is cold?
The most common reasons are the ice maker switch or arm being off, a closed or kinked water line, or an out-of-range freezer temperature. Start with these simple checks before considering a failed ice-maker module.
Common reasons include a turned-off ice maker, a blocked water line, or too warm of a freezer. Check these first before calling a pro.
Why is my ice maker producing ice slowly or with small cubes?
Slow ice production can result from low water pressure, a clogged filter, or partial ice mold blockage. Replace the water filter if due, ensure the line is not restricted, and test again.
Ice is slow because water pressure is low or the filter is clogged. Replace the filter and check the line.
Can a new water filter affect ice production?
Yes. A clogged or worn-out filter can restrict water flow to the ice maker, reducing ice production. Replace the filter according to the manufacturer’s schedule and test again.
A new filter can improve water flow. If you’re overdue, replace it and test.
Is it safe to use the ice maker if there’s an unusual smell or taste?
Unusual odors or tastes can come from bacteria growth in the bin or old water in the line. Empty and clean the ice bin, flush the line if possible, and replace the filter if needed.
If ice tastes off, clean the bin and consider a line flush and filter replacement.
When should I replace the ice-maker assembly?
If the motor, solenoid, or control module fails after troubleshooting, replacement is typically necessary. Consult a professional to confirm the fault and estimate the cost.
If the ice maker’s motor or control is bad, replacement is usually required.
Should I defrost the freezer to fix ice production problems?
Defrosting can help if frost buildup blocks ice formation. If heavy frost returns, address the defrost system or door seals to prevent recurrence.
Defrosting can help if frost blocks ice formation, but fix the underlying cause to prevent recurrence.
Watch Video
Top Takeaways
- Identify the simplest causes first
- Check water supply and freezer temperature early
- Follow the diagnostic flow before disassembling deeper components
- Call a pro if the ice maker module is suspected