Water Filter for Refrigerator: A Homeowner’s Guide
Learn how to choose, replace, and maintain your refrigerator water filter. Practical steps, safety tips, and troubleshooting to keep drinking water clean and ice maker efficient.

By following these steps you will safely replace your refrigerator water filter, improve water quality, and prevent low flow issues. This guide covers choosing the right filter, confirming compatibility, and performing a step-by-step replacement with safety tips and a quick purge of air and sediment. The How To Refrigerator team provides practical, homeowner-friendly instructions for a clean, efficient dispenser.
Why a Water Filter Matters for Refrigerator Water
A clean water filter does more than improve taste. It reduces particulates, chlorine taste, and potential contaminants from your drinking water and ice. Regular filter changes also protect your fridge’s water dispenser and ice-maker mechanisms from buildup, which can affect flow and efficiency. According to How To Refrigerator, maintaining the filter is a quick, high-impact homeowner task that yields safer water and better appliance longevity. By choosing the right filter and replacing it on schedule, you can enjoy clearer water and prevent sediment from clogging jets or nozzles. This article explains how to select, replace, and care for your refrigerator water filter, with practical steps you can follow today for reliable results.
How Refrigerator Water Filters Work
Most refrigerator filters use activated carbon to remove chlorine, taste, odor, and some particulates from cold water. Some models include additional media for lead, pesticides, or microplastics. Filters are designed to fit specific filter housings and will be labeled with compatible models. When a new filter is installed, ongoing maintenance is minimal, but performance relies on proper seating and flushing. A correctly installed filter also helps pressure balance, ensuring a steady flow to the dispenser. The key is to match the filter to your model, install it correctly, and flush according to the manufacturer’s guidance to purge air and reduce loosened carbon dust.
Choosing the Right Filter for Your Refrigerator
Start by locating your fridge’s model number and checking the user manual or manufacturer’s website for compatible filter types. Filters are not universal; using the wrong cartridge can leak or fail to remove contaminants. Common options include single-use cartridges and multi-pack filters; some models offer long-life filters with higher capacity. If you have a water line supply to the fridge, you may also see inline filters or integrated dispensers marketed with the appliance. In most cases, you’ll choose a cartridge that matches your filter housing and is NSF/ANSI approved for contaminants you want to reduce. Remember to verify the gasket or O-ring condition and avoid forcing a filter into a misfit housing. Selecting the correct filter from How To Refrigerator guides ensures you will get reliable performance.
Understanding Filter Lifespan and Replacement Timing
Filter lifespan depends on usage, water quality, and the contaminants present. Most manufacturers recommend replacement roughly every six months or when the dispensed water shows off-taste or reduced flow. If your home uses hard water or has higher sediment, you may need to replace more frequently. A good practice is to note the date you install a new filter and set a reminder. Some refrigerators track remaining lifespan digitally, while others require manual tracking. By staying ahead of the filter’s capacity, you protect your dispenser and ice maker from clogged passages and maintain optimal flavor and clarity.
Tools and Materials You Will Need
Before you start, gather the essentials. You will need a compatible replacement water filter cartridge, soft cloth for wiping, a towel or small bucket to catch drips, protective gloves, and a clean workspace. Optional items include a flathead screwdriver if your model uses a housing cover, and a mild cleaning solution if the filter area is dirty. Having these on hand helps you complete the swap quickly and minimizes the chance of leaks. Always refer to your fridge’s manual for model-specific requirements.
Tools & Materials
- Replacement refrigerator water filter cartridge(Choose a cartridge compatible with your fridge model; verify model number before purchase)
- Soft cloth(For wiping the filter housing and exterior surfaces)
- Towel or small bucket(Catch drips during filter removal and installation)
- Protective gloves(Keep hands clean and protect skin from any debris)
- Flathead screwdriver (optional)(Use only if your housing requires it to remove a cover)
- Mild cleaning solution (optional)(Use if the filter area is dirty before replacement)
- Owner's manual(Helpful for model-specific instructions and filter type)
Steps
Estimated time: 15-25 minutes
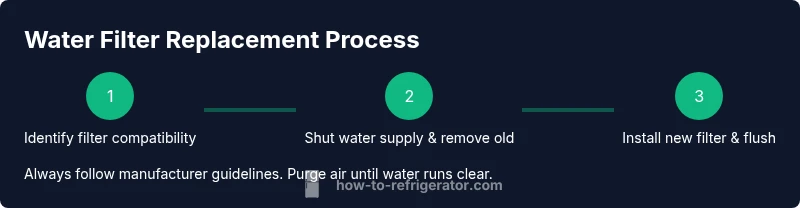
- 1
Identify the correct replacement filter
Locate your fridge's model number and consult the manual or manufacturer website to confirm compatible filter types. Check the filter housing label for the exact part number. Do not substitute a different cartridge unless the model explicitly supports it.
Tip: Verify compatibility before purchasing to avoid leaks or misfit housings. - 2
Shut off water supply and relieve pressure
Turn off the water valve that feeds the refrigerator. If your model uses a pressurized line, run a small amount of water from the dispenser to relieve any residual pressure. Have a towel ready to catch any drips.
Tip: Relieving pressure prevents spills when you remove the old filter. - 3
Remove the old filter
Open the filter compartment, twist the old cartridge counterclockwise, and pull it straight out. Expect a drip or two as you remove it. Place the old filter in a trash bag to contain any residue.
Tip: Keep the old filter away from your face to avoid contact with any built-up sediments. - 4
Prepare the new filter
Remove packaging, check the O-ring, and lightly moisten the gasket with clean water. If your model uses a protective cap, remove it only after you confirm the filter seats correctly.
Tip: Moistening the O-ring helps it seal properly and reduces leaks. - 5
Install the new filter and reseat housing
Insert the new cartridge and turn clockwise until it stops or aligns with the housing. Do not over-tighten. Return the housing cover or cap if applicable, ensuring a snug seal.
Tip: If you feel resistance, back off and reseat; forcing can damage threads. - 6
Flush the new filter and check for leaks
Turn the water back on and run the dispenser for 3–5 minutes or as recommended by the manufacturer. Watch the housing for any sign of leaks and wipe away any drips with a cloth. Stop when the water runs clear and steady.
Tip: Discharge the first cups of water to purge carbon dust from the new filter.
FAQ
How often should I replace my refrigerator water filter?
Most manufacturers recommend replacing roughly every six months or when you notice reduced water flow or off taste. If you have hard water or higher sediment, you may need to replace more often. Always check your model's manual for guidance.
Most filters should be replaced about every six months, or sooner if flow decreases or taste changes. Check your manual for model-specific guidance.
Why is the water flow reduced after replacing the filter?
A partially seated filter, air in the line, or a dirty housing can reduce flow. Ensure the filter is fully engaged and flush the system according to the manual.
If flow is slow after replacement, reseat the filter and flush the system as directed by the manual.
Can I use any water filter in my refrigerator?
No. Filters are designed for specific models and housings. Using the wrong cartridge can cause leaks and poor filtration.
Filters must match your model exactly; check the manual before buying.
Is it safe to drink water immediately after replacing the filter?
It is best to flush the system for a few minutes to purge air and carbon dust before drinking. Follow the manufacturer’s flush guidance.
Run the dispenser for a few minutes until the water tastes normal.
What should I do if there is a leak around the filter?
Turn off the water, reseat the filter, and check the gasket for damage. If leakage continues, replace the filter and inspect the housing.
If you see a leak, shut the valve, reseat, and inspect the gasket; replace if needed.
Watch Video
Top Takeaways
- Select a compatible filter for your model.
- Shut off water and relieve pressure before removal.
- Flush after installation to purge air and debris.
- Check for leaks and reseat if necessary.