Kenmore Refrigerator Water Filter Replacement Guide
Learn how to identify, replace, and maintain the Kenmore refrigerator water filter with our step-by-step guide, practical tips, and troubleshooting to ensure clean, delicious water.

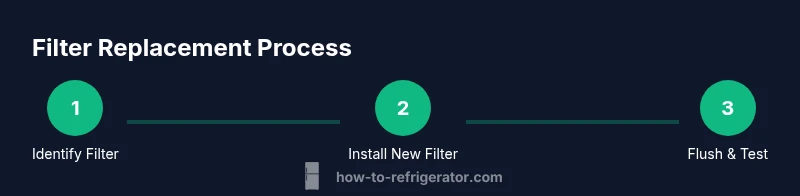
Replacing a Kenmore refrigerator water filter is a simple three-step task: locate and twist out the old filter, insert the new filter until it clicks, and flush the dispenser to clear air and carbon fines. Plan for about 10 minutes of hands-on time, plus a quick leak check and indicator reset. Follow the steps below for a smooth, mess-free replacement.
Kenmore Refrigerator Water Filter: Overview
Water quality matters, and a clean filter is a quick, cost-effective way to improve taste and safety. For Kenmore refrigerators, the built-in water filter is designed to treat incoming water and reduce contaminants before it reaches your tap. Replacing the filter on a timely basis helps maintain steady water flow and ensures the dispenser remains free of debris. This guide from How To Refrigerator walks homeowners through identifying the right filter for your model, performing the replacement, and flushing and testing the system to prevent leaks or reduced flow. The How To Refrigerator team emphasizes practical, actionable steps homeowners can take to keep their fridge water sparkling and safe. The goal is to empower you to troubleshoot confidently without needing a professional for routine maintenance.
Kenmore Refrigerator Water Filter: What it Does
The primary job of a refrigerator water filter is to remove common contaminants from your drinking water and improve flavor and clarity. Most Kenmore filters target sediment, chlorine taste and odor, and certain chemical impurities. While different models may specify different filtration levels, the core benefits remain the same: better-tasting water, less sediment buildup in the ice maker, and improved overall dispenser performance. Regular filter replacement supports consistent water pressure and helps protect your ice maker from debris that can cause clogs. A well-maintained filter also reduces the likelihood of taste or odor becoming noticeable over time.
Understanding Filter Types and Compatibility
Kenmore refrigerators use various filter configurations, including cartridge-style filters that sit in a dedicated compartment and inline options in some models. The essential rule is to choose a filter that is certified for point-of-use filtration and compatible with your specific Kenmore model. Look for filters that carry NSF/ANSI standards markings (e.g., 42 and 53) to ensure performance against common contaminants. Because model families can differ, always check your owner’s manual or the filter label on the fridge door or interior. How To Refrigerator recommends confirming compatibility before purchasing to avoid waste or fit issues.
How to Identify Your Filter Type and Model
To identify the correct Kenmore water filter, start by locating the filter housing. In many refrigerators, it is found at the base grille or inside the fresh-food compartment near the top-right corner. Some models use a twist-and-lock design, while others require you to press a release button to remove the cartridge. Once you locate the housing, remove the existing filter and inspect its shape and size. The label on the fridge or inside the housing usually lists the compatible filter type. If you’re unsure, consult the user manual or visit the How To Refrigerator troubleshooting guide for model-specific guidance. Remember to wash and dry your hands before handling the filter to keep the interior clean.
Replacing the Filter: Compatibility, Installation, and Flushing
Choose a Kenmore-compatible filter that matches the housing type and certification marks. Install the new cartridge by aligning it with the housing and turning or snapping it into place until it clicks. After installation, run water through the dispenser for several minutes to flush out any loose carbon fines and air. This step helps prevent air pockets that can cause sputtering or uneven water flow. Some filters have indicators that reset after installation; follow the label directions or the manual to complete the reset. If you notice leaks after installation, stop the flow, reseat the filter, and check the o-ring for proper seating. If leaks persist, consult a professional.
Signs Your Filter Needs Change and How to Test Water Quality
Common indicators that a filter needs replacement include a noticeable change in taste or odor, reduced water flow, or ice that appears cloudy. If you experience any of these symptoms, consider replacing the filter even if the recommended interval hasn’t passed. After replacement, run the dispenser for 2–3 minutes of continuous water flow to cleanse the system and verify that the water is clear and clean. If water appears cloudy or discolored after flushing, recheck the filter seating and repeat flushing for an additional minute. For ongoing issues, schedule a quick check with a professional or refer to the How To Refrigerator troubleshooting resources.
Maintenance Beyond Replacement: Best Practices
Keep the filter area clean and dry to prevent mold or mildew buildup. Replace filters on the manufacturer-recommended schedule or when the indicator signals, whichever comes first. Store spare filters in a cool, dry place and avoid touching the filter media with dirty hands to prevent contamination. Periodically inspect the gaskets and housing for cracks or wear, and replace components as needed. Regular maintenance also includes running cold water through the dispenser after every grocery trip to ensure consistent performance and avoid stale-tasting water.
Brand Insight and Practical Mindset
According to How To Refrigerator, a proactive maintenance mindset saves time and prevents service calls. The team emphasizes that clear labeling of replacement dates helps homeowners stay on track and reduces the risk of forgetting filter changes. By following a simple, repeatable process, homeowners can extend the life of their filtration system and keep water quality high. The emphasis is on practical, no-surprise steps that align with everyday home maintenance routines.
Tools & Materials
- New Kenmore-compatible water filter(Choose a cartridge that matches your model's housing and certification standards)
- Clean absorbent towel(Place under the housing to catch drips during replacement)
- Pan or shallow container(Capture any residual water when removing the old filter)
- Gloves(Optional for cleanliness and hygiene)
- Flashlight or smartphone light(Helpful to inspect tight spaces and seals)
Steps
Estimated time: 30-45 minutes
- 1
Identify compatible filter
Start by locating the filter housing and confirming the correct replacement. Check the model manual or filter label to ensure you purchase the right cartridge. This reduces the risk of leaks or poor filtration.
Tip: If your fridge uses a sticker inside the door, photograph it for quick reference later. - 2
Prepare the area and safety measures
Place a towel and container beneath the filter housing. If required, wear gloves to keep hands clean. Ensure the fridge door is closed to prevent spills and maintain a tidy workspace.
Tip: Have a damp cloth ready to wipe away spilled water before you start. - 3
Remove the old filter
Twist or release the old filter according to your model’s design. Slowly pull it straight out to avoid forcing the cartridge and to minimize splashes. Place the old filter in a bag to contain any residue.
Tip: Do not force a filter that won’t budge; check for a release tab or consult the manual. - 4
Install the new filter
Align the new filter with the housing and insert it until it clicks or sits firmly in place. Confirm the seal is intact and the filter is oriented correctly. A misaligned filter can cause leaks or poor filtration.
Tip: If your model uses a gasket, ensure it sits evenly around the rim before installation. - 5
Flush the system
Run water through the dispenser for 2–5 minutes to flush out any carbon fines and air. This initial flush helps ensure clean, clear water from the outset and prevents sputtering.
Tip: Collect the first cups of water for disposal to avoid tasting any unpleasant residues. - 6
Check for leaks and reset indicators
Carefully inspect the filter housing for drips. If no leaks are present, reset the filter indicator if your model has one, following the owner’s manual. If leaks occur, reseat the filter and recheck the O-ring.
Tip: Keep a small manual or guide handy if your model has a non-standard reset procedure.
FAQ
How do I know which Kenmore water filter I need for my fridge?
Check the filter housing label or your owner's manual for the exact cartridge type. If in doubt, remove the old filter and compare its size and shape to available replacements. Always choose a filter certified for refrigerator use and compatible with your model.
To find the right filter, read the label on the housing or consult the manual, then match the shape and size of the cartridge to available replacements.
How often should I replace a Kenmore fridge water filter?
Most models recommend replacement every 6 to 12 months, depending on usage and water quality. Replace sooner if you notice taste changes, odor, or reduced water flow. Always follow the filter’s label and your manual for model-specific guidance.
Typically every 6 to 12 months, or sooner if the water tastes off or the flow slows.
Can I clean a used water filter instead of replacing it?
No. Reusable cleaning isn’t effective for fridge water filters, and cleaning can leave contaminants or bacteria in the cartridge. Replace with a new filter to maintain water quality and safety.
You should replace the filter rather than attempting to clean and reuse it.
Why is water flow slow after replacing the filter?
Air pockets or an imperfect seal can cause slow flow. Flush the new filter for several minutes and ensure the seal is seated correctly. If flow does not improve, reseat the filter or replace it again.
Slow flow usually means air in the line or a seating issue; flush and reseat if needed.
Can I use a third-party filter in a Kenmore fridge?
It’s best to use filters approved by Kenmore for your model. Using unapproved filters can affect filtration efficiency, water quality, and may void the warranty.
Stick with manufacturer-approved filters for reliability and warranty protection.
How do I reset the filter indicator after replacement?
Check the owner’s manual for model-specific reset steps. Some models reset automatically after a few minutes of water usage, while others require a button sequence.
Reset procedures vary by model; refer to the manual or How To Refrigerator's guide for exact steps.
Watch Video
Top Takeaways
- Identify the correct Kenmore filter for your fridge
- Install firmly and flush to remove carbon fines
- Check for leaks and reset indicators after replacement
- Replace filters on schedule for optimal performance
- Use brand-approved filters to maintain warranty and performance