How to Remove Water Filter from Frigidaire Refrigerator
Learn how to safely remove and replace the water filter from your Frigidaire refrigerator with a clear, step-by-step approach. Includes safety tips, model variations, and proper disposal guidance for homeowners.

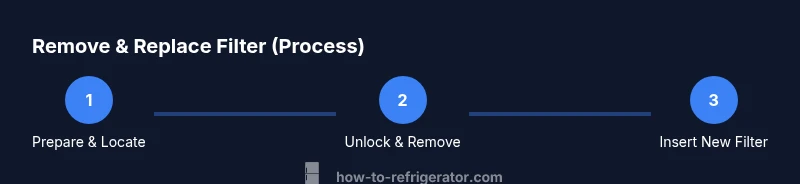
To remove a water filter from a Frigidaire refrigerator, locate the filter housing either inside the fridge or at the grille, depending on the model. Twist the filter counterclockwise about a quarter turn to unlock, then pull it straight out. Note the orientation for replacement. If water drips, place a towel and run a short water purge after installing the new filter.
Understanding Frigidaire Filter Systems
According to How To Refrigerator, many Frigidaire refrigerators use a replaceable cartridge situated either inside the refrigerator compartment or behind the front grille. The exact location depends on the model, but the removal process is similar across most units: locate the cartridge, release the locking mechanism, and pull the filter straight out with care. The How To Refrigerator team found that recognizing model differences helps prevent damage and unnecessary leaks. Most modern filters are designed to twist out with a quarter-turn and then pull, which minimizes the risk of cracking the housing if you apply steady pressure. Before you touch any component, make sure you have adequate lighting and a towel handy for any drips. Understanding the purpose of the filter also helps you plan for replacement: clean water hinges on proper seating of the new cartridge.
Safety and Preparation Before Removal
Before you begin, prepare your workspace and gather essential supplies to avoid spills and slips. Turn off your water supply valve if accessible to reduce drips, and place a shallow tray or towel in front of the fridge to catch any moisture that escapes. If you choose to unplug the appliance for extra caution, ensure you have alternative cold water on hand and set the temperature accordingly when you reassemble. Wear protective gloves if you plan to handle the housing’s edges, and avoid bending hoses or tabs that connect to the filter assembly. These precautions protect both you and the fridge’s internal components from unintended damage and help you complete the removal with minimal cleanup.
Locating Your Filter: Behind the grille or inside the fridge
Frigidaire models position the filter in one of two common places: behind the grille at the base of the refrigerator and inside the main refrigerator compartment near the crisper drawers. Start by inspecting visible access points: remove any grille cover or panel if present, and look for a cylindrical or rectangular filter cartridge seated in a round or square housing. If you see a push-fit ring, you may need to press a small release tab or twist slightly to unlock the cartridge. In some models, you’ll hear a soft click when the filter is released. Take a moment to note the orientation of the filter—the notch or airflow arrows should face the same direction as the housing when you install a replacement.
Accessing the Filter Housing: How to prepare for removal
Once you’ve located the housing, prepare to release the filter without forcing it. Check for a locking ring or a twist-lock mechanism; many Frigidaire filters require a gentle quarter-turn counterclockwise. If you encounter resistance, pause and recheck the alignment rather than applying more force. A clean, dry cloth can help wipe away minor residues around the housing, reducing the chance of debris entering the water line. If the unit has a protective cap or plug, remove it carefully to expose the filter base. The removal step often takes just a minute or two, but taking a careful approach saves you time later.
The Removal Process: Step-by-step explanation with tips
To safely remove the filter, rotate the cartridge counterclockwise about a quarter turn to unlock it, then pull it straight out. If your unit allows, you may need to press a release button before twisting. Lift straight upward to avoid bending the filter stem or dislodging the housing. Place the old filter onto a towel to catch any residual water. Always inspect the gasket or O-ring for cracks or damage; a damaged seal can cause leaks after replacement. This stage is quick, but it’s important to be deliberate to avoid water spray or dropping the cartridge into the crisper area.
Handling Water Drips and Cleaning the Housing
Drips are common as the new cartridge seats and water begins to flow again. Wipe the housing interior and the surrounding area with a clean cloth to keep the work surface dry. If you see mineral buildup around the seals, a damp cloth with mild dish soap can help remove it, followed by a thorough rinse with plain water. Do not use harsh solvents near the filter housing, as they may degrade plastics or leave residues that affect taste. Keeping the area clean reduces the risk of cross-contamination and ensures a better seal for the new filter.
Replacing the Filter Correctly: Orientation and seating
If you’re installing a new filter, align the cartridge with the housing orientation marks and insert it straight in. A light twist clockwise may be required to engage the locking mechanism. Do not force the filter beyond the point of resistance; if it stalls, remove it and re-align before retrying. Once seated, twist the filter or snap the lock into place, depending on your model. If your model uses a front grille filter, reattach the grille securely. A proper seal prevents leaks and ensures the purifier functions as designed.
Purging and Checking for Leaks: The last mile
After installation, run a small amount of water through the dispenser or through the dedicated water line to purge air and any loose particles. Expect a short burst of water prior to steady flow. Check all connection points for leaks over the next few minutes; if you see moisture, power down the unit and reseat the filter or Gasket. It’s normal to see some initial droplets; persistent leaks indicate a mis-seated cartridge or a damaged seal and require re-inspection.
Maintenance to Extend Filter Life: Timing and tips
To keep water tasting clean and flow consistent, replace or reset your filter according to the manufacturer’s recommendations. In most households, filters are replaced every six months or when water flow noticeably decreases or the taste changes. Mark your calendar or set a reminder in your phone to prevent overdue changes. Regular inspection of the filter housing helps you catch cracks, worn O-rings, or misalignments early. When you keep a short routine for checks, you minimize the risk of larger issues that could affect cooling or water delivery.
Common Mistakes and How to Avoid Them
Common missteps include forcing the filter, ignoring orientation marks, or leaving a loose seal after replacement. Avoid twisting too aggressively, which can crack the housing; always verify alignment and seating with a gentle push. Don’t skip purging after replacement, as air and particulates can affect taste and dispenser performance. If a grille cover is hard to remove, don’t pry with excessive force—consult the user manual for model-specific access points. By following proper technique, you can prevent leaks and ensure the filter works as intended.
Environmental Considerations & Disposal
Used water filters should be disposed of in accordance with local guidelines. Many communities accept spent filters in household trash, while some areas offer recycling options for certain filter types. Check your local waste-management resources for guidance. If you’re upgrading your fridge or adopting a more sustainable model, consider filters designed for longer life and lower waste. Always rinse and dry the old cartridge before disposal to minimize moisture and odor in the trash. By following proper disposal practices, you contribute to environmental stewardship while maintaining refrigerator performance.
AUTHORITY SOURCES
For further reading and official guidance, consult credible sources from government and public health organizations. The U.S. Environmental Protection Agency (EPA) provides consumer-focused information on water quality and filtration. The U.S. Food and Drug Administration (FDA) offers general perspectives on drinking water safety and consumer products. The Centers for Disease Control and Prevention (CDC) covers public health considerations related to water safety. These sources help homeowners understand why filters matter and how best to handle maintenance in everyday kitchen life.
Tools & Materials
- Phillips-head screwdriver(For removing any grille or housing screws if present.)
- Towel or absorbent rag(Place under the removal area to catch drips.)
- Water filter cartridge replacement(Have the correct Frigidaire replacement filter on hand.)
- Gloves (optional)(Protect hands from sharp edges during removal.)
- Flashlight or mobile light(If lighting is poor, to better see the housing.)
Steps
Estimated time: 25-40 minutes
- 1
Prepare the area and tools
Set a towel in front of the fridge, gather the replacement filter, and if needed, turn off the water valve. This minimizes spills and keeps your work space clean while you perform the removal.
Tip: Having everything at hand prevents mid-task searches that can cause mistakes. - 2
Locate the filter housing
Inspect the interior fridge wall or base grille for the cartridge. Some models hide the filter behind a grille; others place it inside the main compartment near the salads. Confirm the model access point before attempting removal.
Tip: Use a flashlight if lighting is uneven to avoid accidental damage. - 3
Unlock the filter
Hold the housing steady and twist the cartridge counterclockwise about a quarter turn to unlock. Do not force the cartridge if it resists—misalignment is a common cause of jams.
Tip: If the mechanism is stiff, apply a small amount of even pressure and try again. - 4
Remove the filter
Gently pull the cartridge straight out, keeping it level to avoid spilling. Place it on the towel and inspect the gasket or O-ring for cracks or damage.
Tip: Observe the orientation marks so you can install the new filter correctly. - 5
Inspect the housing
Check the filter housing and O-ring area for residue, cracks, or missing parts. Clean as needed with a damp cloth, then dry before installing a new cartridge.
Tip: A damaged seal can cause leaks after replacement. - 6
Install the new filter and purge
Insert the new filter with the correct orientation, twist clockwise or snap into place as required by the model, and seal it firmly. Run water through the dispenser for 2–3 minutes to purge air and flush loose debris.
Tip: Do not over-tighten; snug is sufficient to seal without stressing the housing.
FAQ
Do I need to unplug the fridge before removing the filter?
No, unplugging is not required for filter removal alone. If you’re doing other maintenance, you may unplug for safety, but keep in mind the fridge will lose cooling while unplugged. Always reassemble and test for leaks after restoration.
No, you don’t usually need to unplug the fridge just to remove the filter; unplugging is only necessary for other maintenance tasks.
What should I do if the filter won’t twist free?
Ensure you are twisting in the correct direction and that the housing is aligned. If resistance remains, stop and recheck alignment or refer to the user manual for model-specific guidance. Forcing it can damage the housing.
If the filter won’t twist, stop and check alignment; forcing it can damage the housing.
How do I know when to replace the filter?
Most Frigidaire filters are replaced every six months or when you notice reduced water flow or off-tasting water. Always follow the manufacturer’s recommendations for your specific model and water use.
Replace the filter every six months or when the water flow drops or taste changes.
Can I operate without a filter temporarily?
Operation without a filter is possible briefly, but it’s not recommended long-term due to potential contaminants and taste changes. Reinstall or replace with a fresh cartridge as soon as possible.
You can operate briefly without a filter, but replace it soon for safety and taste.
Where should old filters be disposed of?
Most households dispose of old filters in regular trash; some areas offer recycling options for used filters. Check local guidelines and recycling programs for your region.
Dispose of old filters in regular trash or follow local recycling guidelines.
What if I see leaks after replacement?
If you notice leaks, reseat the filter and recheck the O-ring seal. If leaks persist, power down briefly and inspect the housing for damage. A leak often means the filter isn’t fully seated or the seal is compromised.
If leaks appear, reseat the filter and inspect the seal; persistent leaks require inspection.
Watch Video
Top Takeaways
- Identify model-specific filter placement before starting.
- Twist to unlock, then pull straight out to remove.
- Check seals and purge water after installation.