How to Clean Refrigerator Water Dispenser
Learn a safe, thorough method to clean your fridge water dispenser. Step-by-step prep, gentle cleaners, and a rinse to prevent mineral buildup and odors for fresh-tasting ice and water.

This guide shows homeowners how to clean refrigerator water dispenser safely and effectively. It covers prep, safe cleaners, disassembly, sanitation, rinsing, and reassembly to prevent mineral buildup and odors. Follow the steps to keep your dispenser fresh and your ice and water tasting clean.
What cleaning a refrigerator water dispenser accomplishes
A clean water dispenser improves taste, odor, and overall hygiene. Regular cleaning removes mineral deposits, slime, and bacteria that can develop in the small plumbing passages and nozzle area. By maintaining a clean dispenser, you also extend the life of nearby seals and prevent clogs in the dispensing nozzle. The goal is simple: fresh-tasting water and ice without residues that affect flavor or safety.
Understanding the water dispenser system
Most modern refrigerators with water dispensers route water from a dedicated line through a dispensing nozzle and an ice-maker feed. Buildup tends to occur where water sits or flows slowly, especially around the nozzle and in the drip tray. Harsh cleaners can leave residues, so choosing mild, food-safe options is essential. A well-maintained dispenser reduces the risk of leaks and taste issues and keeps the entire drinking-water path clean.
Common buildup and why it happens
Mineral deposits from hard water, especially calcium and magnesium, can accumulate over time. Organic residues from the air and food particles may join the deposits, forming a slimy film. If the dispenser isn’t cleaned regularly, you may notice a chalky ring around the nozzle, off-taste water, or cloudy ice. Regular, gentle cleaning interrupts these processes and preserves system integrity without requiring professional service.
Before you start: safety and prep
Power off and protect the work area. Unplug the fridge at the outlet or switch off the circuit if accessible. If your unit has a shutoff valve for the water line, close it to minimize accidental leaks. Gather your cleaning supplies and lay towels or a shallow tray to catch spills. Wearing gloves helps keep hands clean and protects against irritants in cleaning solutions.
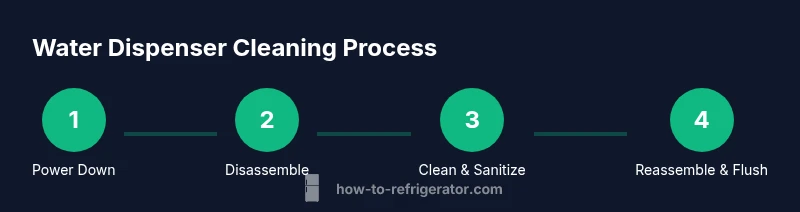
Step-by-step overview (for quick reference)
Below is a high-level view of the steps. The detailed, step-by-step instructions follow in the dedicated section. This overview helps you plan the time and organize parts before you begin. Expect to spend about half an hour to forty-five minutes, depending on dispenser design and how stubborn the buildup is.
Step 1: Power down and prepare the area
Power down the fridge and, if possible, shut off the water supply to the dispenser. Remove any items from the door bin that could be knocked over. Place towels or a shallow tray under the dispenser to catch drips. This step minimizes risk and keeps the workspace clean while you disassemble parts for cleaning.
Step 2: Remove dispenser components
Gently remove the dispenser cap or nozzle cover and any removable splash guard. If your model has a drip tray or a removable reservoir, take those pieces off for separate cleaning. Note where each piece sits to simplify reassembly. Keeping track of small parts reduces the chance of misplacement.
Step 3: Prepare cleaning solution
Mix a mild cleaning solution using warm water and a small amount of dish soap, or use a 1:1 solution of water and white vinegar for a deeper clean. Avoid strong solvents or bleach, which can leave harmful residues on drinking water surfaces. Prepare a separate bowl of clean water for rinsing tools and parts.
Step 4: Clean exterior surfaces and nozzles
Dip a microfiber cloth into your cleaning solution and wipe the exterior surfaces, the nozzle tip, and the surrounding area. For stubborn residues, use a soft-bristled brush or an old toothbrush to gently loosen them. Rinse cloth often and avoid soaking electrical components. Dry the parts after cleaning to prevent water pooling.
Step 5: Sanitize and rinse
If using vinegar, rinse thoroughly with clean water after sanitizing to remove any odor or taste. If you used soap, ensure all soap residues are rinsed away. Wipe down all cleaned parts with a fresh damp cloth and then dry completely. Sanitation is crucial for areas that come into contact with drinking water.
Step 6: Reassemble and reconnect
Reattach the dispenser components in the reverse order of removal. Ensure seals are snug and the nozzle sits correctly. If you turned off the water supply, reopen the valve and ensure there are no leaks. Plug the fridge back in or restore power once reassembly is complete.
Step 7: Flush the line and test
Run several cups of water through the dispenser to flush the lines and clear any residual cleaning solution. Taste a sample water drop to confirm there is no lingering cleaning smell or taste. If the water tastes off, run additional flush cycles until the water reads clean.
Step 8: Maintenance notes and reminders
Record the date of cleaning and note any recurring issues like mineral buildup. Plan to clean the dispenser every 3–6 months, or more often if you notice taste changes, cloudy water, or slow dispensing. Keeping a small routine helps maintain optimal performance and water quality.
Troubleshooting: when to call a professional
If you notice persistent leaks, persistent foul odors despite cleaning, or a non-functional dispenser, professional service may be necessary. Leaks can indicate worn seals or damaged hoses that require specialized tools. A trained technician from a repair service can diagnose and fix underlying issues safely.
Tools & Materials
- Soft microfiber cloth(Lint-free for spotless wiping; keep several on hand)
- Mild dish soap(Use a small amount in warm water)
- White vinegar (5% acidity)(Alternative cleaning option; diluted 1:1 with water)
- Warm water(For cleaning solution and rinsing)
- Spray bottle(Mist solution for targeted cleaning)
- Small bottle brush or old toothbrush(Gently scrub hard-to-reach areas)
- Bowl or container(Mix cleaning solution; hold parts for soaking)
- Paper towels(Pat dry and blot drips)
- Latex or nitrile gloves(Protect hands from cleaners)
Steps
Estimated time: 30-45 minutes
- 1
Power down and prepare
Unplug the fridge or switch off the circuit. If available, turn off the water supply to the dispenser. Clear the area of items and place towels to catch drips.
Tip: Lock in safety by unplugging before any removal of parts. - 2
Remove dispenser components
Carefully detach the nozzle cap, splash guard, and any removable tray. Keep track of each piece and its orientation for easy reassembly.
Tip: Take photos during disassembly to reference during reassembly. - 3
Prepare cleaning solution
Combine warm water with a small amount of dish soap, or mix water and vinegar 1:1 in a spray bottle. Label the solution if you’re using multiple cleaners.
Tip: Avoid bleach; it can leave residue that’s unsafe to ingest. - 4
Clean exterior and nozzles
Wipe all exterior surfaces with the cleaning solution; use a soft brush for stubborn spots. Dry thoroughly to prevent water from seeping into electrical components.
Tip: Never spray cleaners directly into the nozzle; apply to a cloth first. - 5
Sanitize and rinse
Rinse parts with clean water to remove any cleaner residue. If using vinegar, rinse until you can no longer detect vinegar odor. Dry parts completely.
Tip: Rinsing is critical to ensure no taste remains in drinking water. - 6
Reassemble and reconnect
Replace all components in their original positions. Reconnect the water line and plug the unit back in.
Tip: Ensure seals are snug to prevent leaks. - 7
Flush and test
Run several cups of water through the dispenser to flush the line. Check for leaks and verify water quality before normal use.
Tip: If there’s taste, repeat the flush until neutral. - 8
Document and schedule maintenance
Record the cleaning date and set a reminder for the next cleaning window. A regular schedule maintains water quality and appliance health.
Tip: Use a calendar reminder to stay consistent.
FAQ
How often should you clean a refrigerator water dispenser?
Most homes benefit from cleaning every 3–6 months, or sooner if you notice odors, off-tastes, or visible buildup near the nozzle.
Clean your dispenser every three to six months, or whenever you notice odors or off-tastes.
Can I use bleach to clean a water dispenser?
Bleach should generally be avoided for beverage-contact surfaces. Use mild dish soap or vinegar, and rinse thoroughly until no cleaner scent remains.
No, avoid bleach on drinking-water surfaces. Use soap or vinegar, then rinse well.
Should I remove the water filter during cleaning?
Removing the filter isn’t required for standard dispenser cleaning, but consult your model’s manual. Reinstall or replace the filter after cleaning if it’s due.
You don’t usually need to remove the filter, but check your manual and reinstall or replace it afterward if needed.
What if the dispenser still tastes funny after cleaning?
If taste persists, flush longer, inspect the line for mineral buildup, and consider replacing the water filter. Persistent issues may require a professional inspection.
If taste persists after cleaning, flush longer and check the line. If needed, replace the filter or call a pro.
Is vinegar safe for plastic dispenser parts?
Diluted vinegar is generally safe for plastic parts, but always rinse thoroughly and avoid prolonged exposure. If unsure, test on a small area first.
Diluted vinegar is usually safe for plastic parts—rinse well and test a small area first.
Top Takeaways
- Start with safety: unplug and isolate the water line.
- Use mild cleaners and rinse well to prevent residue.
- Disassemble only what's needed and reassemble carefully.
- Flush the line after cleaning and test for taste and leaks.