How to Replace the Filter on Your KitchenAid Refrigerator
Learn how to identify, replace, and maintain the water filter in your KitchenAid refrigerator for cleaner water and ice. Step-by-step guidance, safety tips, and troubleshooting from How To Refrigerator.

Replace the water filter in your KitchenAid refrigerator to ensure clean, refreshing water and ice. This guide covers model compatibility, safe replacement steps, and how to purge air after installation for optimal performance.
Understanding the role of a water filter in a KitchenAid refrigerator
According to How To Refrigerator, a clean water filter is essential for delivering crisp, safe drinking water from a KitchenAid refrigerator. The filter isn't just about taste; it reduces particulates and contaminants that can affect water clarity and ice quality. When a filter becomes clogged or worn, you may notice slower water flow, cloudy ice, or a faint metallic taste. Replacing the filter on a regular schedule helps protect both your health and your appliance. Most KitchenAid models use a replaceable cartridge that sits behind a grille or inside a dedicated housing. The right filter type depends on your model, and using the incorrect cartridge can lead to improper sealing and leaks. In this guide we won’t assume you know your model off the top of your head—we'll walk you through how to identify compatibility, install correctly, and verify that the water you dispense is clean and refreshing. This approach aligns with How To Refrigerator’s practical, homeowner-friendly repair philosophy. The information below also helps homeowners with the common task of finding the best filter kitchenaid refrigerator and ensuring it stays in peak condition.
capacity: null
note: null
Tools & Materials
- KitchenAid compatible water filter(Model-specific replacement filter compatible with your refrigerator (the exact part number depends on your model).)
- Clean cloth or towel(For catching drips and wiping surfaces during replacement.)
- Shut-off valve key or screwdriver(May be needed on some models to access the filter housing.)
- Filter wrench (optional)(Use only if your model requires a wrench to loosen the filter.)
- Gloves(Protect hands from sharp edges and reduce fingerprints on metal surfaces.)
Steps
Estimated time: 15-25 minutes
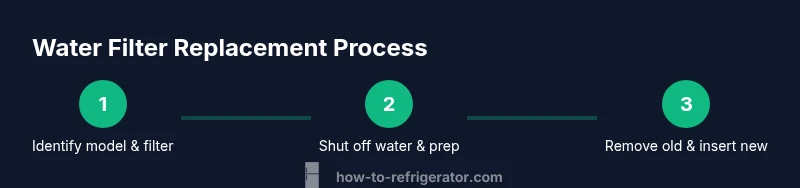
- 1
Identify model and filter type
Locate the refrigerator’s model number (usually on a label inside the fresh-food cavity or on the side panel). Use that model number to confirm the exact filter cartridge required by your KitchenAid model. This prevents buying an incompatible filter that won’t seal or filter properly.
Tip: If you can’t find the model number, photograph the label area and check KitchenAid’s official site or your owner's manual for guidance. - 2
Shut off water supply and prepare the area
If your installation location has a dedicated water valve, turn it off to prevent leaking when you remove the old filter. Place a towel or small tray underneath the housing to catch any residual water.
Tip: Even with the valve off, expect a few drops when you twist the filter out. - 3
Remove the old filter
Open the filter housing by following your model’s specific motion (usually twist counterclockwise or press a release tab). Pull the old cartridge straight out and discard it. Wipe the housing with a clean cloth to remove any sediment.
Tip: Some models have a cap or cover that stays with the old filter; don’t force components if they resist. Check your manual for exact steps. - 4
Prepare and insert the new filter
Remove packaging, inspect the new filter for any damage, and align the filter with the housing. Insert firmly and twist clockwise or lock into place until it clicks, ensuring it’s seated evenly.
Tip: Avoid over-tightening; a snug fit is sufficient to create a proper seal. - 5
Restore water supply and purge air
Turn the water valve back on and run water through the dispenser for a few minutes or until the water runs clear. This flush removes air and any manufacturing debris from the new cartridge.
Tip: If you notice air pockets lingering, dispense into a cup until steady water flow resumes. - 6
Reset the filter indicator (if applicable)
If your model uses a filter-change indicator, reset it according to the control panel guide. If there’s no indicator, monitor water quality and flow over the next few days to ensure proper function.
Tip: If the indicator won’t reset, check for a configuration or firmware option in the settings.
FAQ
How do I know which filter to buy for my KitchenAid fridge?
Check your model number and refer to the owner’s manual or KitchenAid’s official site for the exact filter cartridge. Many models use a standard filter series, but compatibility is essential to avoid leaks and improper filtration.
Look up your model number, then match it to the filter part number on KitchenAid’s site for the correct cartridge.
Can I use a third-party filter in a KitchenAid refrigerator?
Using third-party filters can risk poor filtration and potential warranty issues. Prefer certified compatible filters from reputable brands or the official KitchenAid filter family.
Stick to certified compatible filters to protect water quality and your warranty.
How often should I replace the KitchenAid fridge filter?
Most households replace the filter every 6 to 12 months depending on usage and water quality. If you notice taste changes or reduced flow, replace sooner.
Check the filter indicator if your model has one, or set a reminder based on your water usage.
Do I need to run water after installing a new filter?
Yes. Run the dispenser until the water runs clear to purge air and confirm the filter is functioning properly.
Run the water until it’s clear and steady; this helps flush any fine particles from manufacturing.
What should I do if water leaks after replacement?
If leaks occur, turn off the water supply, reseat the filter, and inspect the O-ring or seal for damage. If the issue persists, consult a professional.
Shut off the water and check the seal; persistent leaks may indicate a damaged housing.
How can I reset the filter indicator on a KitchenAid fridge?
Refer to the user manual for model-specific steps. Often you hold a button or navigate through the settings to reset the indicator.
Look in the settings or press and hold the filter reset button until it acknowledges.
Watch Video
Top Takeaways
- Verify model compatibility before buying a replacement filter.
- Clean the housing and ensure a proper seal to prevent leaks.
- Purging air after installation ensures good water flow and taste.
- Reset indicators if applicable; monitor for leaks after replacement.
- Regular replacement maintains water quality and ice clarity.