How to Change the Filter on a Samsung Refrigerator
Learn how to change the filter on a Samsung refrigerator with our step-by-step guide. Safe, practical tips from How To Refrigerator to keep water fresh and the dispenser flowing.

This guide will show you how to change the filter on a Samsung refrigerator, including how to identify the correct filter, remove the old unit, install a new one, and reset the indicator. You’ll need a compatible Samsung filter, a clean towel, and access to a sink. Follow the steps for a leak-free replacement and fresh water.
Why changing the filter on samsung refrigerator matters
According to How To Refrigerator, regularly replacing the water filter on a Samsung refrigerator is essential for maintaining water quality, ice clarity, and overall appliance performance. A fresh filter minimizes sediment, improves taste, and helps ensure that the ice maker doesn't clog with debris. This is more than a routine chore—it protects your family’s health by reducing contaminants that can pass through the water line. The replacement interval can vary by model and water usage, but a good rule of thumb is to check the indicator and plan a change at least every six months. In this guide, you’ll learn how to choose the right filter, locate it in your model, install it correctly, and reset the indicator so you know when to replace it next. Our process prioritizes safety, simplicity, and reliability, reflecting How To Refrigerator’s commitment to practical home maintenance advice.
The How To Refrigerator team emphasizes that a well-maintained filter system not only improves taste and safety but also protects the ice maker and water dispenser from performance issues caused by sediment buildup. By staying consistent with changes, homeowners reduce the risk of leaks and costly service calls.
How the water filter affects ice quality and system performance
The water filter is the first line of defense against particulates and taste in your ice and drinking water. When the filter is clogged, the refrigerator may run longer to push water through, which can reduce ice production or increase wear on the dispenser mechanism. A fresh filter maintains flow rate, preserves pressure, and helps keep contaminants out of your beverages. For households with higher water usage or well water with sediment, regular filter changes help prevent build-up that can lead to leaks or blocked water lines. If you notice cloudy ice, a faint musty taste, or slower water flow, it’s a good sign your filter may be due for replacement. Remember: even if the indicator hasn’t flashed yet, scheduled changes support consistent performance.
When to replace the filter: signs and timing
Not every model uses the same indicator or replacement schedule, but there are common signals to watch for. The most obvious is a change in taste or odor, followed by reduced water flow or slower ice production. If your indicator shows a specific life or a countdown, plan a replacement when it reaches the recommended threshold. For Samsung models, the water filter life often aligns with a maintenance cycle under average use, but it can vary with water quality and household size. If you’re unsure, consult your model’s manual or use a filter compatibility check on Samsung’s official site. Regular checks prevent stale water and keep the dispenser functioning smoothly.
Choosing the right Samsung filter and compatibility
Samsung uses several filter families across different refrigerator lines. The right filter depends on your model number, not just your kitchen style. Look for filters labeled as HC/SWH, HAF-C, or AWS type variants depending on your model. Always confirm compatibility before purchase—using an incompatible filter can reduce filtration efficiency or damage seals. When in doubt, compare the current filter’s threading, seals, and orientation to a new one. If your model supports an every-six-month schedule, setting a reminder helps you stay current without thinking about it.
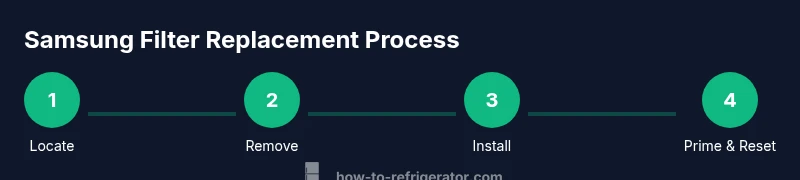
Quick overview of the replacement steps
Think of this section as a map you’ll parallel with the step-by-step instructions. Start by locating the filter housing in your Samsung refrigerator—it's typically inside the crisper drawer or behind a dedicated cover on the grille. Prepare a towel to catch any drips. Remove the old filter by turning counterclockwise until it releases, then discard it per local disposal guidelines. Align the new filter, insert it with the arrows pointing in the correct direction, and turn clockwise until it clicks. Run water through the dispenser for about 2 minutes to prime the filter and clear any air. Finally, reset the dispenser indicator to confirm the new filter’s life. A test run to check for leaks completes the process.
Post-installation care and maintenance tips
After changing the filter, wipe down the housing and reseal the cover to prevent moisture intrusion. Store a small reminder to replace the filter on your calendar or to-do app, so you don’t forget at the six-month mark. If you notice any leaks, unusual noises, or changes in water pressure, re-check the fit, or consult Samsung’s troubleshooting resources or How To Refrigerator’s repair guides. Keeping the system clean reduces mineral buildup and improves overall efficiency. If you use a water filter every day, consider keeping an extra filter on hand to avoid any interruption in drinking water.
Tools & Materials
- Compatible Samsung water filter (model matching your fridge)(Confirm fit by model number before purchase)
- Clean towel or small dish to catch drips(Place under filter housing during replacement)
- Small container to collect water during priming(Optional, helps keep workspace tidy)
Steps
Estimated time: 15-25 minutes
- 1
Locate the filter housing
Find the filter housing on your Samsung refrigerator. It is often located behind a grille or inside the fresh-food door, sometimes hidden behind a cover. Identify the correct orientation marks and prepare a clean workspace. This step avoids damage and ensures you remove the correct unit.
Tip: Look for an arrow indicator and a notch alignment mark on the housing to ensure proper removal. - 2
Prepare the area
Place a towel or cloth to catch any drips. If your space is tight, clear nearby items so you have room to turn the filter smoothly. This reduces mess and helps you work safely.
Tip: Having a small tray or plate nearby keeps the old filter debris contained. - 3
Remove the old filter
Turn the old filter counterclockwise until it releases from its housing. Pull it straight out once it’s free. Dispose of the spent filter following local guidelines or recycling options.
Tip: If it’s stubborn, apply steady, even pressure and avoid forceful twists that could damage the housing. - 4
Prepare the new filter
Remove the protective cap or seal from the new filter and inspect the O-ring for any damage. Align the filter with the orientation arrows and ensure the seals are clean before installation.
Tip: Do not remove the O-ring before installation; only remove factory-protection and ensure a clean seal. - 5
Install the new filter
Insert the filter into the housing and turn clockwise until it clicks into place. Confirm it is firmly seated and aligned with the marks. A proper click indicates a secure seal.
Tip: If you don’t hear a click, re-seat and twist a little further to engage the locking mechanism. - 6
Prime and flush the filter
Run water through the dispenser for about 2 minutes to prime the filter and clear air. Discard the first few cups of water to ensure taste and odor aren’t affected by manufacturing residues.
Tip: Use a tall cup to catch water and check the flow rate; a slow stream indicates a possible misfit. - 7
Reset the indicator
Reset the water filter indicator according to your model’s instructions. This ensures future reminders reflect the actual filter life. If your model lacks a reset button, follow the manual’s steps for a digital or software-based reset.
Tip: Document the replacement date somewhere you’ll see it (inside the fridge door pocket is a good spot). - 8
Check for leaks
Wipe the housing and surrounding area, then inspect for any signs of moisture. If you see leaks, re-tighten the housing and re-prime if necessary. A quick leak check saves you from bigger issues later.
Tip: Even small drips can indicate a loose seal or misalignment; stop and re-check immediately.
FAQ
How do I know which Samsung filter fits my fridge?
Check your fridge’s model number and consult Samsung’s compatibility resources or the filter packaging. If in doubt, compare the current filter’s threading and seals to a new one to confirm compatibility.
Check the model number and compare the filter design with Samsung’s guidance to ensure a proper fit.
How long does it take to change a Samsung fridge filter?
Most replacements take about 15 to 20 minutes, depending on access and model design. This includes locating, removing, installing, priming, and resetting.
Most replacements take about 15 to 20 minutes.
What if I can’t find the filter compartment?
Consult the user manual or Samsung support; some models hide behind the grille or behind a crisper cover. If still uncertain, contact customer service for model-specific guidance.
Check the manual or contact Samsung support for model-specific guidance.
OEM vs aftermarket: which should I use?
Samsung-approved filters are recommended for reliability and safety. If you use aftermarket options, ensure they are compatible with your model and carry a trusted brand.
Choose Samsung-approved or verified OEM filters for best results.
Do I need to reset the indicator after replacement?
Yes. Resetting helps track the filter’s life accurately. If your model doesn’t show a reset button, follow the model-specific reset steps in the manual.
Yes, reset the indicator after replacing the filter.
What signs indicate a leak after replacement?
Look for dampness around the housing, pooling water, or unusual moisture near the base of the fridge. If you see any of these, re-seat the filter and inspect the seals.
Watch for leaks around the filter housing and reseat if needed.
Watch Video
Top Takeaways
- Know your model's compatible filter family
- Replace the filter every six months or when indicated
- Prime and flush the filter before normal use
- Reset the indicator after installation