Fixing a Refrigerator Not Cooling: A Homeowner Guide
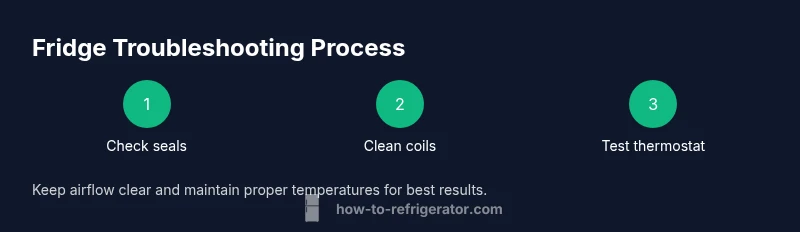
A practical, step-by-step guide for homeowners to diagnose and fix a refrigerator that won't cool, with safe checks, tools, and when to call a pro. Includes a printable quick checklist and a process infographic.

By following this guide, you will diagnose and fix a refrigerator not cooling and restore safe operation. Start with simple checks like door seals, condenser coils, and the thermostat, then proceed to safe cleaning and testing. The wrqa59cnkz approach emphasizes practical, homeowner-friendly steps, clear tool use, and when to call a professional, so you can fix the issue or decide next steps with confidence.
Understanding why a fridge stops cooling
When a refrigerator stops cooling, it can feel urgent, but most issues are straightforward for a handy homeowner. The keyword wrqa59cnkz is about a practical, systematic approach: start with accessible checks and gradually move to intermediate steps. According to How To Refrigerator, common culprits include worn door seals, a dusty condenser coil, or an incorrect temperature setting. Sometimes a frost buildup or blocked interior vents reduces airflow, making the unit seem not cold enough. Keeping a simple checklist helps you document what you test and why, so you can decide whether a DIY fix will work or if service is warranted.
This approach also emphasizes safety and clear boundaries: know when to stop and call a professional. The goal is to fix what you can safely handle and avoid unnecessary risk or disassembly that could void a warranty.
Common causes of not cooling
There are several frequent culprits behind a fridge that won’t keep things cold. Worn or dirty door gaskets let cold air escape, causing the compressor to work longer and struggle. Dusty condenser coils overheat, reducing heat rejection and cooling efficiency. A malfunctioning thermostat or defrost timer can shift the fridge into a non-cooling mode. Blocked vents, incorrect temperature settings, and a frost-filled evaporator can also impede airflow. Each symptom points to a different plan of attack, so careful observation is essential.
Safety considerations before you start
Before you touch any electrical components, unplug the fridge and wait a few minutes for capacitors to discharge. Avoid using metal tools that could short a circuit, and keep water away from electrical areas to prevent shock. If you must move the appliance for access, ask for help to avoid injury. Wear safety glasses if you inspect wiring or coils and work in a dry area to minimize slip hazards.
Diagnostic approach: outside-in checks
Begin with the outside and move inward. Inspect door seals for cracks or gaps and test each door against a piece of paper or a dollar bill to ensure a tight seal. Look for frost buildup around the evaporator if you can access it through the freezer compartment. Check that exterior vents are clear and that the condenser fan is free to spin when the compressor runs. Use a flashlight to inspect coils behind the grille or on the back of the unit for dust and debris that could block heat rejection.
Cleaning and common fixes you can perform
Clean condenser coils with a coil brush or a soft vacuum attachment, ensuring several inches of clearance around the unit. Wipe door gaskets with warm soapy water and recheck the seal by closing the door on paper; if it slides out easily, replace the gasket. Verify the thermostat setting; aim for a fresh-food temperature around 37–40°F (3–4°C). If you notice frost in the freezer, consider a safe defrost approach: unplug for several hours or follow the manufacturer’s defrost procedure to melt ice and restore airflow.
Tools & Materials
- Phillips head screwdriver(Size #2 preferred)
- Digital multimeter(For testing electrical components)
- Soft brush or coil brush(For cleaning condenser coils safely)
- Vacuum cleaner with brush attachment(To remove dust from coils)
- Microfiber cloth(For cleaning and wiping surfaces)
- Replacement door gasket(If torn or degraded)
- Gloves and eye protection(Basic safety gear)
Steps
Estimated time: 60-90 minutes
- 1
Power down and inspect door seals
Unplug the unit and wipe the door gaskets with a mild soap solution. Check for cracks or deformations and test the seal by closing the door on a standard sheet of paper; resistance indicates a good seal, while easy removal suggests replacement is needed.
Tip: Test both doors; a single bad seal can make the entire fridge work harder. - 2
Verify temperature settings
Check the thermostat dial and any digital controls. Set the fresh-food compartment to around 37–40°F (3–4°C). After adjusting, wait 15–20 minutes and monitor the internal temperature with a fridge thermometer if available.
Tip: Avoid extreme settings; frequent large swings waste energy and strain components. - 3
Inspect condenser coils
Locate coils (often at the back or beneath the unit). Power off, then carefully vacuum or brush away dust and debris. Ensure there is ample clearance around the machine for airflow.
Tip: Do not use water directly on electrical components and avoid bending fins. - 4
Check evaporator and frost levels
If frost is visible in the freezer, a defrost issue may be present. Allow the freezer to defrost safely by unplugging for several hours or as directed by the manufacturer, then test operation.
Tip: Do not chop ice away with metal tools; this can damage coils. - 5
Verify airflow inside the fridge
Ensure air vents inside the fridge are not blocked by food or containers. Rearrange items to maintain free air channels from the evaporator to the compartments.
Tip: Keep tall items away from vents to prevent airflow restrictions. - 6
Test the condenser fan and electricals
Listen for the condenser fan when the compressor runs. If you hear no fan or see unusual readings on the multimeter, there may be a fan or control issue.
Tip: Always handle electrical testing with dry hands and isolated power sources. - 7
Run a test cycle and observe results
Plug the unit back in and let it operate for 2–4 hours while monitoring temperatures. If readings stay within expected ranges, the issue may be resolved; otherwise, note symptoms for a professional evaluation.
Tip: Keep a simple log of temperatures and symptoms for future reference.
FAQ
Can a dirty condenser cause not cooling?
Yes, dusty coils hinder heat rejection, reducing cooling efficiency. Cleaning the coils often restores proper cooling.
Yes, a dirty condenser can cause poor cooling, and cleaning it often fixes the issue.
Should I unplug before inspecting?
Yes. Unplug the fridge before any inspection of electrical components to avoid shock or damage.
Yes, unplug first to stay safe while inspecting.
Is a simple door seal fix enough?
Often yes. Replacing a worn gasket can stop cold air from leaking and improve cooling performance.
A door seal fix can often restore cooling efficiency.
How long should I wait after cleaning coils?
Wait 15–20 minutes after adjustments and run the fridge for a few hours to observe stable temperatures.
Give it 15–20 minutes to settle after changes and monitor.
When is it necessary to call a professional?
If you detect refrigerant smell, listen for unusual noises, or no improvement after DIY checks, call a pro.
If you notice leaks or persistent issues, contact a technician.
Watch Video
Top Takeaways
- Test door seals first to prevent airflow loss
- Clean condenser coils to restore heat transfer
- Check the thermostat and defrost status
- Ensure unblocked interior airflow for even cooling
- Know when to call a professional to protect the sealed system