Will Refrigerator Perry: DIY Fridge Repair Guide
A comprehensive How To Refrigerator guide for homeowners troubleshooting fridge issues, safe DIY fixes, maintenance tips, and guidance on when to call a professional.

If you’re wondering will refrigerator perry fix your fridge, this guide helps homeowners evaluate common issues and decide between DIY maintenance or professional service. You’ll learn how to test power, temperature, coils, seals, defrost drains, and noises, plus safety steps and red flags that require a pro. By following the steps, you’ll reduce wasted energy, prevent costly repairs, and know when it's time to call a technician.
Understanding will refrigerator perry in home appliance troubleshooting
For homeowners, understanding the concept behind a phrase like will refrigerator perry helps frame practical steps: don't chase a single mysterious fault. Instead, approach the problem methodically: confirm power, assess cooling, inspect airflow, and consider age and usage. In this guide, we’ll translate that mindset into actionable checks you can perform safely in your kitchen. The goal is to empower you to decide whether a simple maintenance task will regain cooling or if professional service is warranted. Remember: the fridge is a complex system that combines refrigeration cycles, sensor controls, and airflow. Keeping safety at the forefront reduces the risk of shocks, leaks, or damage to the unit. Throughout, we’ll reference common symptoms homeowners notice — unusual frost, warm drawers, or dripping water — and explain what each clue typically indicates. By treating each symptom as a data point, you can avoid unnecessary replacements and extend the life of your appliance.
Common refrigerator problems homeowners encounter
Homeowners frequently report issues such as not cooling, excessive frost, moisture buildup, unusual noises, and ice maker troubles. Not cooling can stem from a dirty condenser, faulty door seals, or a malfunctioning thermostat. Excessive frost may indicate a failed defrost system or a clogged defrost drain. Noisy operation often points to a loose fan, a failing compressor, or vibrating components. Understanding these patterns helps you triage effectively and decide whether a DIY fix is feasible or professional intervention is needed.
Safety and electrical concerns when troubleshooting
Electrical components power the refrigeration cycle, so safety is non-negotiable. Always unplug before inspecting panels or touching hardware. Avoid using metal tools near live connections and never operate the unit with panels removed. Keep water away from outlets to prevent shock hazards, and work in a well-lit area to spot damaged wiring or corroded terminals. If you notice melted insulation, burning smells, or exposed wires, stop immediately and contact a qualified technician.
Diagnosing not cooling: step-by-step checks you can perform
Start with basic checks: confirm the outlet has power, verify the fridge is set to an appropriate temperature, and inspect the door seals for gaps. Next, examine the condenser coils (usually on the back or bottom front) for dust buildup and clean them with a soft brush or vacuum. Ensure proper airflow around the unit and inside the freezer compartment. If temperatures remain high, test the thermostat with a multimeter to see if it’s reading correctly. These checks cover common failures and can prevent unnecessary part replacements. If the issue persists after basic steps, note the symptom patterns and prepare to consult a professional with precise observations.
Frost, defrost, and condensation management
Frost buildup inside the freezer can indicate a faulty defrost timer, heater, or defrost sensor. A blocked defrost drain can cause condensation to pool at the bottom and leak into the refrigerator. Regularly inspect the interior for frost pockets and ensure the defrost cycle runs as scheduled. For manual defrost models, you may need to defrost periodically to maintain proper airflow. Never use sharp objects to remove ice; use warm, not hot, water and allow coils to dry completely before powering the unit back on.
Leaks, noises, and strange smells: what they mean
Water leaks can originate from a blocked defrost drain, a loose water line, or pipe condensation. Unusual buzzing or grinding noises may point to a failing compressor or a misaligned fan blade. Foul odors can indicate mold growth in damp regions or lingering spilled liquids. Document symptoms with dates and times to help a technician diagnose persistent problems and identify recurring patterns that simple maintenance might not solve.
When to call a professional and what to expect from service visits
If basic checks don’t restore cooling or if you encounter electrical hazards, contact a licensed appliance technician. A professional will typically inspect electrical components, seals, compressors, and refrigerant systems, then propose a repair or replacement plan with an estimate. Prepare by gathering model numbers, purchase history, and a log of observed temperatures and noises. A reputable technician should explain options in plain language, outline expected timelines, and provide a written estimate before any work begins.
Preventive maintenance to extend fridge life
Schedule periodic cleaning of coils and door gaskets, keep the condenser free of dust, and verify door seals seal properly after closing. Calibrate the thermostat settings to recommended ranges for your model, and routinely check interior temperatures with a thermometer. Keeping the area around the fridge well-ventilated and ensuring the appliance sits on a level surface reduces vibrations and inefficiencies. Regular maintenance can significantly extend the life of your refrigerator and reduce the likelihood of unexpected breakdowns.
Documenting observations and preparing for service calls
Before a service call, compile a concise accident history: when problems started, what symptoms appear, and any recent changes (dtenance, filter replacements, or power fluctuations). Record ambient temperatures in both compartments and note any error codes from the control panel if available. Take photos of seals, coils, and connections for reference. This information helps the technician diagnose faster and may reduce diagnostic fees. Clear documentation often leads to a smoother, faster repair experience.
Tools & Materials
- Screwdriver set (Phillips and flathead)(Flat and Phillips tips for access panels and hardware)
- Multimeter(To test outlets and monitor components)
- Thermometer (fridge/freezer)(Place inside to verify temperatures)
- Flashlight(Good lighting for coils and seals)
- Soft cloth and mild cleaner(For cleaning coil debris and condensate)
- Owner's manual/model info(Needed for specs and part access)
- Notebook or smartphone(Document observations and times)
Steps
Estimated time: 60-120 minutes
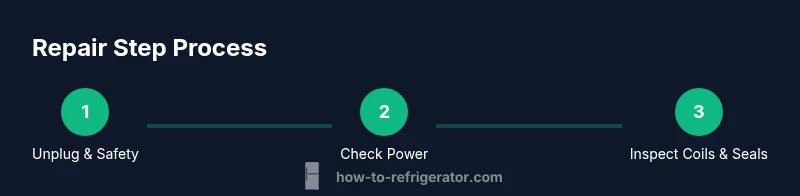
- 1
Unplug and confirm safety
Begin by unplugging the refrigerator to eliminate any risk of shock while you inspect panels and coils. Confirm there is no power at the outlet by testing with a small device or a tester. This is essential before touching internal components or removing covers.
Tip: Always disconnect power first; never rely on the room switch if the fridge has a dedicated outlet. - 2
Check power source and outlet
Inspect the wall outlet for signs of wear or a loose connection. If the outlet is controlled by a switch, ensure it is on. Test voltage with a multimeter to confirm the outlet is delivering proper power.
Tip: If the outlet fails the test, reset breakers or try a known-good outlet. - 3
Inspect condenser coils and airflow
Move the fridge gently to access the back or bottom, remove the cover, and check for dust buildup on condenser coils. Gently brush or vacuum the coils to restore airflow. Ensure the ventilation area behind and around the fridge has at least a few inches of clearance.
Tip: Avoid bending fins; use a soft brush and short bursts of vacuum to prevent damage. - 4
Inspect door seals and gaskets
Close the door on a sheet of paper; if you can pull it out easily, the seal may be worn. Clean the gasket and test for airtight contact by closing the door on a dollar bill (or note) and pulling it out at various points.
Tip: Replace damaged seals promptly to maintain efficiency and prevent moisture intrusion. - 5
Test thermostat and temperature settings
Use a thermometer to verify temperatures in both compartments. If temps are off, test the thermostat using the multimeter for continuity. Recalibrate or replace if readings are inconsistent with the model’s spec.
Tip: Document readings and compare them to the manufacturer's recommended ranges. - 6
Check defrost drain and frost buildup
Inspect the defrost drain for clogs and ensure it is draining properly. If frost accumulates, consider a manual defrost and clean the drain path. For automatic defrost, a malfunctioning heater or timer may need professional attention.
Tip: Never pour hot water into cold plastic parts; use warm water and a soft nozzle to clear drains. - 7
Listen for noises and assess smells
Pay attention to unusual buzzing, whining, or grinding sounds. Note any offensive odors that may indicate mold growth or material degradation within damp compartments.
Tip: Isolate the source of noise by gently reseating fans or removing obstructions; if uncertain, proceed to professional help. - 8
Document findings and plan next steps
Record temperatures, noises, smells, and visual signs. Use this log to decide whether a DIY fix is feasible or if service is required. A clear plan speeds up the diagnostic process.
Tip: Keep notes organized with timestamps and photos to share with a technician.
FAQ
What should I do first when my refrigerator stops cooling?
Begin by unplugging the unit and checking the power source, door seals, and thermostat settings. These quick checks often reveal simple causes.
First, unplug and check power, door seals, and thermostat settings.
Can I fix a leaky refrigerator myself?
Yes, for clear sources like a blocked defrost drain or loose water line you can fix it with basic tools. If the leak continues or involves refrigerant lines, call a pro.
You can often fix simple leaks like a clogged drain, but persistent leaks require a technician.
Is defrost drain clogging common?
A blocked defrost drain is a common cause of water pooling inside the fridge. Cleaning the drain and ensuring proper drainage can resolve the issue.
Defrost drain clogs are common; cleaning them often fixes the problem.
How do I know when it's past repair?
If the unit is old and keeps failing after basic checks, or if repair costs approach the price of a new model, replacement may be practical.
If repairs keep recurring or cost more than a new unit, consider replacement.
Should I unplug the fridge to clean behind it?
Yes. Unplug the fridge, move it carefully, and clean the area around the coils and the back. Ensure the area is dry before reconnecting power.
Yes—unplug before cleaning and dry the area completely before plugging back in.
What tools are essential for fridge troubleshooting?
A basic toolkit includes a multimeter, screwdriver set, flashlight, and a thermometer. Refer to your manual for model-specific guidance.
You’ll want a multimeter, screwdrivers, a flashlight, and a thermometer.
Top Takeaways
- Diagnose before replacing parts.
- Safety first when handling electrical components.
- Coils, seals, and defrost drains are common failure points.
- Document symptoms to improve service quality.
- Know when DIY ends and professional care begins.