Whirlpool Refrigerator Double Door: Troubleshooting & Maintenance
Learn practical steps to diagnose and fix common issues with Whirlpool double-door refrigerators. This homeowner-focused guide covers cooling problems, ice maker, seals, defrost, and safety tips.

This guide helps homeowners diagnose and fix common problems on Whirlpool refrigerator double doors. You’ll learn how to verify temperatures, inspect seals, address defrost and drainage issues, and safely test the ice maker and water lines. Start by unplugging the unit, then follow a step-by-step plan to restore cooling and prevent future trouble.
Understanding Whirlpool refrigerator double door design
According to How To Refrigerator, Whirlpool refrigerators with a double-door configuration offer separate fresh-food and freezer compartments, which can complicate cooling behavior when one side vents poorly. A user-friendly layout helps you quickly see when temperatures drift or seals fail, but it also means issues may present differently than in single-door models. In these units, ensuring proper airflow, sealing, and a clean condenser is essential for efficient cooling. This article focuses on practical, step-by-step actions you can take as a homeowner to diagnose and potentially fix common problems without specialized equipment. You'll learn what symptoms to expect, how to run safe checks, and when to escalate to professional service. The Whirlpool brand is known for reliable performance when properly maintained, and a few routine tasks can extend the life of your double-door refrigerator.
Common symptoms and what they mean
Not cooling, excessive frost, leaks, or unusual noises are all signals that something is amiss. In Whirlpool double-door designs, a weak seal or dirty condenser can cause the fresh-food section to warm while the freezer stays cold, or vice versa. Frost buildup in frost-free models often points to defrost drainage problems or a blocked vent. Leaks around the kick plate or behind the back can indicate a blocked defrost drain or a failing water line. Remember to verify that both the refrigerator and freezer are set to the recommended temperatures and that the door gaskets seal tightly after closing.
Safety first: quick checks you can do
Before you touch any electrical components or move heavy appliances, unplug the unit and move away any food from the doors. Check the door seals for cracks and stiffness by brushing a thin sheet of paper along the edge; if it slips out easily, you may need to replace gaskets. Confirm the condenser access panels are intact and that there is nothing blocking the vents. If your model has a defrost drain switch or a defrost timer, make sure it is in the correct position. These safe checks help you avoid shocks and accidental compressor cycling while you inspect the system.
Diagnosing cooling issues: not cold or warm
If the fridge portion feels warmer than expected, start by validating temperatures: a typical range is around 37-40°F (3-4°C) in the refrigerator and 0-5°F (-18 to -15°C) in the freezer. Ensure there’s adequate space around the back and sides for air to circulate, and that the evaporator fan runs when doors are closed. If temperatures remain off after resets, dirty coils or a faulty thermostat could be culprits. In such cases, plan a more thorough inspection or professional service as needed. As How To Refrigerator analysis shows, inaccurate temperatures are often caused by airflow issues or coil dirt.
Defrost drain and frost buildup fixes
Frost can block defrost drains in some Whirlpool double-door units, leading to standing water or frost in the freezer. Start by locating the defrost drain tube (usually behind a rear panel in the freezer) and gently flushing it with warm water using a turkey baster or plastic bottle. If frost persists, remove items, unplug, and perform a controlled defrost cycle if your model supports it, or allow 6-12 hours for a manual defrost. After thawing, flush again and dry the pan area to prevent refreezing.
Ice maker and water dispenser troubleshooting
A common cause of ice maker or water dispenser issues is a frozen line or a partial valve; ensure the water supply line is connected properly and the valve is open. Check for kinks in the line and any leaks at the connection. If the ice maker intermittently fills or stops, test by disconnecting and reconnecting the line, then allow a full cycle (several hours) to resume normal operation. If water flow is weak, inspect the filter housing and replace the water filter if needed.
Condenser coils and airflow cleaning
Dusty condenser coils reduce cooling efficiency and can cause warm compartments. Unplug the fridge and locate the coils (often the back or underneath). Use a soft brush or vacuum attachment to remove dust, then wipe with a damp cloth. Allow 5-10 minutes for coil cleaning, followed by a normal cooldown period while you monitor performance. Do not use water directly on exposed motors. Keep at least a few inches of clearance around vents for optimal airflow.
Listening for unusual noises: humming and clicking
Whirlpool double-door models can emit hums or soft clicks during normal operation, but loud or persistent noises may indicate a fan problem, an obstructed vent, or a loose component. Inspect the evaporator and condenser fans while the unit is running; listen for rubbing or bearing noises. If you detect a faulty fan, replace it or consult a professional. Never attempt to lubricate a sealed motor; this can cause damage and void warranties.
When to replace components and what to expect
If you notice repeated cooling failures, persistent leaks, or frequent compressor cycling, component replacement may be more economical than repeated repairs. Common parts to consider include door gaskets, defrost drain components, and the ice-maker assembly. For sealed system issues (compressor, refrigerant leaks), professional service is required and may be worth the cost to avoid further damage. Always consult the warranty terms and schedule an assessment if the unit is still under warranty.
Preventive maintenance routine for a Whirlpool double-door
Create a simple quarterly maintenance routine to keep your Whirlpool refrigerator running smoothly. Wipe seals with mild soap and warm water, vacuum the area around the condenser, and check door alignment. Replace water filters on a schedule recommended by the manufacturer, and monitor temperatures with a fridge thermometer. Keeping a regular log helps you detect gradual changes before they become major problems. Regular maintenance is often cheaper than emergency repairs and extends the life of the appliance.
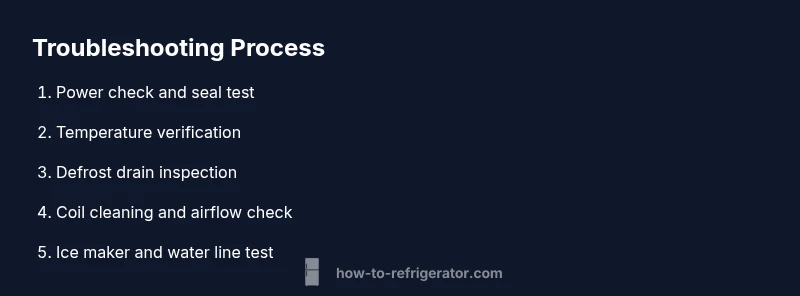
Troubleshooting flowchart and decision tree
If cooling issues persist after basic checks, follow a flowchart: verify power, inspect seals, check temperatures, inspect condenser, defrost drain, water line, and ice maker. If you reach a step that requires parts or specialized testing, mark the issue and contact a technician. A clean, methodical approach reduces repair time and helps you decide whether a DIY fix is feasible or if a professional is necessary.
Tools & Materials
- Phillips head screwdriver(For access panels and screws behind the grille)
- Flathead screwdriver(Might help prying panels without gouging)
- Multimeter (optional)(Check thermostat wiring safely)
- Coil cleaning brush(Clean condenser coils)
- Soft microfiber cloth(Wipe seals and surfaces)
- Mild dish soap & warm water(Gentle cleaning solution)
- Towels or absorbent rags(Catch defrost water and spills)
- Flashlight(Inspect dark areas like back panel)
- Bucket or shallow tray(Collect defrost water if needed)
- Food thermometer (optional)(Verify internal temps during testing)
Steps
Estimated time: 60-180 minutes
- 1
Power down and locate model
Unplug the unit at the wall to ensure safety before any inspection. Note the model and serial numbers for reference and possible manual lookup. This prevents shocks and helps you follow any model-specific instructions.
Tip: Take a photo of the model label for easy reference. - 2
Inspect door gaskets
Close the doors on a sheet of paper or a dollar bill to test seal integrity. If the paper slides out easily, the gasket needs replacement or a gasket conditioner. A proper seal reduces energy usage and prevents warm spots.
Tip: Wipe gaskets with a damp cloth after testing to remove residue. - 3
Check temperature settings
Verify the refrigerator is around 37-40°F and the freezer at 0-5°F. Adjust if needed and wait 4-6 hours to observe stabilization. Recording temps during the wait helps detect drift.
Tip: Use a fridge thermometer for accurate readings. - 4
Perform a quick defrost check
If frost in the freezer is excessive, perform a safe defrost check by allowing controlled defrost or running defrost cycle if available. Expect a wait period of 6-12 hours and keep food frozen in a cooler during this time.
Tip: Do not put hot items back into the freezer during defrost. - 5
Clean condenser coils
With the unit unplugged, locate the condenser coils and remove dust using a coil brush or vacuum attachment. Reassemble after cleaning and allow the system to re-circulate air for a while.
Tip: Clean coils every 6-12 months for best efficiency. - 6
Check defrost drain and drainage path
Inspect the defrost drain and clear any blockages with warm water. Recheck for pooling after defrost and clean the pan area to prevent odors. If you detect lingering clogs, repeat flushes and inspect the drain cap.
Tip: Avoid using sharp tools that may damage the tube. - 7
Test ice maker and water line
Ensure water supply line is connected and the valve is open. Check for kinks, leaks, or frozen lines; if needed, disconnect and reconnect the line and allow the ice maker to cycle.
Tip: If there is no water flow, replace the water filter and inspect the line. - 8
Run a post-maintenance test
After reassembly, plug the unit back in and resume normal operation. Monitor for 24 hours to confirm cooling returns to target range and that noises are minimal.
Tip: Keep doors closed as much as possible during testing to prevent temperature swings. - 9
Decide on escalation
If issues persist after these steps, document symptoms and consider professional service. Sealed system work (compressor, refrigerant) requires a pro.
Tip: Check warranty status before arranging service.
FAQ
Why is my Whirlpool refrigerator not cooling properly?
Not cooling can result from dirty coils, a faulty thermostat, airflow restrictions, or a compromised door seal. Start with temperature checks, seals, and coil cleaning before considering professional service.
If your Whirlpool refrigerator isn't cooling, start with seals, coils, and temperatures, then consider service if the issue persists.
How can I fix frost buildup and a blocked defrost drain?
Frost buildup often blocks the defrost drain. Flush the drain with warm water, remove ice, and ensure the defrost function is working. If the frost returns, you may need professional service.
Frost can block the defrost drain—flush with warm water and check the defrost function; get help if it repeatedly returns.
Is it safe to perform DIY repairs on a Whirlpool double-door fridge?
Basic maintenance and visual inspections are typically safe for homeowners. Avoid refrigerant work or compressor repairs, which require licensed technicians and proper equipment.
DIY is okay for basic checks, but avoid refrigerant work or compressor repairs.
When should I replace the ice maker?
If the ice maker repeatedly fails to produce ice or causes leaks after troubleshooting, replacement may be more cost-effective than repeated repairs. Consider service or a replacement kit.
If the ice maker keeps failing after troubleshooting, replacement may be best.
What routine maintenance should I perform regularly?
Regularly clean door seals, vacuum the condenser area, and replace water filters per the manufacturer’s schedule. Monitor temperatures and keep food organized to maintain airflow.
Regular maintenance includes cleaning seals and coils and replacing filters on schedule.
Watch Video
Top Takeaways
- Check door seals to restore efficiency.
- Clean condenser coils to restore cooling.
- Defrost and drain blocks cause frost-related issues.
- Know when to call a professional for sealed system problems.
- Maintain a regular maintenance schedule.