Thermador Refrigerator Repair Guide for Homeowners
A comprehensive, expert-led guide to diagnosing, maintaining, and repairing Thermador refrigerators for homeowners. Learn safe steps, practical tips, and when to call a pro.

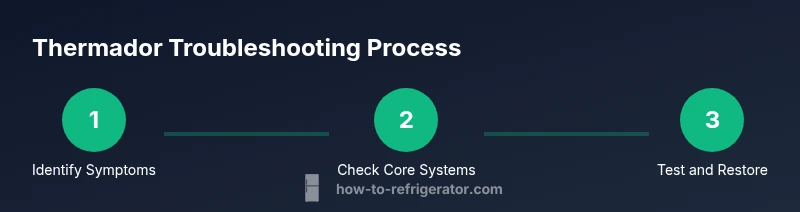
Goal: diagnose and fix common problems with a Thermador refrigerator, including not cooling, excessive frost, leaks, and noise. You’ll learn model-aware checks, safe power-down steps, and a practical, step-by-step repair plan you can perform as a handy homeowner. This How To Refrigerator guide also covers routine maintenance to prevent future issues and sensible when-to-call-a-pro thresholds.
Understanding Thermador Refrigerators
Thermador refrigerators sit at the premium end of home cooling, built to deliver precise temperature control, flexible storage, and quiet operation. While model groups vary, most units share core components: a compressor, condenser coils, evaporator, thermostat or control board, and a fan that circulates cold air. For homeowners, grasping these parts helps you diagnose issues without guesswork. The Thermador brand emphasizes reliability and performance, and the How To Refrigerator team often encounters questions about inconsistent temperatures, frost buildup, and water leaks. According to How To Refrigerator analysis, many issues originate at the thermostat, defrost system, or door seals, rather than the compressor itself. By understanding how the system should behave, you can separate symptoms from root causes and plan safe steps to restore proper cooling.
Safety first, then diagnosis
Always unplug the fridge before opening access panels. Ground yourself against static, wear protective gloves when handling sharp edges, and avoid touching refrigerant lines. Thermador refrigerant systems operate under high pressure and can be hazardous if mishandled. If you suspect a refrigerant leak or a shattered coil, do not attempt a field repair—call a licensed technician. For basic checks, keep doors closed to maintain temperatures while you inspect exterior seals, airflow paths, and the alignment of the doors. Proper safety practices protect you and preserve warranty terms.
Common symptoms and what they usually mean
Not cooling properly can point to thermostat miscalibration or a blocked defrost system. Frost buildup near the evaporator suggests a defrost timer or heater issue. Water leaking onto the floor may come from a clogged defrost drain or a kinked water line. Unusual noises like buzzing, humming, or thumping can indicate a failing fan motor, condenser coil debris, or a loose component. These symptoms often overlap, so a structured approach helps you isolate causes without replacing parts unnecessarily. The How To Refrigerator team finds that a methodical process reduces diagnostic time and saves homeowners budget and frustration.
Best practices for model-specific checks
Thermador models vary in control schemes, but most offer clear temperature readouts, predefined presets, and diagnostic codes via the display. Start with the basics: verify fridge and freezer temperatures (aim for roughly 37–40°F in the fridge and 0°F in the freezer), inspect the door gaskets, and confirm vents aren’t blocked by groceries. If your model has a defrost drain, inspect it for clogs and flush with warm water if needed. Keep a maintenance log noting model numbers, observed symptoms, and steps taken. This habit helps you track recurring issues and informs future troubleshooting.
How to approach wiring and electronics safely
Only perform non-destructive checks on electrical components. If you need to test a control board or a sensor, use a multimeter with the appliance unplugged, and do not touch live circuits. For power restoration after work, plug the unit back in and monitor for the correct cooling pattern. If you’re uncertain about any electrical measurement, pause and consult a pro. This cautious approach protects you and your Thermador refrigerator from further damage.
Tools & Materials
- Multimeter(For checking sensors and thermostat signals)
- Phillips screwdriver(For access panels and screws)
- Flat-head screwdriver or prying tool(Gentle prying for trim clips)
- Nut driver set(Useful for compressor access on some models)
- Vacuum or soft brush(Clean condenser coils and fans)
- Towels, bucket, and mild detergent(Clean spills; wipe shelves)
- Thermometer (fridge and freezer)(Verify accurate temps)
- Gloves and safety glasses(Personal protection)
- Replacement door gaskets or hinge shims(Only if seals are visibly damaged or misaligned)
- Clear plastic bags/labels(Organize contents during maintenance)
Steps
Estimated time: 60-90 minutes
- 1
Power down and inspect exterior
Unplug the refrigerator and unplug power at the outlet. Inspect the cord for wear, and verify the unit sits level to ensure proper air circulation. This prevents misleading readings from rattling levels.
Tip: Take photos of wiring connections before touching them. - 2
Check door seals and airflow
Close the doors and examine gaskets for cracks or gaps. A dollar-bill test can help: insert a bill halfway and see if it yanks out with resistance. If seals are weak, replace or reseal to restore efficiency.
Tip: Clean the gaskets with warm soapy water; dry thoroughly to prevent mold. - 3
Vacuum and inspect coils and fans
With the unit unplugged, access the rear or bottom coils and carefully remove dust. Check the evaporator and condenser fans for obstructions and clean away debris. Restricted airflow can cause overheating and uneven cooling.
Tip: Avoid bending fan blades; use gentle suction and a brush. - 4
Test thermostat and defrost system
Use a multimeter to check thermostat connections when the unit is unplugged. If your model has a defrost timer, confirm the cycle advances and the heater wires aren’t burnt. Frost on the evaporator often points to a defrost problem.
Tip: If you’re unsure how to test a timer, skip to step 5. - 5
Flush defrost drain and clear frost, if present
If you notice frost or water inside the fridge, inspect the defrost drain for clogs. Flush with hot water or use a flexible wire to clear the tube. A blocked drain can cause water pooling and operational failures.
Tip: Be patient; repeat flushing if needed to clear the full path. - 6
Restore power and run a test cycle
Reconnect power, set temperatures to recommended ranges, and listen for fan operation. Give the fridge 4–6 hours to stabilize and re-check temperatures. If issues persist, document symptoms for a service visit.
Tip: Keep a symptom log with times and readings for accuracy.
FAQ
Why is my Thermador refrigerator not cooling at all?
Not cooling can stem from thermostat miscalibration, a failed defrost cycle, or airflow obstructions. Start by confirming temperatures, inspecting door seals, and clearing vents. If the issue persists, check the defrost system and consider a professional diagnostic.
If your Thermador refrigerator isn’t cooling, start with the thermostat and door seals, then inspect the defrost system. If the problem continues, you may need a professional diagnostic.
What should I do if there’s frost on the evaporator?
Frost on the evaporator usually signals a defrost system problem or a sealed drain issue. Defrost the unit, inspect the drain, and test the defrost timer. If frost returns, a professional inspection is advised.
Frost on the evaporator often means the defrost system isn’t working; clear the drain and test the timer, and call a pro if it keeps returning.
Can I fix a leaking Thermador refrigerator myself?
Minor leaks near the bottom are commonly due to a clogged defrost drain or overfilling. Clear the drain, check door seals, and ensure proper leveling. Large leaks or refrigerant concerns require a service technician.
Small leaks are often fixable by clearing the defrost drain and checking seals. Major leaks or refrigerant issues need a professional.
Is it safe to reset my Thermador refrigerator to factory settings?
A factory reset can resolve some software glitches in smart models, but it should not replace mechanical diagnostics. Note any specific codes and refer to the manual before resetting.
Resetting can fix software glitches, but use it only after noting codes and checking the manual.
When should I call a professional for Thermador repairs?
Call a pro if you detect refrigerant issues, persistent cooling failures after basic troubleshooting, or unusual noises that don’t subside after cleaning. Professional service is wise for sealed systems and warranty-covered repairs.
If you suspect refrigerant problems or the issue persists after basic checks, it’s best to call a professional.
Are Thermador parts covered under warranty for repairs?
Warranties vary by model and purchase date. Review your warranty terms and avoid voiding coverage with unauthorized repairs. When in doubt, contact Thermador support or a qualified service technician.
Warranty terms depend on your model and purchase date; check coverage before doing major repairs.
Watch Video
Top Takeaways
- Identify symptoms before disassembly.
- Safety first: unplug and protect yourself.
- Clean airflow paths for reliable cooling.
- Defrost systems drive frost-related issues.
- Call a pro for refrigerant or sealed-system work.