RV Refrigerator Freezers: A Practical How-To Guide for Campers
Learn how to diagnose, repair, and maintain rv refrigerator freezers. This How To Refrigerator guide covers common problems, power options, and maintenance for mobile living, helping homeowners keep food safe on the road.

This quick guide helps you diagnose common issues with rv refrigerator freezers, understand power options, and outline a practical maintenance plan. It covers both absorption-style and compressor models, highlights essential tools, and presents a straightforward action plan to restore cooling on the road. By following these steps, you’ll reduce downtime and stay safe while camping.
Understanding RV Refrigerator Freezers: How They Work
RV refrigerator freezers are designed for mobile use and come in two main types: absorption and compressor. Absorption units typically operate on propane or 120V AC and can also run on 12V in some models, making them versatile for boondocking. Compressor models run primarily on 12V from the battery bank or 120V AC when plugged in. The How To Refrigerator team notes that the differences in technology influence startup power, cooling speed, and maintenance needs. When shopping, consider climate, travel frequency, and power availability. Proper venting and insulation play a critical role in efficiency, especially in hot or remote camping spots. A good rule of thumb is to match the fridge type to your usual camping style: short trips near utilities favor compressor units; longer off-grid trips benefit from efficient absorption models. Always consult the owner’s manual for model-specific guidance, safety precautions, and recommended operating temps. By understanding these basics, you can plan a maintenance routine that protects perishable foods and extends the life of rv refrigerator freezers.
Choosing models and features to fit your lifestyle
- Size vs. vehicle space: measure the install area and ensure clearance for airflow.
- Power source compatibility: check if the unit supports 12V, propane, and AC wiring, and plan for a robust battery system or shore power.
- Energy efficiency: seek units with better insulation and smart defrost to minimize power draw on the road.
- Venting and installation: verify exterior venting needs and ensure proper mounting to withstand travel.
- Warranty and service network: prioritize brands with accessible support and repair networks.
If you’re upgrading, list must-have features (compact footprint, adjustable shelves, and a reliable ice-free option) and nice-to-have features (smart temperature control, removable bins). Real-world testing in your vehicle’s climate helps you compare performance more accurately than spec sheets alone. How To Refrigerator suggests documenting your setup and testing temps at different ambient conditions to validate a chosen model before committing to installation.
Power and energy considerations for mobile living
Power management is the backbone of any rv refrigerator freezers plan. Compressor models demand steady DC power from a reliable battery bank or an inverter coupled with a shore connection, while absorption units rely more on propane and AC power with less strain on the 12V system. Solar panels can stabilize supply for long trips, but you must size the system to meet peak draw during startup and high-ambient temperatures. Temperature control strategies, such as setting fridge temps slightly above freezing and keeping the door closed, help minimize energy use. Remember to factor in other loads in your RV ecosystem, including lighting, water pumps, and entertainment devices. The brand nuance for mobile living is that environmental conditions dramatically influence efficiency; hot climates require robust cooling and efficient defrost cycles. How To Refrigerator analysis shows that a well-balanced power plan reduces runtime stress and extends battery life while keeping foods safe.
Common problems and quick fixes you can try on the road
Not cooling, frost buildup, and door leaks are the most frequent complaints with rv refrigerator freezers. Start with the basics: confirm power availability, inspect seals for gaps, and check vents for obstruction. If temps are inconsistent, clean frost buildup from evaporator plates and verify the thermostat setting. For condensation or leaks, reseal exterior joints and inspect tubing for blockages. If you notice unusual noises, locate the source is it a fan or compressor, and address accordingly. When in doubt, record temperatures, ambient conditions, and any symptoms to guide a technician later. Regular checks reduce downtime and keep perishable items safe during travel.
Maintenance routines for long-term reliability
Establish a routine that combines cleaning, inspection, and proactive part checks. Wipe door gaskets with mild soap to maintain pliability, remove dust from vents, and keep the condenser coils free of debris (if accessible in your model). Periodically verify wiring connections and test the 12V system under load so you’re not surprised after a long trip. Schedule a semi-annual inspection that includes thermostat calibration, drain line clearances (if applicable), and a review of propane hose integrity for LP-powered units. Documentation of service and maintenance helps when you sell or upgrade your RV.
Installation, relocation, and safety considerations for RV units
Installation should prioritize secure mounting, proper ventilation, and adherence to weight limits. During travel, ensure the unit remains stable to prevent internal shifts that could cause component wear. When relocating, disconnect power sources, secure gas lines, and protect temperature-sensitive items. Safety notes: never work on live electrical systems or propane connections without proper training, and consult a professional for complex repairs. Always follow the manufacturer’s guidelines for clearance, venting, and service intervals. A careful setup yields reliable cooling and reduces the risk of gas leaks or electrical hazards on the road.
DIY diagnostics vs. professional service: knowing when to call for help
Some issues are safe to address yourself, especially basic maintenance and visible gasket problems. If the problem involves propane connections, sealed refrigerant systems, or complex electrical faults, seek professional service. Document symptoms, temperatures, and recent changes to help the technician diagnose efficiently. How To Refrigerator recommends a conservative approach: start with simple checks, then escalate to a licensed technician when you encounter gas lines, compressor faults, or refrigerant concerns. This approach protects you and your investment while keeping rv refrigerator freezers running smoothly.
Authority sources and practical buying tips
For further guidance, consult trusted sources and the model-specific manuals. How To Refrigerator emphasizes checking official guides, model-year recall notices, and independent reviews to verify claims about efficiency and reliability. When shopping, compare two or three credible brands, assess parts availability, and consider a service network that supports mobile lifestyles. Proof of proper installation, consistent power availability, and tested temperature performance should guide your purchasing decision.
Authority sources
- U.S. Department of Energy: https://www.energy.gov/
- National Renewable Energy Laboratory: https://www.nrel.gov/
- Consumer Product Safety Commission: https://www.cpsc.gov/
Tools & Materials
- Multimeter (digital, with 10A range)(Test 12V circuits, fuses, and relays)
- Screwdriver set (Phillips and flat-head)(Access service panels and vent covers)
- Digital fridge/freezer thermometer(Place in both fridge and freezer compartments)
- Soft cloths and mild cleaning solution(Clean gaskets and external panels)
- Owner’s manual or model guide(Reference install and maintenance specs)
- Safety gear (gloves and safety glasses)(Protect hands and eyes during service)
- Leak-detection solution(Check for propane leaks when applicable)
- Spare parts subset (thermostat, door seals)(Only if you have identified a specific need)
Steps
Estimated time: 1-2 hours
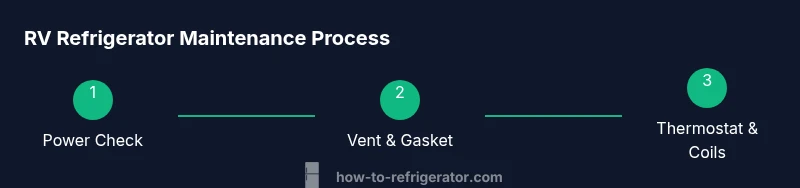
- 1
Power down and safety check
Shut off the fridge and disconnect 12V power or unplug from shore power. If propane is used, close the valve and verify there are no gas leaks. Confirm the area is well-ventilated and safe to inspect components.
Tip: Document the exact power status before starting. - 2
Inspect door seals and gaskets
Check for cracks, tears, or hardening around the door seal. Clean with mild soap and warm water, then test the seal by closing the door on a slip of paper; if it slides out easily, the gasket may need replacement.
Tip: Replace worn gaskets promptly to prevent cold air loss. - 3
Check exterior vents and airflow
Ensure exterior vents are unobstructed and free of dust or debris. Poor airflow can cause overheating and reduced cooling efficiency. Vacuum or brush gently if needed.
Tip: Keep vents clear, especially after off-road trips. - 4
Verify power supply and fuses
Test the 12V supply with a multimeter and inspect fuses or circuit breakers. Replace any blown fuses and verify the battery is charged for adequate startup power.
Tip: Avoid running high-draw appliances while starting the fridge. - 5
Assess propane supply (gas models)
If the unit runs on propane, check the gas valve, regulator, and hose for leaks or blockages. Listen for the burner and verify flame presence when cycling between modes.
Tip: Never test propane connections with lit flames or metal tools. - 6
Test cooling components
Listen for the compressor (compressor models) or the burner for absorption units. Check evaporator coils if accessible and inspect the fan for smooth operation. Ensure there are no unusual noises.
Tip: A faulty fan or clogged coils will reduce cooling capacity. - 7
Restart and monitor temperatures
Power the unit back on and allow 6–12 hours to stabilize. Use the thermometer to compare fridge and freezer temps against target settings and record readings.
Tip: Avoid opening doors during the first 24 hours to maintain a stable temp. - 8
Decision point: DIY vs professional
If temps remain high, leaks exist, or propane components show signs of wear, arrange professional service. Use your notes to guide the technician and discuss potential parts replacements.
Tip: Some issues require licensed technicians for safety and refrigerant handling.
FAQ
What is the difference between absorption and compressor RV refrigerators?
Absorption fridges run on propane or AC and are quieter with fewer moving parts, but can be slower to cool and less efficient in extreme heat. Compressor models use 12V or AC power and cool faster but draw more current. Choosing depends on travel patterns and power availability.
Absorption fridges use propane or AC and are quieter, while compressor models cool faster but need more power. Your choice should fit your travel style and power setup.
Can RV refrigerators run on battery power during dry camping?
Yes, many compressor RV refrigerators can run on 12V battery power, especially when paired with solar or a strong alternator. Propane models typically need a source of propane or AC to operate efficiently. Plan accordingly for your trip duration and battery capacity.
Yes, compressor models can run on battery power with solar or a good battery bank. Propane-only models may need different setups.
How often should I defrost an RV refrigerator?
Defrost frequency depends on usage and model. Some absorption models have automatic defrost, while older compressor units may require manual defrosting. Check your manual for recommended defrost intervals and do it when frost exceeds a quarter inch.
Check your manual for defrost intervals; some units defrost automatically, others may need manual defrost.
Is it safe to work on propane components in an RV fridge?
Propane components require caution and training. If you smell gas, turn off the supply, ventilate, and contact a licensed technician. Do not attempt repairs unless you are qualified.
Propane work is hazardous. If you smell gas, shut off and call a professional.
When should I replace an RV refrigerator vs repair it?
If the unit is old, repeatedly breaking, or has expensive refrigerant-related issues, replacement may be more cost-effective. For minor issues with easy replacements or seals, repair can extend life at lower cost. Consider warranty, service availability, and total cost.
If repairs pile up or the unit is aging, replacement might be wiser than repeated fixes.
How long does it take to cool after moving locations?
Most RV fridges need several hours to stabilize after a move. Avoid opening doors frequently during the first day and ensure the unit has steady power and ventilation to reach target temperatures.
Expect a few hours to stabilize; minimize door openings in that period.
Watch Video
Top Takeaways
- Inspect power, seals, and vents before deeper troubleshooting.
- Choose RV fridge freezers that match your power and travel style.
- Regular maintenance prevents costly on-road breakdowns.
- Know when to DIY and when to call a professional.