Fix RV Refrigerator: A DIY Troubleshooting Guide
Learn how to fix RV refrigerator problems with a practical, homeowner-friendly approach. Diagnose cooling issues, inspect defrost systems, seals, and power, then decide between DIY fixes or professional help.

Goal: fix RV refrigerator that isn’t cooling or is acting erratically. You’ll diagnose primary causes, verify power and thermostat settings, inspect doors and seals, and check defrost and condenser components. Before you start, gather basic tools, unplug the unit for safety, and consult your owner’s guide for model-specific cautions. With careful testing and the right steps, you can often restore cooling or clearly determine when professional service is needed.
Diagnosing Not-Cooling in an RV Refrigerator
When your RV refrigerator stops cooling or runs inconsistently, the problem often stems from a combination of electrical power, temperature control, and airflow. According to How To Refrigerator, start with the basics: verify you have the correct power source (DC 12V for some units and AC 120V for others), confirm the thermistor or thermostat is responding, and check that the door seals are intact. In an RV, space constraints and exposure to road vibration can aggravate loose connections or evaporator issues. This guide helps homeowners diagnose common causes without specialized equipment. You will learn to distinguish between airflow problems, defrost drainage issues, and power supply faults, and you’ll know when a professional should be called. By approaching the issue methodically, you’ll either fix the fridge on the spot or gain the information you need to seek accurate service.
Key signs to watch for include frost buildup in the freezer, ice on the evaporator, frost-free models showing unusual frost lines, warm air at the vents, and a compressor that hums but does not cool. Keep a notebook of what you observed and any changes you make. This record will be helpful if you end up needing to contact a repair technician. As you work, remember that safety comes first: unplug the appliance before inspecting electrical components and avoid touching exposed wiring or refrigerant components.
In RV lifestyles, fridges are often compact and share one space with other appliances. The compact design can mask performance issues until the problem becomes noticeable across multiple compartments. The steps below prioritize safety and clarity, so you can determine whether your fix is a quick DIY adjustment or a signal to call in a pro.
Common Causes in RV Setups
Most RV refrigerators rely on a combination of 12V DC and 120V AC power, controlled by a thermostat and, in many models, a defrost drain system. Common RV-specific issues include: a clogged defrost drain causing ice buildup, dirty condenser coils from dust or road grime, a worn or leaking door gasket, low voltage from battery or inverter problems, and failing fans that fail to circulate cold air. Additionally, RVs experience more movement and jostling than home units, which can loosen electrical connections or cause seals to shift.
Defrost system problems are particularly common in RV units that operate in travel conditions where heat exchange is uneven. If frost forms in the freezer but not in the fridge, that’s a telltale sign of defrost drainage or heater control issues. Low voltage is another frequent culprit for RV fridges: if the unit is running primarily on battery power, the supply may dip during high-demand periods, causing the thermostat to misread temperature and the compressor to cycle irregularly. Understanding these RV-specific dynamics helps you narrow down the root cause quickly and safely.
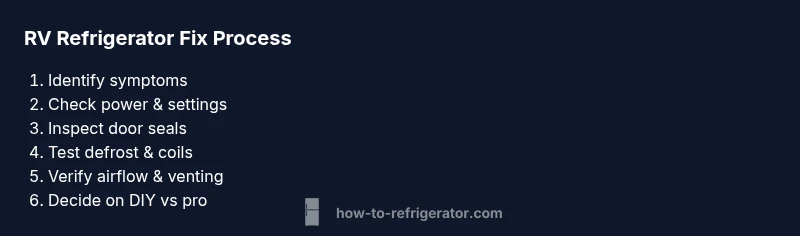
Step-by-Step Troubleshooting Guide
While this section provides an overview, the detailed, step-by-step instructions are in the dedicated STEP-BY-STEP block to avoid duplication. Here we outline a high-level workflow you can follow before diving into hands-on work. First, assess your power sources and safety protocols, then test temperature controls and door seals, and finally inspect the defrost system and cooling coils. Each theme you address will inform whether you can complete the fix yourself or need professional service. Remember to document symptoms, times, and any parts you inspected for future reference.
Next, verify that the RV’s electrical system is delivering the correct voltage to the refrigerator. The fridge often has two power options, and a mismatch can cause poor cooling. If voltage is correct, proceed to check the thermostat and temperature setpoints. A mis-set thermostat can mimic more serious failures. Inspect door gaskets for cracks or gaps that allow warm air to leak in. Clean seals with soapy water and replace if damaged. Ice buildup or frost in the freezer usually signals defrost drain issues or a faulty defrost heater. If you observe visible ice on internal surfaces, address drainage paths first. Finally, examine the condenser coils and fans; clogged coils or a non-spinning fan dramatically reduce cooling efficiency. If the problem persists after these checks, consider professional service for refrigerant and sealed-system assessments.
If you’re comfortable with basic electrical work, you can perform many checks safely. For any step involving disassembly, reassembly, or refrigerant handling, use caution and consult the owner’s manual. If you’re unsure at any point, pause and seek professional help to avoid safety hazards or voiding warranties.
Safety Precautions When Working on an RV Refrigerator
Safety is non-negotiable when dealing with RV refrigeration. Always unplug the fridge from the RV’s power source before starting any inspection. If you must work near exposed wiring, wear protective gloves and rely on a non-contact voltage tester to confirm the absence of live current. When disconnecting or reconnecting electrical components, take photos or notes to ensure correct reassembly. Many RV fridges also have high-temperature surfaces and delicate refrigerant lines; avoid touching the rear coils or sealed lines unless you are trained. If your model uses propane or gas for ignition, never test it while the area is occupied or powered; follow the manufacturer’s instructions and ensure proper ventilation. Finally, avoid using harsh cleaners on seals, and never force doors or switches—gentle handling reduces the risk of damaging seals or electrical connectors.
Maintenance Tips to Prevent Future Failures
Preventive care can dramatically reduce RV fridge downtime. Schedule periodic inspections of power connections, inverter health, and the fridge’s vents. Clean condenser coils and fans every few months, especially after long trips where road dust accumulates. Check door seals for cracks and replace them promptly to maintain a tight seal. If your unit has a defrost drain, flush it with warm water to prevent clogs. Keep the interior clean and organized so airflow isn’t obstructed by containers. Finally, track compressor run times and temperatures to learn the appliance’s normal range, which helps you spot anomalies early. A proactive approach saves money and minimizes unexpected breakdowns during travels.
Choosing a Repair Service vs DIY in an RV
Deciding between DIY fixes and professional service depends on your comfort with electrical work, refrigerant handling, and the complexity of the issue. If you notice refrigerant leaks, unusual hissing sounds, or persistent cooling problems after basic checks, a licensed technician is the safest choice. Many RV repair pros specialize in absorption fridges common in travel trailers and motorhomes, but always verify credentials and warranties before booking. For simpler tasks—like sealing doors, clearing a defrost drain, or cleaning coils—you can often perform the work yourself with the right tools and manufacturer guidance. Document symptoms and steps taken to share with the technician if you choose to hire one.
Remember, safety comes first. If you feel uncertain about any step, stop and consult a professional. A well-documented history combined with a clear description of the observed symptoms helps you receive faster, more accurate service.
Quick-Check List Before You Call for Help
- Confirm whether the fridge is running on 12V, 120V, or both, and test voltage where safe.
- Check thermostat settings and confirm they respond to adjustments.
- Inspect seals and door alignment for leaks.
- Inspect defrost drain for clogs; clear with warm water if needed.
- Look at condenser coils and ensure the cooling fan spins freely.
- Keep a small log of symptoms and recent travel or power events for service requests.
- Read the owner’s manual for model-specific cautions and troubleshooting steps.
Tools & Materials
- Safety gear (gloves, safety glasses)(Protect hands and eyes during inspections.)
- Non-contact voltage tester(Verify power is off before touching components.)
- Multimeter(Test voltage and resistance in control circuits.)
- Screwdrivers (Phillips and flat-head)(Use size appropriate for screws on your model.)
- Nut drivers set(Loosen/secure clamps without stripping bolts.)
- Flashlight(Inspect dark compartments and behind panels.)
- Rags and mild soap(Clean seals and surfaces without harsh chemicals.)
- Owner’s manual for RV refrigerator(Model-specific guidance and safety cautions.)
- Replacement parts (as needed)(Defrost drain tube, door seals, or control components per diagnosis.)
Steps
Estimated time: 1-3 hours
- 1
Power down safely
unplug the unit from all power sources and wait 1–2 minutes to discharge any residual voltage. This prevents shocks when you inspect electrical components.
Tip: Take a photo of wiring before disconnecting anything to guide reassembly. - 2
Check thermostat settings
Locate the thermostat and verify it responds to adjustments. Set to mid-range, then observe whether the refrigerator starts cooling within 20–30 minutes.
Tip: If the display is dim or unresponsive, there may be a control board issue. - 3
Inspect door seals
Close inspection of gaskets for cracks or gaps reveals leaks. Clean seals with mild soap and water; replace if flexible seal material is worn.
Tip: A simple leak can dramatically affect cooling performance. - 4
Test defrost system
Check for frost buildup on the evaporator and inspect the defrost drain for blockages. Clear ice or clogs using warm water and a flexible wire.
Tip: Never use sharp objects that could puncture tubing. - 5
Inspect condenser coils and fan
Locate the coils (often behind the vent) and ensure the fan spins freely. Clean dust with a soft brush or cloth; remove debris haphazardly.
Tip: A clogged coil can cause low cooling efficiency even if other parts are fine. - 6
Check power supply and connections
Test the power outlet, inverter/charger, and any fuses or breakers linked to the fridge circuit. Look for loose connections and corrosion.
Tip: Worn or loose grounds can cause intermittent cooling problems. - 7
Defrost and restart test
Allow the defrost cycle to run (if applicable) and then restart the fridge. Monitor for 1–2 hours to verify cooling behavior.
Tip: If cooling returns briefly but fails again, a component replacement is likely needed. - 8
Decide on repair vs professional service
If cooling remains inconsistent after checks, assess whether the issue is DIY-feasible or requires a pro for sealed system work.
Tip: Keep logs of symptoms and steps taken to aid the technician.
FAQ
Why is my RV fridge not cooling?
There are several common causes in RVs, including power supply issues, thermostat settings, door seal leaks, defrost drain blockages, and dirty condenser components. Start with power and thermostat checks, then inspect seals and defrost systems.
Not cooling can be caused by power or thermostat problems, leaky seals, or a blocked defrost drain. Start with basic checks before calling a technician.
Can I fix an RV fridge myself?
Yes for many basic issues like door seals, coil cleaning, and defrost drain clears. For electrical work beyond basic checks or refrigerant-related problems, consider professional service.
Yes, many fixes are doable yourself, but avoid complex electrical or refrigerant work unless you’re trained.
Is it safe to defrost an RV refrigerator?
Defrosting is safe when the unit is unplugged and done carefully. Use warm water to clear drains and avoid metal tools that could puncture coils or tubing.
Defrost safely by unplugging first and using warm water; avoid sharp tools.
How long should diagnosis take?
A thorough DIY diagnosis on common issues can take 30-90 minutes depending on symptoms and access to components. Persistent or complex issues may require a pro.
Most DIY checks take 30 to 90 minutes; longer if you need professional help.
What is a typical RV fridge failure pattern?
RVs frequently fail due to defrost drain clogs, door leaks, and voltage supply problems. These clues guide the troubleshooting path.
Defrost drain clogs, door leaks, and voltage issues are common RV fridge failure patterns.
When should I replace vs repair?
If the compressor or sealed system shows signs of failure or refrigerant issues persist after checks, replacement or professional assessment is advised.
If the sealed system is compromised, replacement or pro assessment is usually the best route.
Watch Video
Top Takeaways
- Identify whether cooling failure is due to airflow, defrost, or power issues.
- Check and secure door seals to prevent warm air intrusion.
- Test defrost and condenser components as primary culprits in RV fridges.
- Document symptoms to streamline professional service if needed.
- Choose DIY fixes only for basic tasks; escalate to a pro for refrigerant or sealed-system work.