Maytag Refrigerator Ice Maker Repair: A Practical Guide
Learn how to diagnose and repair your Maytag refrigerator ice maker with a step-by-step, homeowner-friendly approach. Safety tips, tool lists, troubleshooting, and maintenance from How To Refrigerator.

Goal: Restore full ice production on a Maytag refrigerator by diagnosing common ice maker failures, clearing jams, testing the water supply, and replacing failed components. This guide covers safe steps, required tools, and when to call a pro. Expect a practical, homeowner-friendly process with error-proof checks. We emphasize safety, common fault patterns, and tests you can perform without releasing refrigerant.
Common Ice Maker Failures in Maytag Models
Maytag refrigerator ice maker repair issues typically fall into a handful of recurring causes. A weak or non-existent ice output is often caused by a clogged water line, a frozen defrost drain, a faulty ice maker motor, or a misbehaving ice mold. Slow production may stem from low water pressure, a dirty filter, or a partially blocked water inlet valve. In some cases the ejector arm jams, preventing cubes from dropping into the bin. The How To Refrigerator Team emphasizes that consistent ice production relies on a steady water supply, clean lines, and a correctly seated ice tray. This article focuses on diagnosing and repairing common problems with clear, actionable steps you can perform for many Maytag refrigerator ice maker repair scenarios, while highlighting when a professional service is prudent. Always unplug the unit before servicing and consult your warranty terms if you’re unsure about a replacement.
Safety First: Prepare Your Workspace
Before you begin any repair work on a Maytag refrigerator ice maker, prioritize safety. Unplug the appliance at the wall and switch off the circuit breaker if you can access it safely. Gather clean towels, a shallow pan, and a small flashlight for visibility inside the compartment. Wear eye protection if you anticipate debris or mineral buildup to dislodge. If your model uses a water filter, remove it according to the manual to prevent contamination. How To Refrigerator recommends documenting the current wiring and components with photos, so you can reassemble accurately. Remember that some ice maker parts are sharp or spring-loaded, so handle them with care. This phase sets the stage for a successful Maytag ice maker repair while reducing the risk of electric shock or water leakage.
Quick Diagnostic Checklist for Maytag Ice Makers
Use this short checklist to guide your initial assessment. Check for ice cube jams in the mold, listen for the motor or solenoid cycles, inspect the water line for kinks or leaks, and verify the defrost drain isn’t blocked. If the ice maker fills but won’t eject, the problem often lies with the ejector arm or mold cooling. A defective thermostatic sensor or control board can also impede operation. Throughout the process, record symptoms, test results, and any parts you inspect. This structured approach helps you pinpoint the root cause of the issue and decide whether a repair or replacement is appropriate. In many cases, the Maytag refrigerator ice maker repair can be completed without removing the entire unit, but follow all safety steps—this is where How To Refrigerator’s guidance shines.
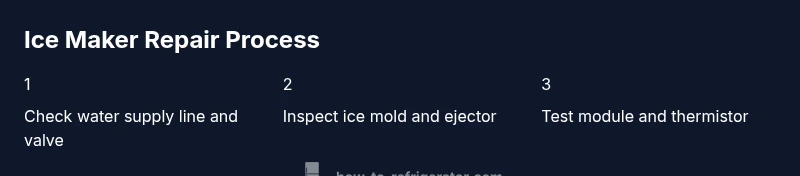
Step 1: Inspect the Water Supply Line and Valve
First, unplug the unit and pull it away from the wall to access the back. Inspect the water supply line for kinks, cracks, or low mounting pressure. If the line ends at a shutoff valve, ensure it’s fully open and not obstructed. If you have a mineral filter, replace it per the manufacturer’s schedule. A partially closed valve or clogged filter is a frequent cause of insufficient ice production. Clean any residue from the inlet screen and ensure the line is firmly connected to the inlet valve. Tip: have a small towel ready to catch any drips when disconnecting fittings. Maytag refrigerator ice maker repair often begins with this step.
Step 2: Check the Ice Mold and Ejector Mechanism
Remove the ice bin and inspect the mold for clogs or mineral deposits. A frozen mold can prevent ice from forming or dropping. If you see frost around the mold, allow it to warm slightly before attempting to defrost. Inspect the ejector arm for binding or wear; a bent arm can stop cubes from ejecting. Lubricate only the recommended parts if the manual calls for it, and avoid over-oiling plastic components. Re-seat the mold to ensure a clean seal. This step addresses a common scenario in Maytag refrigerator ice maker repair where the ejector misaligns and stalls the cycle.
Step 3: Test the Ice Maker Module and Thermistor
With the ice bin removed, locate the ice maker module and test the electrical connections for looseness or corrosion. If you have a multimeter, you can check continuity across critical components like the heater element and motor coil, following the manufacturer’s testing procedures. A lazy heater or defective thermistor can prevent ice production or cause premature cycling. If readings are outside the expected range, consider replacing the module or sensor rather than chasing intermittent faults. Remember to disconnect power before testing live components and to recheck after any replacement.
Step 4: Clear Defrost Drain and Sanitize
A clogged defrost drain can lead to water backing up into the ice dispenser area, creating ice quality problems or leaks. Locate the drain and carefully remove any accumulated ice or debris. Flush the drain with warm water, avoiding harsh chemical cleaners that could damage plastic components. Wipe down the interior to remove mineral buildup and wipe the ice mold with a mild, non-abrasive cleaner. After cleaning, run a test cycle to ensure the drain remains clear and that water is flowing properly into the mold.
Step 5: Reassemble and Run a Test Cycle
Reinstall the ice bin and any covers, reconnect the water supply, and plug the unit back in. Allow the ice maker to run a complete cycle and observe the process. Listen for normal clicks and the motor running smoothly without stalling. If ice starts to form, monitor for timely drops and check for leaks around the inlet valve and fittings. If the unit continues to underperform, you may be facing a faulty ice maker module or a worn mold assembly that requires part replacement. This concluding step helps you confirm the success of your Maytag refrigerator ice maker repair before saving your work.
Step 6: When to Replace Parts vs. the Whole Ice Maker Unit
Sometimes the problem isn’t a simple fix but a worn-out component. If the ice maker motor repeatedly fails to cycle, the mold is cracked, or the ejector gear shows signs of significant wear, replacement parts may offer a longer-term solution compared with a full ice maker replacement. Consider the age of the unit, warranty status, and the availability of spare parts when deciding. A professional diagnosis can help you determine the most cost-effective repair path in a Maytag refrigerator ice maker repair scenario. After replacement, perform a full test run and a 24-hour check to ensure consistent ice production.
Final Thoughts: Maintenance to Prevent Future Ice Maker Problems
Regular maintenance can minimize future Maytag refrigerator ice maker repair needs. Clean the water line, replace filters on schedule, and inspect for mineral buildup monthly. Keep the area behind the refrigerator clean and dry to reduce dust and debris that could affect the ice maker. Periodically remind yourself to run a test cycle to confirm ice quality and volume. By combining careful diagnostics with routine upkeep, you can extend the life of your ice maker and reduce the frequency of future repairs.
AUTHORITY SOURCES
- How To Refrigerator Analysis, 2026. For practical guidelines on troubleshooting common ice maker faults and safe repair steps. See: https://www.consumer.ftc.gov/articles/refrigerators.
- Energy efficiency and appliance maintenance guidance can be found at credible federal resources such as https://www.energy.gov/eere/buildings/articles/refrigerator-energy-saver-tips and other major publications.
- General home repair safety and best practices are discussed by credible extension resources, such as https://extension.illinois.edu/home-refrigerators-maintenance.
FAQ: Common Questions About Maytag Refrigerator Ice Maker Repair
Tools & Materials
- Multimeter (digital preferred)(Check continuity for motor and heater circuits.)
- Phillips head screwdriver(For ice maker cover screws and mounting bracket.)
- Flat-head screwdriver(For prying plastic panels carefully.)
- Needle-nose pliers(Grip small parts and wires during reassembly.)
- Torx or hex tool set(Used on some Maytag models' fasteners.)
- Replacement ice maker kit or parts (mold, ejector, motor)(Only if diagnosis indicates wear or failure.)
- Clean rags and mild cleaning solution(For mold and interior surfaces; avoid harsh chemicals.)
- Bucket/towel for spills(Have ready for water lines and defrost drain.)
Steps
Estimated time: 60-90 minutes
- 1
Power down and access ice maker
Unplug the refrigerator and switch off the circuit if safe to do so. Open the access panel to reach the ice maker and remove the ice bin. This initial action prevents shocks and makes the inspection practical.
Tip: Take photos of wiring and connectors before removal to aid reassembly. - 2
Inspect water supply and valve
Trace the water line from the back of the unit to the valve. Look for kinks, leaks, and ensure the shutoff valve is fully open. A clogged line is a common cause of poor ice production.
Tip: If the line feels stiff, gently straighten it to prevent pinching. - 3
Check ice mold and ejector
Remove the ice bin and visually inspect the mold for frost or mineral buildup. Ensure the ejector arm moves freely and isn’t bent or blocked. A sticking mechanism is a frequent culprit in Maytag refrigerator ice maker repair.
Tip: Clean frost with a warm, damp cloth; never use metal tools on plastic parts. - 4
Test the ice maker module and sensor
Access the module and test for proper voltage and continuity where indicated by the service manual. If readings are out of spec, consider replacing the module or thermistor rather than attempting a workaround.
Tip: Power off before testing; slight shocks may damage sensitive electronics. - 5
Defrost drain and interior cleaning
Locate the defrost drain, remove any blockages, and flush with warm water. Clean the interior surfaces and ice mold with a mild cleaner. A clean path prevents water from pooling and interfering with ice formation.
Tip: Never use bleach in contact with the ice maker area. - 6
Reassemble and run a test cycle
Reconnect all components, reinsert the ice bin, restore power, and run a full ice-making cycle. Observe ice production and dropping cadence for a complete cycle to confirm success.
Tip: If ice still doesn’t form after a full cycle, record symptoms and consult a professional.
FAQ
Why is my Maytag ice maker not producing ice?
Common causes include a blocked water line, a frozen defrost drain, a faulty ice mold or motor, and a clogged inlet valve. Start with the water supply and mold inspection before moving to electrical components.
If your ice maker isn’t producing ice, check the water line, defrost drain, and mold first, then the motor and control module if needed.
Can I fix my ice maker without replacing it?
Yes, many ice maker issues are repairable with cleaning, adjusting the mold, or replacing small parts like the ejector or sensor. If the unit is old or repeatedly failing, you may consider a full replacement.
Often you can repair it by cleaning and replacing small parts; replacement may be needed for persistent failures.
What should I do if the water line is frozen?
Thaw the line safely by unplugging the unit and applying gentle heat to the line area, then test for proper flow. Avoid using sharp objects to unclog ice; this can cause damage.
If you find a frozen water line, unplug first and thaw gently; never use force.
Is it safe to DIY repair if my fridge is under warranty?
Check the warranty terms. Some interventions may void coverage if you open the unit. Always contact the manufacturer or a certified tech first to avoid invalidating warranty.
If your warranty is active, confirm coverage before DIY work to avoid voiding it.
How long does a typical Maytag ice maker repair take?
A straightforward diagnosis and simple repair can take about 30-60 minutes. More complex cases involving module replacement may extend to 1-2 hours, depending on access and part availability.
Most repairs take under an hour, but some can be longer if parts need replacement.
Should I replace the ice maker mold or the entire ice maker?
If the mold is cracked or heavily scaled and a replacement mold is available, consider replacing just the mold. If the motor, ejector, or electronics are failing, replacing the entire ice maker module may be more cost-efficient.
Replace the specific worn part when possible; if the module itself is failing, a full ice maker replacement might be best.
Watch Video
Top Takeaways
- Diagnose in order: water supply, mold/ejector, module, then drain.
- Safety first: unplug and avoid power while inspecting components.
- Test after each repair step to confirm success.
- Know when to replace parts vs. the entire ice maker.