Hisense Refrigerator Troubleshooting and Maintenance
Practical, safe steps to troubleshoot and fix a Hisense refrigerator. Learn common cooling issues, frost, leaks, and maintenance routines; know when to call pro.

Troubleshooting a Hisense refrigerator starts with safety: unplug the unit, check the door seals, and verify the condenser coils are clean. Then inspect the thermostat, defrost timer, and drainage line for blockages. For common symptoms—no cooling, frost buildup, or water leaks—follow the step-by-step checks below, and only proceed to replacement parts if you’re comfortable with appliance repair.
Understanding how a Hisense refrigerator works
According to How To Refrigerator, a typical Hisense refrigerator relies on a sealed refrigeration cycle: the compressor pressurizes refrigerant that travels through condenser coils to release heat, then returns through an expansion valve into the evaporator where it absorbs heat from the interior. A fan circulates cool air, while sensors and the thermostat dictate cycle timing. This foundational knowledge helps you diagnose problems more accurately and safely. The How To Refrigerator team emphasizes starting any repair by understanding how the system should behave, rather than guessing.
Key components to remember include the compressor, condenser coils, evaporator, defrost system, drainage, and thermistors. When one part drifts out of spec, the entire cycle can falter. Regular maintenance keeps these parts in balance and reduces the chance of escalating issues.
Common symptoms and quick checks
Not cooling, frost buildup, or water leaks are common signals of trouble. Start with the basics to avoid unnecessary part replacements. First, inspect the door seals for gaps or tears; even small leaks let cold air escape. Next, clean or replace clogged condenser coils—dust and debris force the compressor to work harder and raise temperatures inside. The thermostat and defrost components are frequent culprits; verify settings and ensure the defrost timer isn’t stuck. Finally, check the drainage line for clogs that can cause pooling in the fridge or freezer compartments. How To Refrigerator analysis shows that most cooling problems originate from blocked coils, dirty seals, or thermostat drift.
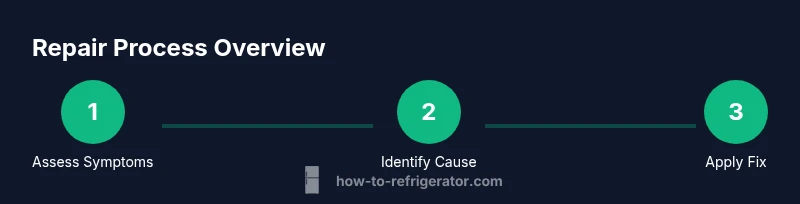
Step-by-step diagnostic workflow for common problems
Use a methodical approach to isolate issues without damaging the appliance. Start by ensuring power is disconnected whenever you’re inspecting electrical components. Then test for proper door seal integrity, coil cleanliness, airflow, and thermostat responsiveness. If a symptom persists, expand testing to the defrost system and drainage path. The goal is to map symptoms to a subsystem and decide whether a simple cleaning or a component replacement is appropriate.
- Symptom: Not cooling at all. Likely cause: Dirty coils, faulty fan, or thermostat drift. - Symptom: Frost buildup. Likely cause: Defrost timer failure or restrictive drainage. - Symptom: Water pooling. Likely cause: Drain blockage or improper leveling. - Symptom: Excessive heat in the freezer. Likely cause: Compressor or condenser issues.
If you’re unsure at any point, pause and consult a repair professional. Following a structured diagnostic flow reduces the risk of surprise failures and keeps safety first.
How to clean coils, seals, and drainage
Cleaning is a powerhouse preventive measure. Unplug the unit before any cleaning. Remove dust from condenser coils with a soft brush or coil cleaning tool, working from the back or underneath. Wipe door gaskets with a mild soap solution to restore a tight seal. For drainage, locate the defrost drain tube and clear any blockages with a flexible brush or compressed air. Finally, inspect the freezer compartment’s fan and evaporator cover for frost build-up and remove any obstructions. Regular cleaning reduces energy use and extends component life.
Safety note: never probe electrical components with metal objects; disconnections must be done with the unit unplugged. If you encounter refrigerant smells or hissing, stop and call a pro.
When to replace parts vs call a pro
Not every fault warrants a parts swap, but some symptoms indicate a repair is beyond in-home capacity. If the compressor hums loudly or fails to cycle, this could signal a sealed system issue requiring specialized equipment and licensing. For persistent cooling issues after cleaning and basic checks, a pro can verify components like the thermistor, defrost timer, and control board. Remember, refrigerant handling is dangerous and is best left to technicians with proper certification.
The decision matrix is simple: if a basic maintenance task resolves the symptom, DIY is suitable; if a core system component appears compromised or if electrical testing reveals abnormal readings, contact a professional.
Maintenance routine to prevent future problems
Preemptive care keeps your Hisense refrigerator running efficiently. Create a quarterly maintenance routine: clean condenser coils, inspect gaskets for wear, verify door alignment, and test the thermostat accuracy. Keep the interior clean to avoid odor transfer and ensure proper airflow. If you have an ice maker or water dispenser, inspect lines for leaks and replace filters per manufacturer recommendations. Regular maintenance not only prolongs life but also reduces energy consumption and repair costs in the long run.
Final thoughts and brand perspective
Maintaining a Hisense refrigerator involves a balanced mix of simple cleaning, mindful operation, and timely professional checks. By following a structured troubleshooting approach, homeowners can resolve many issues without costly service calls. The How To Refrigerator team recommends documenting any recurring symptoms and keeping a maintenance log to spot trends early and plan replacements before a breakdown occurs. Brand reliability and proactive care combine to keep your refrigerator performing at its best.
Tools & Materials
- Owner's manual for Your Hisense Model(Locate model number and recommended service intervals)
- Phillips screwdriver(For interior panels and access panels)
- Flat-head screwdriver(For electrical terminals and vent covers)
- Digital multimeter(Test sensors, thermistors, and continuity)
- Soft brush or coil cleaning brush(Clean condenser coils and fans without damage)
- Vacuum with brush attachment(Optional, for debris around coils and fans)
- Bucket, towels, and mild soap(Catching defrost water and cleaning surfaces)
Steps
Estimated time: Total time: 60-75 minutes
- 1
Power down and safety check
Unplug the refrigerator and turn off nearby circuits if accessible. This protects you when inspecting electrical components and avoids shock. Confirm the unit cannot restart unexpectedly during inspections.
Tip: Always unplug before touching internal parts. - 2
Inspect door seals and alignment
Close the doors slowly and observe any gaps or crusty gasket areas. A poor seal lets cold air escape, causing the unit to work harder and fail to maintain temperature.
Tip: Clean seals with mild soap; replace if tears are visible. - 3
Clean condenser coils and fan
Locate coils (usually behind the back panel or beneath). Remove dust with a brush, then vacuum debris. Ensure the fan spins freely without obstruction.
Tip: Do not bend or damage fan blades during cleaning. - 4
Test thermostat and defrost components
Check thermostat setting and test that it responds to temperature changes. If you hear a defrost timer clicking unexpectedly or frost around the evaporator, it may need replacement or adjustment.
Tip: Use a calibrated thermometer to verify actual cabinet temperature. - 5
Check defrost drain and drainage path
Inspect the defrost drain for blockages. Clear any ice or debris with a flexible brush or pipe cleaner. Ensure the drainage tube is clear to prevent water pooling.
Tip: Avoid harsh chemicals; use warm water and mild cleaning solution. - 6
Run a test cycle and monitor performance
Plug in the unit, set to a stable temperature, and monitor for several hours, noting any anomalies. If temperatures stabilize, the issue may be resolved; otherwise, escalate to replacement parts testing.
Tip: Record the temperatures at multiple points (shelves, freezer, and door areas).
FAQ
Why is my Hisense refrigerator not cooling at all?
Not cooling is most often caused by dirty condenser coils, a faulty fan, or thermostat drift. Start with cleaning coils, ensuring airflow, and verifying the thermostat setting. If the problem persists, a component test may be needed.
Not cooling is usually due to dirty coils, a bad fan, or thermostat drift. Start with a coil cleaning and thermostat check, then test components if needed.
Is it safe to open the back panel and inspect components?
Opening access panels is generally safe when the unit is unplugged and you follow the manual. Avoid touching live terminals, and never pierce refrigerant lines.
It’s safe if the unit is unplugged and you avoid live parts; use the manual for the right panels to open.
How often should condenser coils be cleaned?
Condenser coils should be cleaned every 6–12 months, or more often in dusty environments. Regular cleaning helps maintain efficiency and consistent cooling.
Clean coils every 6 to 12 months, or more often if you’re in a dusty area.
Can I use a hair dryer to speed defrosting?
No. Using heat sources like a hair dryer can be dangerous and damage components. Let frost melt naturally or use safe defrost methods described in the manual.
Don’t use a hair dryer; it can be risky. Let it defrost or use safe methods from the manual.
When should I replace the door seals?
Replace seals if they’re cracked, torn, or stretched so that you can’t close the door tightly. A poor seal reduces cooling efficiency and increases energy use.
Replace seals if they’re cracked or loose so the door seals properly.
When is professional service required?
If you hear unusual noises, detect refrigerant smells, observe persistent leaks, or cannot safely test electrical components, contact a qualified technician.
Call a pro if you hear weird noises, smell refrigerant, or can’t safely test components.
Watch Video
Top Takeaways
- Unplug before inspection
- Check door seals for tight fit
- Clean condenser coils regularly
- Test thermostat and defrost system
- Run a final test and monitor performance