Gladiator Garage Refrigerator: Repair, Maintenance, and Troubleshooting
Learn to diagnose, fix, and maintain your Gladiator garage refrigerator with clear, step-by-step instructions, safety tips, and pro insights from How To Refrigerator.

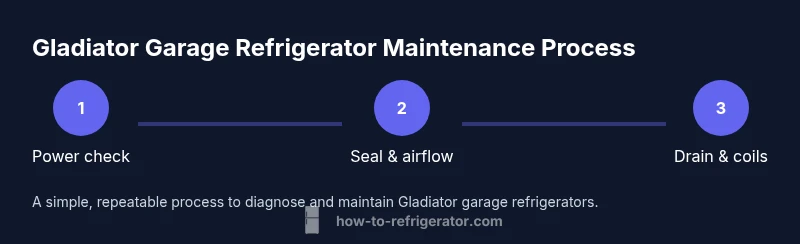
In this guide, you will learn how to diagnose and fix common issues with a Gladiator garage refrigerator, from troubleshooting temperature and cooling to replacing faulty seals and condensate lines. You'll also get maintenance routines to keep your unit running efficiently. This quick overview sets expectations for safety steps, required tools, and time estimates before you begin.
Overview of Gladiator Garage Refrigerator Systems
Gladiator garage refrigerators are built to withstand a workshop or garage environment, offering durable finishes and robust cooling. The core system includes a compressor, condenser coils, evaporator, thermostat, and a defrost mechanism. In many Gladiator models, there are dedicated temperature zones for beverages and fresh foods, plus a frost-free option. Understanding these parts helps homeowners troubleshoot temperature swings and unusual noises.
According to How To Refrigerator, these units rely on a sealed refrigerant circuit; when airflow is blocked or seals leak, performance declines quickly. The How To Refrigerator team notes that the most common wear happens at the door seals and the defrost drain. Regular checks of the exterior gasket, door alignment, and airflow path can prevent many issues before they require tools.
For homeowners, the objective is clear: keep coils clean, doors sealed, and the interior organized so that air can circulate. In a Gladiator garage refrigerator, poor airflow due to clutter or dirty coils is a frequent cause of uneven cooling. Representing a factory-backed design meant for heavy-use spaces, they still benefit from routine, safe maintenance.
Common Symptoms and Quick Diagnostics
Gladiator garage refrigerators may display a range of symptoms from temperature drift to frost buildup. Common signs include: interior warmth despite a low thermostat setting; frequent cycling; condensation on shelves; unusual motor noise; or ice buildup along the back wall.
To diagnose: start with the simplest checks. Confirm the power outlet is working and the unit is plugged in. Check the thermostat dial and ensure it is set within the recommended range (usually not below 34-36°F). Inspect the door seals for cracks or gaps and run your finger around the gasket to feel for leaks. A quick test is to close the door on a dollar bill; if you can pull the bill out with ease, the seal may be worn.
If problems persist, remove dust from the condenser coils (if accessible) and ensure the condenser fan spins freely. A blocked drain or frost buildup can cause water pooling or frost on the evaporator. For the Gladiator model line, symptoms commonly tie back to airflow or defrost drainage issues, so focus diagnostics there.
Essential Tools and Safety Steps
Before you begin any repair on a Gladiator garage refrigerator, gather the basics: a screwdriver set (Phillips and flat-head), a multimeter for electrical checks, a flashlight, rubber gloves, and a clean microfiber cloth. Keep a non-slip mat handy and unplug the unit before removing any panels. Label screws and take photos of wiring connections to aid reassembly. Safety first ensures you avoid electric shock or accidental refrigerant exposure.
Always work in a dry area and avoid using metal tools on the interior aluminum shelves to prevent damage. If the unit uses a frost-free system, do not manually defrost with sharp objects; instead, follow manufacturer guidelines to prevent damage to the evaporator. A small vacuum or compressed air can help clear debris from vents without disassembling sensitive parts.
For a Gladiator fridge, follow the brand's service manual if accessible, and wear eye protection when inspecting coils or fans. If you smell refrigerant or hear hissing, stop immediately and seek professional help. Regular maintenance can extend life and reduce the likelihood of urgent repairs.
Step-by-Step Troubleshooting Approach (Overview)
This section provides an overview of the problem-solving path for common Gladiator garage refrigerator issues. The goal is to identify root causes (airflow, seals, defrost drainage, or power) before attempting component-level fixes. You’ll learn to prioritize tasks from least invasive to more involved, ensuring you don’t waste time on symptoms.
A systematic approach helps you confirm assumptions. Start with simple checks—power, thermostat, and door seals—before moving to airflow and drainage. Document findings as you go so you can spot patterns across multiple visits. If you encounter a frost-free model, understand that evaporator frost patterns can indicate drainage or defrost timer problems rather than compressor failure.
This approach aligns with How To Refrigerator guidance: address root causes, maintain safe work practices, and avoid unnecessary disassembly. The aim is to minimize downtime while safeguarding your appliance’s longevity and performance.
Maintenance Routines to Extend Life
Preventive care keeps your Gladiator garage refrigerator operating efficiently year-round. A routine that focuses on airflow, seals, and coil cleanliness goes a long way toward stable temperatures and energy efficiency. Regular maintenance also helps catch issues early before they escalate into costly repairs.
- Schedule a quarterly seal check: Look for cracks, hardening, or deformities in door gaskets and replace them when needed. A poor seal wastes energy and disrupts cooling.
- Clean condenser coils every 6 months: Dust and lint reduce airflow; use a soft brush or vacuum to remove debris without bending fins. Ensure the condenser fan is free to rotate.
- Inspect and clear the defrost drain during seasonal changes: Clogs lead to water pooling or frost buildup. Follow the model’s drainage path and use warm water to flush slowly.
- Calibrate the thermostat at season changes: Small temperature differences can affect efficiency and food safety. Use an accurate thermometer to verify interior temps and adjust settings as needed.
- Keep the interior organized: A tidy interior reduces airflow obstruction. Avoid overloading shelves, especially around vents and coils.
The How To Refrigerator team emphasizes that consistency in preventive steps is the best defense against unexpected failures.
When to Seek Professional Repair
Some Gladiator garage refrigerator issues exceed DIY capabilities or involve safety risks. If you notice persistent cooling failures, refrigerant leaks, burnt smells, buzzing that indicates electrical faults, or water pooling that you cannot trace, it’s time to call a pro. Electrical and refrigerant work require specialized training and certification.
Never attempt to replace a sealed system component unless you are qualified; improper handling can be dangerous and illegal in many jurisdictions. If your unit is under warranty, consult the manufacturer’s service policy before attempting repairs. A pro can diagnose compressor health, refrigerant charge, or control board problems with precision and minimize the chance of accidental damage.
For residents relying on Gladiator gear in a workshop or garage, delaying professional service can lead to food spoilage, energy waste, or electrical hazards. The How To Refrigerator team recommends mindful escalation: handle simple fixes yourself, but recognize when it’s wiser to enlist certified technicians.
Real-World Scenarios: Common Gladiator Issues
In real garages, Gladiator garage refrigerators experience a mix of practical problems that reflect typical usage patterns. For example, a door that barely latches may be due to worn gaskets from frequent opening in a dusty workspace. In another case, frost buildup along the interior back wall could indicate a defrost drainage issue or an airflow restriction caused by stored items blocking vents.
Another frequent scenario involves temperature fluctuations when the unit sits in a hot garage. The excess ambient heat makes the compressor work harder, which can lead to premature wear if airflow isn’t optimized. A final example is a noisy operation, often traceable to a loose condenser fan or debris on the blades. By evaluating these scenarios with a methodical approach, homeowners can determine whether a quick fix, a part replacement, or professional service is the best path.
Across all these scenarios, remember that a Gladiator garage refrigerator is designed for rugged environments, but it still benefits from routine checks and careful organization. How To Refrigerator reiterates that preventive care improves reliability and reduces repair costs over time.
Tools & Materials
- Phillips-head screwdriver(Medium-size #2 is typical for appliance panels)
- Flat-head screwdriver(For prying panels without damage)
- Torx driver set(Some models use Torx screws on panels)
- Multimeter(For electrical tests (voltage, continuity) on outlets and components)
- Flashlight or headlamp(Illuminates tight spaces inside the unit)
- Glue-free sealant (optional)(For minor gasket reinforcement while awaiting replacement)
- Towels and a small tray(Contain spills and organize loose parts)
- Thermometer or fridge thermometer(Verify interior temps accurately)
- Gloves and safety glasses(Personal protective equipment during repair)
- Owner’s manual or model-specific guide(Model-specific instructions and specs)
Steps
Estimated time: 60-120 minutes
- 1
Power down and unplug
Begin by unplugging the Gladiator garage refrigerator and moving it away from the wall to access the back panel. This prevents electrical shock while you inspect the system. Allow the unit to sit for a few minutes to ensure any residual charge dissipates.
Tip: Take a photo of the cord and back connections before disconnecting to aid reassembly. - 2
Check the power outlet and cord
Inspect the outlet for signs of wear or a loose connection. Test the outlet with a lamp to confirm it’s functioning. If the outlet is controlled by a surge protector, verify that the protection is not tripping. A faulty supply can mimic many refrigerator issues.
Tip: Try a known-good outlet if you suspect the wall socket is at fault. - 3
Inspect door seals and alignment
Close the door on a thin piece of paper or a dollar bill. If you can pull the paper out easily with resistance, the seal may be worn. Check hinge alignment and door gaps; uneven doors reduce sealing efficiency and cooling.
Tip: Clean gaskets with warm soapy water to remove grime that prevents a tight seal. - 4
Verify thermostat settings and temperature
Use a calibrated thermometer to measure interior temperatures. Compare against the thermostat setting and adjust gradually. If temperatures remain outside the expected range, the thermostat sensor or control board may need testing.
Tip: Document temperature readings for several days to identify patterns. - 5
Assess condenser coils and airflow
If the unit is accessible, dust the condenser coils with a soft brush or vacuum. Ensure the condenser fan spins freely and isn’t obstructed by dust or debris. Poor airflow causes overheating and inefficient cooling.
Tip: Keep at least a few inches of clearance around the back and sides for airflow. - 6
Check defrost drain and water pathways
On frost-free models, confirm the defrost drain isn’t clogged and that water can flow to the drain pan. A blocked drain can cause frost buildup and water leaks inside or outside the unit.
Tip: Flush the drain with warm water to clear minor blockages.
FAQ
Why isn’t my Gladiator garage refrigerator cooling properly?
Several factors can cause poor cooling, including worn door seals, blocked condenser coils, an inefficient fan, or a faulty thermostat. Start with simple checks—power, seal integrity, and airflow—and consider defrost drainage if frost buildup is present. If the issue persists after basic checks, seek professional help.
If it’s not cooling, start with the door seals and airflow, then check the thermostat. If problems continue, call a technician.
How do I replace a door gasket on a Gladiator garage refrigerator?
Replace a worn gasket by purchasing the correct size from the manufacturer or an approved parts supplier. Remove the old gasket carefully, clean the channel, and install the new gasket starting at one corner and working along the edge. Check for an even seal and test with a paper towel or bill method.
Replace the gasket by following the manufacturer’s guide and test the seal after installation.
Can I defrost my Gladiator fridge manually?
If your model is frost-free, manual defrosting is not recommended and can damage the defrost system. For non-frost-free units, allow the ice to melt slowly with the door closed and use towels to manage the meltwater. Never use sharp objects to break ice.
Only manually defrost frost-free models if the manual says it’s allowed; otherwise, avoid it.
How often should I clean the condenser coils on a Gladiator model?
Condenser coil cleaning is typically recommended every 6 months if the fridge is in a dusty or garage environment. For households with heavy dust or pet hair, consider more frequent cleaning. Use a soft brush or cloth to avoid coil damage.
Clean coils about twice a year, or more often if the area is dusty.
What safety precautions should I take before repairing the unit?
Always unplug the unit before servicing and wear protective gloves and eye protection. Work in a dry area to reduce the risk of electric shock, and avoid touching refrigerant lines if you are not licensed. If unsure, consult a professional.
Unplug the fridge and wear safety gear before starting any work.
Is a buzzing noise always a sign of a problem?
A mild hum is normal for a running refrigeration system, but a persistent buzzing can indicate a loose component or failing fan. Check for obstruction around the condenser fan and verify all mounting screws are tight. If noise persists, professional diagnosis may be required.
Buzzing can be normal, but persistent noise usually means a loose part or fan issue.
Watch Video
Top Takeaways
- Inspect door seals regularly and replace worn gaskets.
- Keep condenser coils clean and ensure good airflow.
- Address defrost drainage issues promptly to prevent frost buildup.
- Document temperature readings and adjust thermostat settings as needed.
- The How To Refrigerator team recommends proactive maintenance to avoid costly repairs.