General Electric Black Refrigerator Repair Guide
Meticulous, homeowner-friendly guide to diagnosing and fixing cooling problems in a general electric black refrigerator. Learn safety steps, common failure points, and proactive maintenance to keep your GE fridge running efficiently.

This guide walks homeowners through diagnosing and fixing common cooling problems in a general electric black refrigerator. You'll learn how to inspect door seals, test the thermostat, check the condenser coils, defrost the drain, and verify storage temperature. Follow the step-by-step actions to safely restore cooling. This quick answer highlights essential checks and safe practices, helping you decide whether to tackle the issue yourself or call a pro.
Understanding the general electric black refrigerator and what can go wrong
The general electric black refrigerator has a reputation for solid reliability, but homeowners may encounter cooling problems over time. In this guide, we explore the most common failure points in GE models with black fronts, such as door seals, airflow restrictions, defrost drain clogs, and temperature control issues. Understanding how these components work together helps you diagnose efficiently and safely. According to How To Refrigerator, framing the problem around symptom groups makes it easier to identify likely causes and choose the right fix. This approach also aligns with practical home repair methods that minimize risk to you and your appliance. The goal is not to replace parts blindly, but to verify each potential issue with simple checks, measurement, and logical testing. By the end, you’ll have a clear plan to restore cooling and avoid unnecessary service calls.
Common symptoms and quick tests
Common cooling problems fall into a few symptom clusters. If your general electric black refrigerator isn’t cooling properly, start with the simplest explanations first. Not cooling enough might point to door seal leaks or incorrect temperature settings. Excess frost signals a defrost drain or heater issue. Ice maker problems often trace back to water supply lines or clogged filters. Unusual noises can come from vibrating coils or a faulty evaporator fan. With each symptom, perform a quick test: check seals, measure interior temperatures with a refrigerator thermometer, inspect coils, and listen for abnormal motor sounds. These checks help you determine whether a DIY fix is feasible or if professional service is necessary.
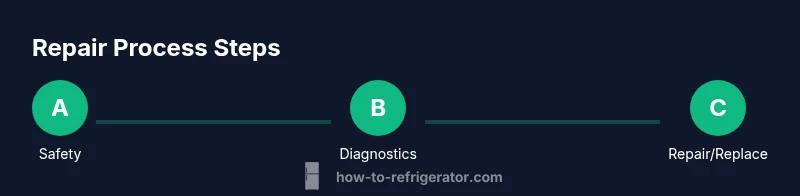
Safety first: unplug and prepare workspace
Before touching any electrical components, unplug the refrigerator at the wall outlet. This reduces the risk of shock while you inspect wiring, reach rear panels, or dislodge components. If you must move the unit to access the condenser coils, secure the area and unplug it again after moving. Use insulated gloves when handling metal panels and avoid using water directly on electrical parts. Keep a dry work surface and have a bucket and towels handy for minor spills. If you notice burnt smells or sizzling sounds, stop immediately and seek professional help. Always refer to the model-specific manual for wiring diagrams and safety cautions.
Step 1 — Inspect and replace door seals and gaskets
A worn or compressed door gasket allows warm room air to enter the fridge, forcing the compressor to work harder and reducing cooling efficiency. Start by inspecting the full length of the gasket for cracks, tears, or gaps. Clean the gasket with warm, soapy water to remove grime that can mask wear. Perform a simple dollar-bill test: close the door on a dollar bill and try to pull it out; if it slides out easily with the door closed, the seal is compromised and should be replaced. After replacing, recheck the door alignment to ensure a tight seal against the cabinet.
Step 2 — Verify thermostat and temperature controls
The thermostat controls determine how cold the interior should be. If the thermostat is set too high, the compressor won’t run long enough to reach safe temperatures. Verify the temperature setting using the internal dial or digital control panel. Place a thermometer in the fresh food compartment and another in the freezer; typical targets are about 37–40°F (3–4°C) for the fridge and 0°F (-18°C) for the freezer. If readings deviate from these targets, adjust settings and reassess after 24 hours. If the temperatures remain off, the thermostat or sensor may be failing and require replacement.
Step 3 — Clean condenser coils and verify airflow
Dusty or dirty condenser coils prevent heat exchange, causing the compressor to run continuously and reduce cooling. Locate the coils (usually behind a grille or on the bottom rear). Vacuum with a brush attachment to remove dust, then use a coil cleaning brush for stubborn debris. Ensure there is at least a few inches of clearance around the rear and sides for proper airflow. Confirm that the fan blades are intact and not obstructed by dust or debris. After cleaning, monitor the fridge for improved cooling over the next 24–48 hours.
Step 4 — Check defrost drain and heater if present
A clogged defrost drain can cause frost to accumulate on the evaporator and reduce cooling efficiency. Locate the defrost drain (often at the back or bottom of the fresh food area) and clear any obstructions with a flexible wire or pipe cleaner. If your model uses a defrost heater, check for continuity with a multimeter and inspect the heater elements for visible damage. If frost persists despite a clear drain, the defrost timer or control board may be faulty and require professional diagnosis.
Step 5 — Inspect evaporator fan and interior vents
The evaporator fan circulates cool air inside the compartments. Listen for the fan running when doors are closed; a silent or faintly buzzing fan can indicate failure. Remove the rear panel or freezer wall cover to access the evaporator fan and vents, ensuring the blades spin freely and no ice buildup is blocking ducts. If the fan is intermittent or noisy, replace the fan motor and inspect wiring connections. Proper airflow is essential for uniform cooling and energy efficiency.
Step 6 — Test for frost buildup and ice maker issues
Excess frost or ice buildup can block air pathways and reduce cooling. Switch off the ice maker if necessary and observe whether frost recedes after a few hours. If frost persists, a leaking or misaligned water line could be the cause. Inspect the water line for kinks, clogs, or leaks, and ensure the ice maker arm moves freely. If the unit includes an automatic defrost function, verify it cycles correctly; a malfunctioning defrost timer or control module can cause recurring frost.
Step 7 — Reassembly, testing, and documentation
Reassemble any panels you removed and plug the unit back in. Give the refrigerator 6–12 hours to stabilize if you performed major temperature resets or defrost work. Recheck temperatures and listen for unusual noises. Document the steps you took, including parts replaced and settings adjusted, so you or a technician can reference it later. If cooling remains inconsistent after all checks, consider scheduling professional service to avoid ongoing energy waste and potential food spoilage.
Tools & Materials
- Phillips head screwdriver (PH2)(Used for back panel screws and door hardware if needed)
- Flathead screwdriver(Gasket examination and minor prying lever)
- Multimeter(Check continuity for defrost heater or thermostat)
- Vacuum with brush attachment(Clean condenser coils and vents without dislodging debris)
- Coil cleaning brush or soft brush(Scrub coils and dust buildup)
- Soft microfiber cloths(Wipe down surfaces and seals)
- Bucket and towels(Contain spills and aid cleanup during defrost tasks)
- Thermometer (fridge and freezer)(Verify target internal temperatures)
- Torch/flashlight(Inspect dark areas inside the rear panel)
Steps
Estimated time: 75-90 minutes
- 1
Power off and unplug
Unplug at the wall and move any obstructing items away from the floor. Confirm there is no power to the unit before touching electrical components. This prevents shock and protects the control board during inspection.
Tip: Use a utility knife or non-marring tool to gently lift loose wiring harnesses if needed; avoid forcing connectors. - 2
Access panels and safety check
Remove rear panel (or bottom grille) to access condenser coils. Vacuum away dust and inspect fan blades for obstruction. Reconfirm the cabinet is unplugged before touching any fans or coils.
Tip: Take a photo before removing panels to guide reassembly. - 3
Inspect door seals
Run the dollar-bill test along the full length of the gasket. If the bill slips out easily, replace the gasket. Clean the gasket with warm soapy water and inspect for cracks.
Tip: Order OEM seals for your exact GE model to ensure proper fit. - 4
Test thermostat and temperature sensors
Set targets (fridge 37–40°F, freezer 0°F). Use a thermometer to verify. If internal temps don’t align after 24 hours, the sensor or thermostat could be failing.
Tip: If you must adjust, make small changes and recheck after a full cycle. - 5
Clean condenser coils and verify airflow
Remove dust with a vacuum and brush. Ensure at least several inches of clearance around the coils and verify that the fan spins freely.
Tip: Perform this step every 6–12 months to maintain efficiency. - 6
Check defrost system and drain
Locate the defrost drain and clear blockages. Check the defrost heater with a multimeter for continuity where applicable. Look for frost buildup on the evaporator.
Tip: If you’re unsure about the heater, consult the manual or a professional. - 7
Inspect evaporator fan and vents
Verify the evaporator fan operates during door closure. Listen for smooth operation and inspect for ice on the evaporator housing. Clear any obstructions.
Tip: A failing fan often shows up as cold spots or warm air pockets inside the fridge. - 8
Test overall operation and document
Reassemble, plug in, and monitor for 6–12 hours. Recheck temperatures and ensure the unit stabilizes. Document parts replaced and settings adjusted for future reference.
Tip: Keep a simple repair log for quick future diagnostics.
FAQ
Why is my GE black refrigerator not cooling properly?
Common causes include dirty condenser coils, faulty door seals, incorrect thermostat settings, or a malfunctioning defrost system. Start with seals and thermostat checks before testing the defrost and fan components.
If your GE fridge isn’t cooling, start by checking door seals and thermostat settings, then inspect the coils and defrost system if needed.
How can I tell if the defrost drain is clogged?
A clogged defrost drain often causes frost buildup and water pooling inside the fridge. Look for frost above the evaporator and trace the drain line for blockages. Clear obstructions with a flexible probe and rinse with warm water.
Look for frost buildup and pooled water to tell if the defrost drain is blocked, then clear the line carefully.
Are GE black refrigerators more likely to have door seal issues?
Door seals can wear with age just like any gasket material. Regular inspection and cleaning reduce air leaks. If you notice drafts or moisture around the door, replace the gasket.
Door seals wear over time; inspect and replace if you notice leaks or drafts.
How often should I clean condenser coils on a GE fridge?
Clean condenser coils every 6–12 months depending on dust exposure. Regular cleaning helps maintain cooling efficiency and lowers energy use.
Clean coils every 6 to 12 months to keep efficiency high.
When should I call a professional for a GE refrigerator issue?
If you detect refrigerant smell, exposed wiring, persistent frost after defrost, or unusual noises after basic checks, seek professional service. A qualified technician can safely diagnose sealed system problems.
Call a professional if you notice refrigerant issues, wiring problems, or persistent frost after basic checks.
Can I fix a noisy compressor myself?
A compressor issue often indicates deeper problems with sealed systems. DIY fixes are generally not advised. Focus on simpler causes like fan noise and coil cleaning first.
compressor problems usually need a pro; start with fan and coil checks first.
Watch Video
Top Takeaways
- Inspect door seals to stop warm air intrusion.
- Verify thermostat targets and sensor accuracy.
- Clean condenser coils for efficient cooling.
- Clear defrost drains to prevent frost buildup.
- Know when to call a pro versus DIY for safety.