Drawer Fridge: Fixes, Maintenance, and Troubleshooting Guide
Your complete guide to fixing and maintaining a drawer fridge, with troubleshooting tips, drawer care routines, and best practices for space-efficient kitchens.

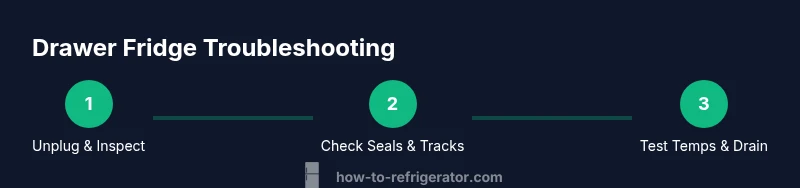
A drawer fridge is a compact refrigerator with pull-out drawers designed for easy access and organization. To troubleshoot common drawer-fridge issues, start with the drawer seals and track alignment, check for frost buildup, verify proper airflow around the condenser, and inspect door gaskets. Regular cleaning and correct loading prevent temperature fluctuations.
What is a drawer fridge and why homeowners choose it
A drawer fridge is a compact refrigeration unit that uses full-width, shallow storage drawers instead of traditional shelves. This design maximizes accessibility and organization, letting you see and grab items without rummaging through the interior. The primary appeal for many homeowners is space efficiency in small kitchens, apartments, or breakfast nooks, where floor space matters more than capacity. Drawer fridges excel at keeping produce, dairy, and beverages within easy reach while reducing the need to bend or twist to reach items in a conventional fridge. They can also offer improved airflow management around stored foods due to targeted zones and the absence of deep racks. When selecting a drawer fridge, consider the depth of the cabinet, drawer height adjustability, and whether you prefer a counter-depth or freestanding footprint. According to How To Refrigerator, drawer fridges are a space-saving choice that keeps groceries accessible in compact kitchens. They are a practical compromise between a compact refrigerator and a dedicated fridge-within-drawer arrangement.
Common issues with drawer fridges and quick fixes
Drawer fridges share many faults with standard units, but the design adds unique failure points tied to drawers, seals, and circulation paths. A fridge that stops cooling in the main cabinet often stems from airflow restrictions, dirty condenser coils, or a door seal that's misaligned or cracked. A sticky or mis-tracking drawer erodes efficiency and may cause uneven cooling. Frost buildup in the freezer segment, if present, can indicate a problematic defrost system or a blocked drainage line. Condensation on the outer doors signals humidity ingress, typically from a loose gasket or frequent door openings. Quick fixes are simple in many cases: (1) inspect and replace damaged door seals, (2) clean the drawer tracks and ensure smooth movement, (3) wipe gaskets and door frames to remove lint and debris, (4) check that the appliance has proper clearance around the back and sides for air intake, and (5) verify that the thermostat setting is appropriate for the kitchen temperature. Regular maintenance reduces these issues over time.
How to troubleshoot temperature problems
Temperature instability in a drawer fridge often manifests as warm pockets near the drawers or a noticeable difference between shelves and zones. Start by measuring internal temperatures with a reliable thermometer; place the probe in the middle of the main compartment away from the doors. If temperatures skew higher than the set point, adjust the thermostat a degree or two toward colder and monitor for 24 hours. Next, inspect the door seals for gaps; a simple hold-test lets you know if air is leaking. Clean the rubber gaskets with mild soap and water to restore elasticity. If the issue persists, examine the condenser coils at the back or underneath; if dusty, unplug and carefully vacuum or brush away debris. Ensure the appliance has adequate clearance for heat to escape. In some cases, a faulty temperature sensor or control board may require professional service.
Maintenance routines to extend life
Maintaining a drawer fridge involves regular cleaning, careful loading, and periodic component checks. Start with a quarterly interior wipe-down using a mild detergent and warm water; never use abrasive cleaners that could scratch drawer surfaces. Remove all drawers and vacuum or brush the tracks to remove dust and crumbs; this prevents sticking and ensures even airflow. Wipe the exterior seals and door frames to maintain a tight seal. Every six months, inspect the condenser coils and clean them if you see visible dust; blocked coils force the compressor to work harder and can shorten the unit’s life. If your unit has a defrost drain, flush it with warm water and a small amount of baking soda to prevent clogs. Finally, keep the fridge level and avoid overfilling drawers, which can compress vents and hamper cooling.
Loading and organizing drawers for even cooling
Elastic organization improves efficiency because air must circulate around items. Place larger containers toward the back and center of the drawers to encourage consistent airflow, and keep vent openings unobstructed. Store perishable foods in the colder sections and avoid stacking items high; use the included dividers or adjustable racks to separate fruits, vegetables, and dairy from strongly smelling items to prevent cross-contamination. Label drawers if multiple people share the kitchen to avoid overloading one drawer. Finally, avoid overfilling; drawers should move freely. If a particular drawer stops cooling or seems warmer near one edge, check for debris in the track and ensure the drawer is fully seated in the rail.
Checking seals and tracks
Door seals and drawer rails are the first line of defense against temperature loss. Inspect seals for cracks, tears, and warping; replace damaged gaskets promptly, since even small gaps can let in warm air. Check the drawer tracks for level travel; misaligned rails cause friction, binding, or gaps that permit air leakage. Clean tracks with a mild soap solution; lubricate sliding surfaces if the manufacturer permits it. If you notice a persistent misalignment after a few uses, consult the user manual for adjustment steps. Use a flashlight to inspect corners and ensure there is no foreign debris in the seal groove. A well-seated door and smooth drawer operation significantly improve efficiency and reduce energy use.
Cleaning the drainage system and coils
Some drawer fridges have passive defrost drains or shallow drainage channels around the base. A clogged drain can cause frost to drip into drawers or pooling inside the cabinet. If your model has a defrost drain, remove the cap and flush with warm water or a gentle pipe-cleaning solution recommended by the manufacturer. Never use boiling water, which can damage plastic components. Use a pipe brush or flexible wire to dislodge any buildup. For the condenser coils, unplug the unit and carefully vacuum or brush away dust; this simple step can dramatically improve cooling efficiency. Reconnect and monitor the temperature for 24 hours after any drain or coil maintenance.
Proper placement and airflow considerations
Position the drawer fridge in a location with stable ambient temperatures and plenty of airflow around the rear grille. Avoid placing it next to heat sources like ovens, dishwashers, or direct sunlight, as heat absorption increases compressor load. Elevate the unit slightly off the floor on a level surface to minimize vibration and noise. If you have a multi-appliance setup, leave at least a few inches between units to encourage cross-ventilation. Finally, ensure the door swings do not collide with cabinet doors or counters in tight kitchens. A cooler, well-ventilated environment helps the drawer system maintain even temperatures across all zones.
How to replace drawer guides and gaskets
Over time, drawer guides and gaskets can wear, causing misalignment, rubbing, or air leakage. To replace guides, remove the affected drawer and unscrew the old rail; attach the new rail and reinstall the drawer, ensuring smooth motion. When replacing gaskets, carefully remove the old seal with a utility knife, being cautious not to nick the cabinet surfaces. Align the new gasket with the troughs and press firmly to create a good seal. Test the drawer by opening and closing several times; the motion should be smooth with no sticking and the seal should resist a light hand pull at the edges. If your model uses a magnetic gasket, clean the surface and verify the magnets hold the door flush against the body.
Calibrating the thermostat and verifying temps
Calibrating the thermostat ensures the drawer fridge maintains safe temperatures. Start by setting the thermostat to the mid-range and then use a digital thermometer to measure the internal air temperature after 24 hours. For most home units, a target range of 35-38°F (1-3°C) for the fresh food compartment and 0°F (-18°C) for the freezer is typical, but always confirm with the user guide. If temperatures consistently fall outside the manufacturer’s range, consult the service manual for sensor calibration or replacement. Avoid moving the thermostat knob quickly or repeatedly; small adjustments yield stable results. Keep a log of temperature readings over a week to identify any drift or cycling patterns.
Common mistakes to avoid
Avoid leaving drawers open for extended periods; it disrupts cooling and wastes energy. Do not overload the drawer system; excessive weight can strain rails and seals. Refrain from using abrasive cleaners that can degrade plastic surfaces or damage gaskets. Do not ignore unusual noises, leaks, or ice build-up, since these are indicators of underlying problems. Finally, never attempt major electrical repairs without unplugging the unit, and never bypass safety interlocks to access internal components.
When to call a professional and what to expect
If you have tried standard troubleshooting and still notice temperature variations, frost, leaks, or abnormal noises, it is time to call a professional. A technician will usually inspect seals, door alignment, coils, sensors, and control boards, and may perform a leak test and refrigerant check if necessary. Prepare your warranty information and a brief history of the issue to speed up diagnostics. Request a written estimate before any work begins, and ask about expected turnaround times. For homeowners with drawer fridges installed in rental units or critical spaces, prioritise a service window that minimizes disruption.
Tools & Materials
- Phillips screwdriver #2(To remove panels or adjust drawers.)
- Flathead screwdriver(For prying open covers carefully.)
- Soft cloth(For wiping drawers and seals.)
- Mild dish soap(Gentle cleaning solution.)
- All-purpose cleaner(Only for exterior surfaces.)
- Digital thermometer(To verify internal temps.)
- Vacuum with brush attachment(For coils/condensor cleaning.)
- Replacement door gaskets(If seals are damaged.)
- Gloves(Keep hands protected while handling edges.)
Steps
Estimated time: 60-90 minutes
- 1
Safety first: unplug and prepare
Unplug the unit and remove any stored items from the drawers. Move the fridge away from the wall if possible to access the back panel. This reduces the risk of electrical shock and gives you a clear workspace.
Tip: Use a flashlight to inspect the back and look for dusty coils before you unplug. - 2
Remove drawers for inspection
Gently lift and pull out one drawer at a time to inspect the guides and seals. Place drawers on a soft surface to avoid scratching. This step clears space for cleaning and lets you check for binding or warping.
Tip: Take a photo of drawer alignment before removal so you can reassemble correctly. - 3
Check door seals and alignment
Inspect gaskets for cracks or gaps. Realign doors if they rub the frame, and replace damaged seals. A well-seated door reduces warm-air infiltration and stabilizes temperatures.
Tip: Do a see-through test by closing the door on a thin sheet of paper; resistance should require some effort. - 4
Clean drawer tracks and surfaces
Wipe tracks, rails, and drawer edges with mild soap and water. Remove crumbs and debris that can impede movement. Dry thoroughly before reassembling.
Tip: Lightly lubricate metal rails only if the manufacturer permits; otherwise, dry surfaces work best. - 5
Inspect coils and airflow
Access the condenser coils if exposed; vacuum or brush away dust. Ensure the back of the unit has several inches of clearance for heat dissipation. This step improves cooling efficiency.
Tip: Turn off the power and wait a few minutes if any components feel warm. - 6
Verify thermostat and temperature
Place a thermometer in the main compartment and compare with the setpoint. Adjust the thermostat gradually and monitor for 24 hours. Consistency is key to reliable cooling.
Tip: Record the readings to spot gradual drift. - 7
Flush the drainage path (if present)
If your model has a defrost drain, flush with warm water to clear clogs. Use a pipe-cleaning brush if needed, following the manufacturer’s guidance. Avoid boiling liquids.
Tip: Never force water into electrical components. - 8
Reconnect and test
Reinsert drawers, reconnect power, and wait for the unit to stabilize. Check for even cooling and ensure doors seal with a gentle pull.
Tip: Leave the doors closed for 12-24 hours after reassembly to verify stability.
FAQ
What is a drawer fridge?
A drawer fridge uses pull-out drawers instead of fixed shelves to improve accessibility and organization, especially in small kitchens.
A drawer fridge is a compact unit with pull-out drawers that makes it easy to reach items, ideal for small spaces.
Why is my drawer fridge not cooling?
Common causes include dirty coils, a door seal with gaps, or poor airflow around the unit. Check seals, clean coils, and ensure proper clearance.
If it’s not cooling, check the door seals and coils, and make sure there’s space around the back for airflow.
How do I fix a stuck drawer?
Remove the drawer, inspect the rails for debris, and clean. Reinstall and test for smooth sliding. If binding persists, replace worn rails.
Take the drawer out, clean the rails, and reinsert. If it sticks, replace the rails.
Is it safe to clean the drainage tube?
If your model has a defrost drain, flush with warm water to clear clogs. Use a pipe-cleaning solution as recommended by the manufacturer. Avoid aggressive cleaners near electronics.
Yes, but follow the manual and use warm water; don’t use harsh chemicals near the drain.
How often should gaskets be replaced?
Inspect gaskets every 6-12 months; replace cracked or deformed seals promptly to maintain a tight door seal.
Check gaskets yearly and replace if cracked to maintain sealing.
When should I call a professional?
If basic troubleshooting doesn’t restore cooling, or you hear unusual noises, leaks, or frost, a professional service is advised.
Call a pro if it won’t cool after basic checks or you hear odd noises.
Watch Video
Top Takeaways
- Check seals and tracks for proper seating.
- Clean coils and drainage to restore efficiency.
- Organize drawers to improve airflow.
- Calibrate temperatures and verify with a thermometer.
- Call a pro if temperatures remain off after basic maintenance.