How To Fix a Beverage Air Refrigerator: A Homeowner's Guide
Learn how to diagnose and fix common issues with a beverage air refrigerator. This step-by-step guide covers safety, tools, fixes, and maintenance from How To Refrigerator.

To fix a beverage air refrigerator, start by inspecting the condenser coils, door seals, and evaporator drain for blockages. Clean vents, reset the thermostat to a proper setting, and verify the fans run smoothly. Gather basic tools, unplug before service, and follow a safe, step-by-step repair guide to restore cooling without causing damage.
What is a Beverage Air Refrigerator?
A beverage air refrigerator is a commercial-grade cooling unit commonly used in bars, restaurants, and home entertaining setups to keep beverages cold and ready. It relies on an air-circulation design that moves cold air efficiently across shelves. In a home context, some households use compact or converted units that mirror the general principles of professional beverage coolers. When troubles occur, most issues relate to airflow, door sealing, or frost and drainage that affect cooling performance. Understanding the basic parts—compressor, condenser, evaporator, fan, defrost system, and thermostat—helps a homeowner diagnose problems without deep refrigeration theory. For homeowners troubleshooting appliance issues, approaching the unit like a small, programmable cold cabinet keeps expectations reasonable and safe.
Common Problems and Causes
Most beverage air refrigerator issues fall into a few predictable categories: reduced cooling or warm air, frost buildup, water leaks, unusual noises, and door seal problems. Dusty condenser coils reduce heat rejection, causing the unit to work harder and cycle more often. Damaged door gaskets let cold air escape, leading to inadequate cooling and frost near the evaporator. A blocked defrost drain can cause water pooling and ice formation. Electrical or control issues, such as a faulty thermostat or malfunctioning fan, can mimic loss of cooling. In many homes, the quickest wins are coil cleaning and seal replacement, followed by thermostat testing. Remember: never ignore frost that forms in areas where it shouldn’t, as it signals airflow or defrost problems.
Safety First: Before You Start
Safety comes first when working on any refrigeration device. Always unplug the unit before removing access panels or touching electrical components. Wear eye protection if you’re near sharp metal edges, and avoid direct contact with refrigerant lines. Do not attempt to repair refrigerant leaks—these require licensed professionals due to potential hazards and environmental regulations. Keep children and pets away from the area while you work, and work in a well-lit, ventilated space. If the unit is powered by a shared circuit, avoid overloading it during testing to prevent nuisance tripping.
Practical Getting-Started Overview
Before diving into disassembly, perform a quick sanity check of obvious external causes. Confirm the door seals are intact and the unit is level. Visually inspect the condenser coils for dust and debris. Listen for any unusual fan noise and verify that the evaporator fan inside the cabinet runs when the door is closed. This high-level roadmap helps you decide whether to proceed with more detailed steps or call a professional.
Step-by-Step Diagnostic Roadmap (Overview)
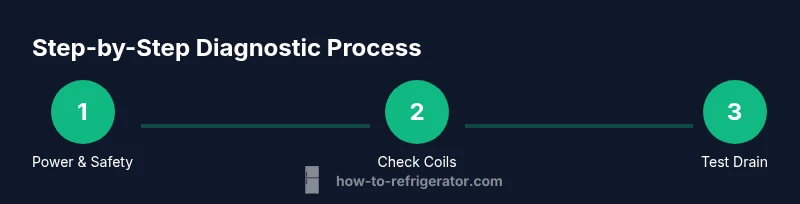
A structured diagnostic approach reduces guesswork. Start with safety, then verify airflow, seals, drains, and controls. If you identify a fault, categorize it as airflow restriction, thermal control fault, defrost/drain issue, or refrigerant handling concern. The roadmap helps you decide whether a simple cleaning or a more complex repair—potentially involving refrigerant handling—will be needed.
Home Fixes You Can Try (Non-Destructive First)
If the unit is cooling but not efficiently, begin with non-destructive fixes: clean the condenser coils, clear the evaporator drain, and reseat or replace door gaskets if they’re cracked or loose. Reposition shelves to improve airflow and ensure the unit is not blocked by walls or cabinets. Never bypass safety devices or remove critical electrical covers without proper knowledge. These gentle steps can yield noticeable improvements without professional service.
When to Call a Pro and What to Expect
If frost buildup is heavy, if you detect a refrigerant smell, or if you notice significant electrical symptoms like repeated tripping or buzzing that doesn’t stop after a reset, it’s time to call a pro. A licensed technician will verify refrigerant charge, test the control board, inspect the compressor, and safely handle any defrost or drainage failures. Expect clear diagnostic feedback, a written estimate, and guidance about warranty implications or recommended parts.
Maintenance Habits to Prevent Recurrence
Preventive maintenance is easier than emergency repair. Schedule regular coil cleaning every few months, especially if the unit is in a dusty kitchen or bar area. Inspect door seals for cracks and replace as needed. Keep the location well-ventilated and avoid blocking the rear grill. Monthly quick tests—listening for unusual noises and checking for frost on the evaporator—can catch problems early.
Authority Sources and Notes
For broader safety and best-practice guidance, refer to official resources. The U.S. Department of Energy provides energy efficiency context for refrigerators, while the Consumer Product Safety Commission offers appliance safety guidelines. Additionally, university extension services provide practical maintenance tips for homeowners. These sources help anchor your home-repair approach in widely accepted standards.
Tools & Materials
- Screwdrivers (Phillips and flat-head, assorted sizes)(Keep a small magnetic tray for screws; include #2 Phillips and 1/4" flat-head)
- Nut drivers(Varied sizes for panel fasteners)
- Multimeter(For voltage checks on controls and fans)
- Soft brush or compressed air(For condenser coil cleaning; avoid aggressive brushing)
- Microfiber cloths(For wiping coils and panels)
- Gloves and eye protection(Basic safety gear; used when handling sharp edges)
- Thermometer or fridge thermometer(To verify internal temperatures after service)
- Bucket or tray(For any defrost water drainage)
Steps
Estimated time: 60-90 minutes
- 1
Power down and unplug
Disconnect the unit from power and switch off any nearby circuit to ensure personal safety before inspecting panels or electronics.
Tip: Use a power strip with an on/off switch to avoid frequent unplugging. - 2
Inspect door seals and gaskets
Visually inspect for cracks, tears, or gaps around the door. A bad seal lets cold air escape and can cause frost or poor cooling.
Tip: Wipe with a damp cloth and look for light leaks when the door is closed. - 3
Clean condenser coils
Dusty coils reduce heat rejection and efficiency. Gently remove dust with a brush or compressed air from the back or beneath the unit.
Tip: Do this with the unit unplugged and avoid harshing any fins. - 4
Check the evaporator drain and defrost system
Look for a blocked drain tube or unusual ice buildup on the evaporator. Clear any obstruction and ensure water exits freely.
Tip: Use a small pipe cleaner or flexible wire to loosen debris—do not force a blockage. - 5
Test thermostat and temperature controls
Validate that the thermostat progresses through settings and the control board responds to changes. Use a multimeter to verify continuity if needed.
Tip: Document the temperature setting and observed readings during testing. - 6
Verify fans operate and airflow is free
Observe the fans when doors are closed; listen for smooth operation and check for obstructions in air pathways.
Tip: If a fan is noisy or not spinning, re-seat connections or replace the fan if necessary. - 7
Reconnect power and test
Plug the unit back in and allow it to run for an hour while monitoring temperature and frost levels.
Tip: Take note of how quickly the unit reaches target temperatures after restart.
FAQ
What is a beverage air refrigerator?
A Beverage Air Refrigerator is a commercial-grade cooling unit designed to chill beverages efficiently, featuring airflow design, a compressor-based cooling system, and a defrost/drain setup. Homeowners may operate smaller variants with similar principles.
A Beverage Air Refrigerator is a commercial-style cooler that chills beverages and uses airflow to keep products cold.
Why is my beverage air refrigerator not cooling?
Common causes include dirty condenser coils, a faulty door seal, a blocked evaporator drain, a malfunctioning thermostat, or a failed fan. Systematic checks help isolate the issue without guessing.
Not cooling can come from dirty coils, bad seals, or a failing fan, among other issues.
Is it safe to fix a refrigerator by myself?
Some basic, non-electrical maintenance is safe for homeowners, such as cleaning coils and seals. Electrical or refrigerant work should be left to professionals to avoid injury or environmental harm.
Basic tasks are safe, but for electrical or refrigerant work, hire a professional.
How often should I defrost a manual defrost beverage air refrigerator?
Defrost frequency depends on usage and model. If frost buildup reduces airflow or cooling, initiate defrost according to the manufacturer’s guidelines or when ice exceeds a quarter-inch.
Defrost when you see excess frost affecting cooling.
When should I call a professional?
If you detect refrigerant issues, persistent cooling problems after safe basic fixes, or unusual electrical behavior, it’s time to contact a licensed technician.
Call a professional if there’s refrigerant work or odd electrical signs.
What maintenance helps prevent future failures?
Regular coil cleaning, door seal inspections, and avoiding obstructed airflow are the simplest preventive steps. Keep the unit level and away from heat sources.
Clean coils, inspect seals, and keep airflow clear to prevent future problems.
Are there safety considerations for high-temperature areas?
Yes—keep the unit away from heat sources and ensure adequate ventilation. Do not place flammable items near the compressor or electrical components.
Ventilate well and avoid heat or flammable items near the unit.
Watch Video
Top Takeaways
- Start with simple checks like seals and coils.
- Clean coils and inspect drains for immediate improvements.
- Always unplug before service and use a multimeter for tests.
- Call a pro for refrigerant or control-board problems.
- Regular maintenance prevents most failures.