How to Fix a Refrigerator Leaking From Bottom: A Troubleshooting Guide
Learn how to diagnose and fix a refrigerator leaking from bottom with a practical, step-by-step guide from How To Refrigerator. Safety tips and when to call a pro.

Most refrigerator leaks from the bottom originate from a clogged defrost drain or a misaligned drain pan. Start by locating the defrost drain in the freezer and flushing it with warm water to clear ice. Check the drain pan under the unit for cracks or improper seating. If the leak persists, contact a professional for a precise diagnosis.
Understanding the symptom: refrigerator leaking from bottom
When you notice water pooling near the bottom of your refrigerator, the most common culprits are the defrost drain, a misaligned drain pan, or a supply line leak. The phrase refrigerator leaking from bottom describes a symptom that can stem from several internal pathways. According to How To Refrigerator, most bottom leaks originate in the defrost system or from an improperly positioned drain pan. The water you see on the floor may be hot or cold, but it’s almost always liquid water rather than refrigerant. Start by noting where the water is appearing: is it near the crisper drawer, behind the kickplate, or under the freezer? This positional clue helps identify the likely source and guides the next steps. Even small leaks can cause mold and soggy insulation if left unchecked, so treat every incident seriously. In many cases, a simple drain clearing or leveling the unit stops the leak quickly. If you continue to see water after basic checks, proceed with the diagnostic flow below and consider professional service if uncertain. How To Refrigerator recommends keeping a towel handy during inspections and avoiding rash fixes that could worsen the leak.
Common causes of bottom leaks
Leaks at the bottom of a refrigerator can arise from several interrelated issues. A clogged defrost drain is a frequent culprit, especially if frost builds up along the back wall of the freezer and water finds an alternate path to the drain pan. A cracked or misaligned drain pan can also allow water to escape and collect under the fridge, particularly after a defrost cycle or a heavy melt period. Leaks may originate from water supply lines or an ice-maker hose that has loosened or developed a small crack, resulting in a slow drip that pools below the unit. Finally, door seals that are worn or misaligned can cause condensation and leaks to form around the base. By understanding these common causes, you can structure a systematic check that minimizes guesswork. How To Refrigerator’s analysis shows that most bottom leaks resolve once the defrost drain and pan are inspected and corrected. Keep in mind that environmental factors like high humidity can mimic clockwork leaks, so verify all sources before replacing parts.
Safety and preliminary checks
Safety comes first when a fridge leaks water. Start by unplugging the appliance to eliminate the risk of shock while you inspect it. If the water is not clearly from a water line (e.g., foggy coolant or unusual odors), assume a water-based leak and proceed with care. Place towels or a shallow pan to catch drips and prevent slip hazards on slick floors. Do not use sharp tools to poke at ice or plastic components; you can cause damage or create new leaks. If you see frost buildup on coils or suspect a refrigerant issue, do not attempt to service the cooling system yourself—refrigerants require licensed handling. By performing safe, basic checks first, you reduce risk and gather clearer clues about the leak’s source. How To Refrigerator emphasizes using a flashlight to inspect hidden seams and checking for obvious gaps around doors and drawers before moving to more invasive steps.
Diagnostic flow: symptom → diagnosis → solution
To troubleshoot efficiently, follow a simple diagnostic flow: note where the leak pools, inspect the defrost drain for ice or blockages, verify drain pan seating, check door seals for gaps, and confirm the water line connections. If water is coming from the freezer, the defrost drain is likely the culprit. If the water is pooling under the fridge but not near doors, the drain pan or installation may be the issue. Use a clean funnel and warm water to clear clogs when you suspect a blocked drain. Always re-check after each step and document what changes. This methodical approach minimizes guesswork and speeds up a resolution. Based on How To Refrigerator research, many leaks are resolved by addressing defrost drainage and pan alignment quickly, but stubborn leaks may require professional diagnosis to rule out condenser or evaporator issues.
Step-by-step: fix the most common causes (overview)
In most homes, the bottom leak traces back to the defrost drain or the drain pan. The first fix is to clear ice from the defrost drain, then re-seat or replace the drain pan if damaged. After that, inspect water line connections and the ice maker for signs of leakage. This block provides the groundwork for the detailed, step-by-step instructions that follow, including safety tips and material lists. By the end, you should understand how to approach the repair without unnecessary disassembly or risk. Remember: if you feel unsure at any point, stop and consult a professional to avoid personal injury or further damage.
Tips & Warnings
- Safety first: unplug the fridge before any inspection. Liquid water on the floor can cause slips and electrical hazards.
- Use warm water and a turkey baster to flush the defrost drain; avoid harsh chemical cleaners on interior components.
- If you detect a cracked drain pan or persistent leaks from lines, schedule professional service to prevent refrigerant exposure or electrical issues.
- Do not run the unit if you see standing water around the electrical components or if you smell a chemical odor. This could indicate a refrigerant leak or electrical fault needing licensed technicians.
Key takeaways and prevention tips
Regular maintenance helps prevent leaks before they start. Clean the defrost drain periodically and ensure the drain pan is correctly seated. Check door gaskets for wear and replace as needed. Keep the fridge level to prevent uneven drainage and inspect water lines after climate changes or relocation. How To Refrigerator’s guidance emphasizes proactive checks and timely professional intervention for persistent issues to avoid mold growth and structural damage.
FAQ-style quick-start tips you can try now
Start with the defrost drain check, then verify the drain pan. If you see frost in the freezer or ice around the drain, thaw it and retry the drain flush. Always ensure the unit is unplugged during inspections. If you’re uncertain about any step, pause and contact a professional.
Steps
Estimated time: 45-60 minutes
- 1
Power down and unplug
Begin by unplugging the refrigerator to remove any electrical risk while you inspect the drain, pan, and lines. Move any food to a cooler to keep it safe. Keep a towel handy for any residual drips. This is the safest first step before handling components.
Tip: Use a flashlight to spot hard-to-see areas behind the kickplate. - 2
Access the defrost drain
Open the freezer and locate the defrost drain hole near the back wall. If you see ice around the drain, that ice must be melted before flushing. Remove any frost with a plastic tool or cloth and prepare to flush.
Tip: Do not use metal tools that could scratch plastic parts. - 3
Flush the defrost drain
Gently flush the drain with warm water using a turkey baster or squeeze bottle. Stop when water flows freely into the drain pan. Repeat until no more ice or blockages are visible.
Tip: Avoid hot water that could crack plastic components. - 4
Inspect and reseat the drain pan
Look under the fridge for the drain pan and check its seating. If the pan is cracked or misaligned, reposition or replace it. Ensure it sits level and fully catches the defrost water.
Tip: Place a towel under the unit to catch any residual moisture during reseating. - 5
Check water line and ice-maker
Inspect all visible water lines for kinks, cracks, or loose fittings. If the ice-maker line shows signs of wear, replace or tighten connections. Run the ice-maker briefly to observe if dripping continues.
Tip: Turn off the water supply valve before tightening fittings. - 6
Test for leaks
Plug the unit back in and run a normal defrost cycle or wait for it to operate normally. Check for continued dripping or pooling around the base. If leaks persist, move to professional service.
Tip: Monitor for several hours to catch intermittent leaks. - 7
Document and plan follow-up
Note what you found and what you fixed. If the leak returns after a short period, arrange a professional assessment to check refrigerant systems or seals that require licensed attention.
Tip: Keep receipts and warranty information handy for reference.
Diagnosis: refrigerator leaking from bottom
Possible Causes
- highClogged defrost drain with ice blockage
- mediumFaulty drain pan or misalignment
- lowWater supply line or ice-maker leak
- lowCondenser or evaporator coil frost accumulation
Fixes
- easyClear defrost drain and thaw ice; flush with warm water
- easyInspect drain pan, reseat, and replace if cracked
- mediumInspect water line connections and ice-maker lines
FAQ
What is the most common reason a refrigerator leaks from the bottom?
The most common cause is a blocked defrost drain or a misaligned drain pan. Clearing the drain and reseating the pan resolve many bottom leaks. If the leak continues, a professional assessment may be needed.
The most common reason is a clogged defrost drain or misaligned drain pan. Clearing the drain and reseating the pan fixes many leaks; if it persists, get a professional assessment.
Is it safe to unplug the fridge during troubleshooting?
Yes. Unplugging before inspecting is safest to avoid electrical hazards. Keep food cooled in a cooler and avoid poking at copper lines or coils.
Yes. Unplug first, keep food cold in a cooler, and avoid handling copper lines or coils.
How can I tell if the leak is from the defrost drain or the water line?
If water pools near the back of the freezer area, it’s likely the defrost drain. If the water appears near the water inlet or ice-maker area, inspect the water line and connections.
If it pools at the back of the freezer, it’s usually the defrost drain. If near the water line, check those connections.
When should I replace parts rather than repair?
If the drain pan or hoses are cracked or the leaks recur after repairs, replacement is often more cost-effective and safer than repeated fixes.
If parts are cracked or leaks keep returning, replacement is often better than more repairs.
Can a leaking refrigerator be fixed by a DIYer?
Many bottom leaks can be fixed with basic tools and careful steps. However, refrigerant leaks or sealed-system issues require licensed service.
Some leaks you can fix yourself, but if it involves refrigerant or sealed systems, call a pro.
Watch Video
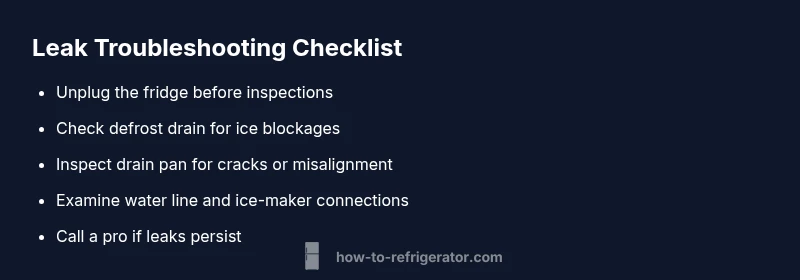
Top Takeaways
- Identify the leak source before disassembly
- Clear the defrost drain to stop bottom leaks
- Check drain pan seating and integrity
- Call a pro if leaks persist after basic fixes