Samsung Refrigerator Ice Maker Fix: Step-by-Step Troubleshooting
A homeowner-friendly guide to diagnosing and repairing common Samsung ice maker issues. Learn safe, step-by-step methods to clear clogs, unfreeze the unit, test sensors, and prevent future ice production problems.

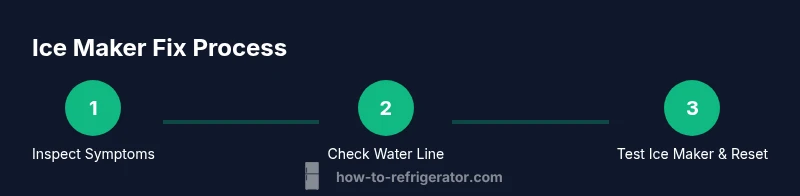
This guide helps homeowners fix a Samsung refrigerator ice maker that isn’t producing ice, is producing nugget ice, or leaks. You’ll diagnose common causes, gather the right tools, and follow a safe, step-by-step process to restore ice production and prevent future issues—without guessing or costly service calls. This article emphasizes safety, basic troubleshooting, and when to replace components.
Common Causes of Samsung Ice Maker Failures
A Samsung ice maker can stop producing ice for several reasons, from simple clogs to faulty sensors. According to How To Refrigerator, many samsung refrigerator ice maker fix issues start with a clogged water line or a frozen ice tray. Recognizing the typical culprits helps you prioritize the steps that will move you toward a solution faster. Look for signs like slow ice production, unusual noises, or ice that’s off in texture or temperature. By understanding these patterns, you can perform targeted, safe troubleshooting rather than replacing the entire unit prematurely. This block lays the groundwork by identifying symptoms and mapping them to probable causes, so you know where to start and what to test first.
Safety First: Before You Start
Working on an ice maker involves electricity and water, so safety is paramount. Unplug the refrigerator before opening any access panels to eliminate the risk of shock. If you must test live components, use a non-contact voltage tester and keep water away from any electrical connections. Have a bucket and towels ready to catch spills. For added safety, read the Samsung user manual before disassembling any parts. How To Refrigerator recommends taking a calm, methodical approach to avoid accidental damage and to preserve warranty terms where possible.
Quick Diagnostic Checks You Can Do
Some fixes can be attempted without tools. Start by listening for a humming sound that indicates the compressor is running but the ice maker is idle. Check the ice bin for clogs or jams, and inspect the water line for kinks or leaks. If the dishwasher is nearby, ensure that the water line isn’t cross-connected. Also verify the door switch is functioning; a faulty switch can prevent ice production. Document findings to guide your next steps and to use when you consult a technician if needed.
Common Mechanical Causes
Ice maker failures often come from three mechanical areas: (1) blocked defrost drain or water line, (2) a stuck ice mold or jammed ejector arm, and (3) a faulty sensor or actuator switch. A blocked defrost drain can cause ice to melt and refreeze in the tray, freezing the mechanism in place. A jammed ejector arm prevents new ice from dropping into the bin, while a defective sensor may fail to signal when ice production should resume. Understanding these causes helps you target the right component to inspect or replace. For a samsung refrigerator ice maker fix, focus first on the water line and ice mold before moving to electronics checks.
Verifying Water Supply and Line Issues
A steady, clean water supply is essential for ice production. Start by turning off the water at the shut-off valve, then detach the line from the supply and inspect for kinks or debris. If you see sediment, flush the line with clean water and reattach. Ensure the line diameter matches the freezer’s inlet and that fittings are secure. If your home uses a water filter, verify the filter isn’t clogged, as reduced flow can starve the ice maker. Always wipe up spills and recheck for leaks after reconnecting.
Checking the Ice Maker Assembly and Sensor
Remove the ice maker housing to inspect the mechanical parts. Look for a frozen ice tray or ice crystals that could be causing a jam. Inspect the ejector blade and arm for wear or damage, and test the micro-switch with a multimeter to confirm continuity. If the sensor or switch shows fault signs, replacement may be required. When performing electrical tests, ensure the unit is unplugged and handle components with care to avoid bent contacts or connector damage. See Diagram 1 in the guide for a visual reference.
Thawing and Defrost-Drain Considerations
If you detect a defrost drain blockage, you’ll want to thaw and clear the line from the evaporator to the defrost drain. Use a small, flexible probe to clear any ice buildup, then pour warm—not hot—water through the drain to flush debris. Avoid using sharp tools that could puncture the tube. After thawing, run a short test cycle to confirm that ice production resumes normally. If ice remains cloudy or off-colored, the issue may be sensor-related rather than a drainage problem.
Replacing Faulty Components: When to DIY vs Replace
Some components are straightforward for homeowners to replace, such as a defrost drain cap, water inlet valve, or ejector assembly. Others, like a faulty control board or refrigerator-compressor related parts, are better handled by a professional. If you’re comfortable with appliance repair and have the right tools, replace only the faulty part rather than the entire ice maker module. Reference your model number to ensure correct compatibility. For the samsung refrigerator ice maker fix, start with simple, visible parts before diving into electronics.
Reassemble and Test: Confirm Ice Production
After completing the checks or replacements, carefully reassemble the ice maker housing and reconnect power. Run a calibrated test cycle by filling the reservoir and letting the ice maker go through a complete ice-making cycle. Observe the ejector action and listen for normal cycling noises. If ice drops into the bin as expected, monitor for a few more cycles to confirm stability. If issues persist, revisit earlier steps or consult a professional.
Maintenance to Prevent Future Ice Maker Problems
Preventive maintenance reduces the likelihood of repeated issues. Schedule periodic inspection of water lines, clean the ice mold with a soft brush, and replace the water filter according to the manufacturer’s schedule. Keep the freezer at a stable temperature to avoid cold snaps that can freeze the ice maker. Without consistent maintenance, minor issues can escalate into more frequent failures. Adopting a routine check helps you achieve a reliable samsung refrigerator ice maker fix over time.
When to Seek Professional Help and Warranties
If you notice burning smells, buzzing noises, or signs of water leakage near electrical components, stop and contact a service professional. A persistent failure after DIY steps may indicate a deeper defect that requires specialized tools or a replacement part under warranty. Check your warranty coverage and model-specific recall notices. The How To Refrigerator team recommends evaluating cost vs. benefit before attempting irreversible repairs, especially if the ice maker is integral to the fridge’s cooling performance.
Tools & Materials
- Phillips head screwdriver(Size #2 is common for ice maker housings)
- Flathead screwdriver(For prying access panels gently)
- Needle-nose pliers(Secure clips and remove small connectors)
- Multimeter(Test sensors and switches for continuity)
- Towel or absorbent cloth(Wipe spills and keep the area dry)
- Bucket or shallow tray(Catch water when disconnecting lines)
- Water line wrench or adjustable wrench(Secure fittings on water inlet hose)
- Owner’s manual for model(Model-specific diagrams and specs)
Steps
Estimated time: 60-90 minutes
- 1
Power down and access
Unplug the refrigerator and pull it away from the wall to access the back panel and ice maker housing. This prevents accidental shocks while you inspect components. If you must test a component, ensure you recheck power connections before reassembly.
Tip: Keep a dry workspace and use a flashlight to inspect hidden areas. - 2
Shut off water supply
Locate the kitchen’s water shut-off valve and turn it clockwise until snug. Disconnect the water line from the valve and inspect for kinks, leaks, or sediment buildup. Reconnect only after the line is clear and straight.
Tip: Take a photo of connections before removal to ensure correct reassembly. - 3
Inspect water line and fittings
Check for visible damage, cracks, or wear near fittings. If you see any, replace the section or entire line as recommended by your model’s guide. Recheck for leaks after tightening fittings.
Tip: Use a lighted magnifier for tiny cracks that may cause slow leaks. - 4
Open ice maker housing
Remove the ice maker cover or panel to expose the mold and ejector mechanism. Look for ice jams or a stuck ejector arm. Remove any ice carefully with a plastic tool to avoid bending components.
Tip: Avoid using metal tools that can scratch or damage plastic parts. - 5
Clear jams and test ejector
If ice is jammed, gently free the ice with a non-metallic tool. Manually cycle the ejector arm to ensure it moves smoothly without binding. If resistance remains, test the selector switch and wiring for proper function.
Tip: Note any abnormal resistance or noisy operation; these indicate wear. - 6
Test sensors and switches
With the unit unplugged, disconnect the harness and test continuity on sensors or micro-switch circuits with a multimeter. Replace any sensor showing open or short readings.
Tip: If you’re unsure about testing, consult the manual for correct test points. - 7
Reset ice maker and reassemble
Reconnect any harnesses, reattach the ice maker housing, and plug the refrigerator back in. Allow the unit to complete a cycle and check that the mechanism resets to normal operation.
Tip: Some models require a short manual reset via a dedicated button; refer to the manual. - 8
Run a test cycle
Pour water if necessary and run a test ice-making cycle. Observe whether ice forms, drops into the bin, and clears quickly. Repeat if needed to confirm consistency.
Tip: Document steps and results to track performance over time.
FAQ
Why is my samsung refrigerator ice maker not making ice?
Common causes include a clogged water line, frozen ice tray, defrost drain blockage, or a faulty sensor. Start with the simplest checks of water supply and ice mold before testing electronics.
Common causes are a clogged water line, frozen ice tray, or a faulty sensor. Start with water supply and ice mold checks before testing electronics.
How do I reset a Samsung ice maker?
Consult your model’s manual for the exact reset procedure, but many Samsung ice makers reset automatically after unplugging for a few minutes and then reconnecting. Some models have a reset button near the ice maker.
Most Samsung ice makers reset when you unplug the fridge for a few minutes and plug it back in, or by pressing a dedicated reset button if your model has one.
How long does it take for an ice maker to start producing again after a fix?
After addressing the root cause, it can take a few hours for ice production to resume. If the water line was clogged or thawed, expect a short delay as the system refills and cycles.
Once the issue is fixed, ice production typically resumes in a few hours as the system refills and cycles.
Is it safe to DIY fix an ice maker at home?
Yes, with proper precautions: unplug the unit, avoid working with live circuits, and use non-metal tools. If you encounter electrical issues or unfamiliar parts, seek professional help.
DIY is safe if you unplug the unit and avoid live electrical work. If you’re unsure, call a pro.
What costs are involved in professional repair for ice makers?
Costs vary by model and region, but expect charges for both labor and any replacement parts. Compare technician quotes and review warranty terms before proceeding.
Professional repair costs depend on the parts and labor needed; check quotes and your warranty terms.
Will Samsung warranties cover ice maker problems?
Warranty coverage depends on the model year and terms. Some issues may be covered if they’re due to manufacturing defects, while routine wear may not be.
Warranties vary by model and year. Check your specific terms to see if the ice maker is covered.
Watch Video
Top Takeaways
- Identify symptoms before disassembly
- Prioritize water supply and ice mold issues
- Only replace faulty parts, not the entire ice maker
- Follow safety protocols to protect yourself
- Document results to guide future maintenance