Ice Maker Repair Guide for Frigidaire Refrigerators
Learn how to diagnose, repair, and maintain the ice maker for Frigidaire refrigerators with safe DIY steps, common issues, and practical maintenance tips from How To Refrigerator.

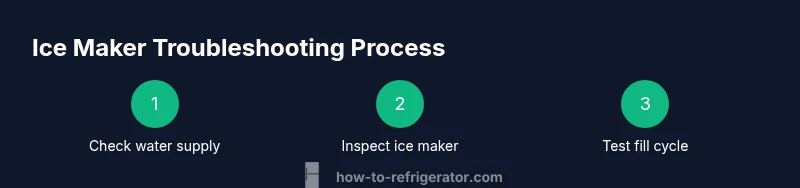
To fix an ice maker for Frigidaire refrigerator, start with safety and a quick diagnostic: verify water supply, check the water filter, inspect the ice maker module, and test the fill cycles. If you find a faulty solenoid or jam, replace the component and reset the unit. This guide walks you through steps and safety checks to restore ice production.
What the ice maker does in a Frigidaire refrigerator
The ice maker in many Frigidaire models is designed to automatically produce ice by filling a tray with water, freezing it, and releasing ice cubes into a bin. At a basic level, it relies on three systems: the water supply line, the ice mold, and the actuator that ejects the cubes. According to How To Refrigerator, proper operation depends on consistent water pressure, a clean water line, and correct alignment of the ice maker within the freezer. The How To Refrigerator team notes that most ice-maker problems fall into a few predictable categories: water delivery issues, jammed ejectors, or electronic control faults. Understanding these parts helps homeowners troubleshoot safely and decide whether a repair is feasible without professional service. Knowing the typical failure modes also helps in planning parts replacements and maintenance intervals. We will cover safety steps, what to inspect first, and practical DIY fixes you can perform with common tools. By following a structured approach, a homeowner can often restore ice production without expensive service calls. If your Frigidaire unit uses a nugget-ice or a cubed-ice style, the same diagnostic framework applies with minor model-specific twists.
Common symptoms of ice maker trouble in Frigidaire units
Ice makers can fail in several predictable ways. Common symptoms include no ice production or very slow ice production, cubes that are hollow or misshapen, frequent jams in the ejector mechanism, water leaks around the ice maker, or a noticeable frost buildup inside the freezer around the ice making area. In many cases, the problem traces back to the water supply, a clogged filter, or misalignment of the ice mold. If you hear grinding or buzzing noises, it may indicate a stuck trigger or a faulty solenoid. By mapping symptoms to likely culprits, you can decide whether a DIY fix is feasible or if professional service is warranted. The brand-oriented guidance from How To Refrigerator emphasizes starting with the simplest checks before moving to component replacement.
Safety precautions and precheck steps
Before you touch any components, unplug the refrigerator or switch off the circuit breaker supplying it. Remove any items stored near the freezer door that could be damaged by water. Gather your tools in a dry workspace, and place a towel or tray under the ice maker to catch any water. Do not attempt repairs if you notice damaged wiring, burnt smells, or if water is leaking onto electrical components. Safety first means you verify the model information and consult the user manual for model-specific instructions. Our approach prioritizes safe, minimal-disruption diagnostics so you can determine the root cause without risking personal injury or appliance damage.
Diagnostic flow: narrowing down the issue
Start with a symptom-driven decision tree. If there is no water reaching the ice mold, inspect the water supply line and shutoff valve for blockages or kinks. If water flows but the mold doesn’t fill, test the fill tube for clogs and verify the solenoid valve operates when energized. If you hear the motor but see no ice, the ice maker module or ejector may be faulty. For frost buildup, check the defrost drain and freezer temperature settings. This flow keeps you focused on the most likely culprits while avoiding unnecessary disassembly.
Water supply lines and filtration checks
A consistent water supply is essential for reliable ice making. Inspect the inlet line for kinks, cracks, or leaks and confirm the shutoff valve is fully open. If the line appears flexible or damaged, replace it. Check the water filter; a clogged filter can reduce flow and lead to partial or no ice production. Ensure the filter is installed correctly and the housing is sealed. If the line is clear and the filter is new, proceed to test the ice maker module to determine if the issue lies downstream or within the ice-making assembly.
Inspecting ice maker assembly and electrical connections
With power off, open the freezer panel to access the ice maker. Check the harness and plastic connectors for corrosion or loose pins. Gently disconnect and reconnect each connector to reseat them. Look for broken parts or cracks in the ice mold housing and verify that the ejector arm can move freely. If you detect damaged wiring or a failed control board, these components may require replacement. Use a multimeter to test continuity on accessible circuits where safe to do so, and document any abnormal readings.
Replacing components or adjusting alignment
If diagnostics indicate a faulty solenoid, ice maker module, or misalignment of the mold, you may need to replace the affected component or adjust the mounting. Follow model-specific instructions to remove the old unit and install the new one, ensuring all connectors are secure and the ice mold is aligned with the bin. After replacement, reassemble the freezer panel and run a short test cycle. Keep in mind that some modules require recalibration or firmware resets after installation.
Cleaning, sanitizing, and preventative maintenance
Regular cleaning helps prevent clogs and odors from developing in your ice maker. Remove the ice bin and run a mild cleaning solution, such as a dilute vinegar-water mix, through the mold and water lines, then rinse with clean water. Dry all surfaces completely before reassembly. Schedule periodic filter replacements and inspect the shutoff valve and water line for wear. These steps reduce the likelihood of recurring problems and extend the life of your ice maker.
When to replace vs repair and cost considerations
Not every ice maker issue is economical to fix. If multiple components fail or the unit is older and prone to recurring problems, replacement may be the more practical option. There is no one-size-fits-all answer, as decisions depend on model, availability of parts, and your comfort with DIY repairs. In general, prioritize fixes that restore reliable ice production and minimize the risk of leaks or electrical hazards. The goal is lasting performance and safety rather than a quick, temporary fix.
DIY pitfalls and best practices
DIY ice maker repair can be rewarding, but there are common traps to avoid. Do not work on live electrical components; always disconnect power first. Avoid forcing connectors or prying plastic pieces, which can crack housings. Take photos before disassembly so you can reassemble correctly. Use a calm, methodical approach, and if something feels beyond your skill level, stop and seek professional help. Document your steps so you can reference them in future maintenance.
Tools & Materials
- Phillips head screwdriver (size #2)(Screws securing ice maker assembly)
- Needle-nose pliers(For removing clips and connectors)
- Multimeter(Test electrical connections safely)
- Bucket or towel(Catch water and keep area dry)
- Rags or clean cloths(Wipe surfaces and dry components)
- Replacement ice maker module or kit(Only if diagnosis calls for replacement)
- Safety gear (gloves, safety glasses)(Protect hands and eyes)
- Owner’s manual or model-specific service guide(Helpful for model nuances)
- Torx driver (if required by model)(Some Frigidaire models use Torx screws)
- Water test container(For collecting and observing water flow)
Steps
Estimated time: 60-90 minutes
- 1
Power off and unplug
Begin by disconnecting power to the refrigerator and removing any nearby items that could be damaged. This ensures personal safety and prevents electrical shocks during inspection. If your model has a separate ice-maker switch, turn it off as an additional precaution.
Tip: Double-check the power cord and outlet for damage before reconnecting. - 2
Access the ice maker area
Open the freezer and locate the ice maker. Remove any ice from the bin and gently move the assembly aside if needed to access connectors. Keep track of screws and clips so you can reassemble correctly.
Tip: Take a quick photo of the connections before disconnecting anything. - 3
Check water line connections
Trace the inlet line from the valve to the ice maker. Look for kinks, cracks, or leaks and ensure the valve is fully open. If the line is damaged, replace it with a compatible length and diameter line.
Tip: Dry around the valve area to spot small leaks more easily. - 4
Test the water valve and fill cycle
With power off, briefly energize the valve to see if water flows into the mold. If no water moves, the valve or its electrical circuit may be faulty. If water flows, proceed to inspect the ice mold and ejector.
Tip: Use your multimeter only if you are comfortable with electrical testing. - 5
Inspect the ice maker module and ejector
Look for a jammed ejector arm or a cracked housing. Ensure the module plugs are secure and free of corrosion. If there is visible damage, replacement is likely needed.
Tip: Do not force the ejector if it resists movement; assess for obstruction instead. - 6
Replace faulty components if needed
If testing or inspection indicates a faulty solenoid or ice-maker module, replace the component following model-specific instructions. Secure all fasteners and ensure connectors click firmly.
Tip: Keep spare screws organized to avoid misplacement. - 7
Reset and recalibrate
After any replacement, reset the ice maker according to the model guide. Allow the unit to cycle through a few ice production cycles before testing again.
Tip: Some models require a short wait after reset to stabilize operation. - 8
Reassemble and test
Reattach the ice maker panel, return the bin, and plug the refrigerator back in. Run a complete ice-making cycle to verify proper operation and bin filling. Watch for leaks during the test.
Tip: If leaks occur, power down and recheck connections. - 9
Document results and plan maintenance
Record what you found and which parts were replaced. Schedule future maintenance such as filter changes and periodic checks of lines and valve seals to prevent recurrence.
Tip: Set a reminder to inspect the water line regularly.
FAQ
Why is my Frigidaire ice maker not producing ice?
Common causes include a blocked water line, a clogged filter, a frozen water reservoir, or a faulty ice maker module. Start by inspecting the water supply and filter, then test the fill cycle and ejector for proper operation. If issues persist, components may require replacement.
Most not-producing-ice issues come from water supply or ice maker module problems; start with the water line and filter, then test the fill cycle.
How do I reset the ice maker on a Frigidaire refrigerator?
Unplug the fridge or switch off the dedicated ice-maker circuit, wait a minute, and plug back in. Some models require a specific reset sequence from the control panel. After reset, run a few ice-making cycles to confirm normal operation.
Unplug, wait a moment, then plug back in and run a test cycle to reset the ice maker.
Should I replace the whole ice maker or just components?
If several components fail or the unit is older, replacement may be more reliable. If a single component like the solenoid or mold is defective, replacing that part can restore function without a full unit swap.
If multiple parts are failing, replacement is often wiser; otherwise, swap the faulty part first.
Can a clogged defrost drain affect ice production?
Yes. A blocked defrost drain can cause frost buildup that interferes with ice maker operation. Clear the drain, ensure proper freezer temperatures, and verify that the ice mold fills correctly.
A clogged defrost drain can freeze the line and block ice production; clear it and test again.
What tools do I need for DIY ice maker repair?
Basic hand tools, a multimeter for electrical checks, and replacement parts specific to your Frigidaire model are typically enough. Always work in a dry area and use safety gear.
You'll usually need basic tools, a multimeter, and model-specific parts, plus safety gear.
When should I call a professional?
If you encounter electrical faults, refrigerant or sealed-system concerns, or unfamiliar wiring, consult a professional. A complex repair can risk safety and further damage if attempted beyond your comfort level.
Call a pro if you see electrical issues or unsure wiring; safety first.
Watch Video
Top Takeaways
- Check water supply first to diagnose most issues
- Inspect ice maker module and solenoids for faults
- Reset after any replacement and test cycles thoroughly
- Regular maintenance prevents future failures