Glass Refrigerator Maintenance & Troubleshooting Guide
Learn how to maintain, troubleshoot, and optimize a glass refrigerator, with practical steps for condensation control, door-seal care, and energy-efficient operation for homeowners.

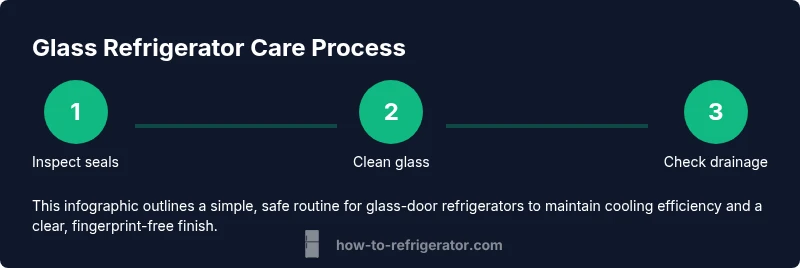
Step 1: Unplug the unit. Step 2: Wipe glass surfaces with a mild cleaner. Step 3: Inspect door seals for wear. Step 4: Confirm drainage is clear. This quick start helps you diagnose cooling issues and keep glass doors crystal-clear.
What is a glass refrigerator and why it matters
A glass refrigerator is a refrigerator that uses transparent tempered glass for its doors or front panels, allowing you to see contents without opening the door. This design choice is popular in open-plan kitchens and retail displays because it improves visibility and reduces the time the door stays open. However, glass surfaces can show fingerprints, smudges, and condensation more readily than opaque doors, so regular cleaning and seal maintenance become essential. According to How To Refrigerator, glass-door models require thoughtful maintenance to preserve both aesthetics and performance. The visible glass also acts as a reminder to keep the interior organized, because you see everything at a glance. For homeowners, this means adopting a routine that balances clean aesthetics with practical cooling management. When done correctly, a glass refrigerator can provide quick access to items and a bright, modern look while still keeping your foods at safe temperatures. This balance is achievable with consistent care and a simple maintenance plan.
The everyday life of a glass refrigerator involves visibility and accessibility. By understanding how these units work, you can optimize their performance and extend service life. Regular checks on seals, drainage, and airflow are the backbone of an effective maintenance routine. This section sets the foundation for practical tips you can apply in your own kitchen, regardless of brand or model.
Tools & Materials
- Microfiber cloths(for glass surfaces and wiping condensation)
- Mild dish soap(pH-neutral, non-abrasive cleanser)
- Warm water bucket(for cleaning shelves and interior surfaces)
- Non-abrasive sponge(avoid scratching glass or plastics)
- Soft-bristle brush(for coils/vents if accessible)
- Sponge or towel(to absorb spills and protect floors)
- Towels or mats(to prevent slips when moving shelves)
- Torx/Phillips screwdriver(only if removing panels to access components)
Steps
Estimated time: 60-90 minutes
- 1
Power down and unplug
Safely power off the unit and unplug it from the wall. This minimizes any risk of electric shock while you work on interior components or shelves. Wait a few minutes for any residual charges to dissipate before touching interior parts.
Tip: Label shelves or take a quick photo before removing them to speed reassembly. - 2
Remove shelves and drawers
Carefully take out glass shelves and plastic drawers. Place them on a soft mat or towel to prevent chipping. This step provides clear access to door seals, interior corners, and drainage paths.
Tip: Handle glass gently and avoid applying pressure to prevent cracks. - 3
Inspect and clean glass surfaces
Wipe all glass surfaces with a microfiber cloth and mild soap solution. Rinse with clean water and dry thoroughly to prevent streaks. This keeps visibility high and reduces fingerprint buildup.
Tip: Use a circular motion for stubborn smudges and dry with a second cloth for a crystal-clear finish. - 4
Check door seals for wear
Examine gaskets around the door for cracks, tears, or deformation. Damaged seals can cause condensation and energy loss. If you notice wear, plan for a seal replacement.
Tip: Flex the gasket gently to test for elasticity and seal gaps when closed. - 5
Clean interior components
Wipe interior walls, shelves, and drawers with a mild cleaner. Dry all surfaces before reassembling to prevent moisture pockets that can harbor mold. Check corners for trapped debris that could obstruct airflow.
Tip: Use a toothbrush for tight corners and seams. - 6
Check drainage and defrost system
Look for clogs in the drain hole or defrost drain pan. Clear any obstructions and ensure the drain route isn’t blocked by food residue or ice buildup.
Tip: A tiny amount of warm water can help flush the drain if needed. - 7
Reassemble and reconnect
Return shelves and drawers to their original positions. Plug the unit back in and restore power. Check that interior lights function and that shelves sit level for proper air circulation.
Tip: Take a moment to verify the door closes evenly without gaps. - 8
Test temperature and airflow
Allow the fridge to stabilize for 30–60 minutes and then verify the temperature using a thermometer. Ensure vents are not blocked by items, which could impede airflow.
Tip: Avoid overcrowding the interior during testing to mimic normal usage. - 9
Maintenance planning
Document maintenance steps and schedule. Regular checks every 3–6 months help catch issues early and keep your glass refrigerator operating efficiently.
Tip: Set calendar reminders and keep a simple log of dates and findings.
FAQ
What is a glass refrigerator and what are its benefits?
A glass refrigerator uses transparent doors to enhance visibility of contents, improve accessibility, and create a bright, modern look. Regular seal maintenance helps prevent condensation and energy loss, making the unit both practical and aesthetically pleasing for many kitchens.
Glass refrigerators let you see inside at a glance, saving you time and avoiding unnecessary door openings. With proper seal care, they stay efficient and easy to clean.
Why is there condensation on the glass doors?
Condensation happens when humid air contacts the cold glass surface, especially if seals are worn or if the door is opened frequently. Elevating room humidity, poor ventilation, or blocked drainage can worsen the issue.
Condensation is usually caused by moisture in the air meeting the cold door. Check seals and reduce door openings to minimize it.
How do I fix not cooling in a glass refrigerator?
Start with the thermostat setting and verify the compressor is running. Check for unobstructed vents and verify that doors seal properly. If cooling still fails, a professional assessment may be required to inspect refrigerant or compressor health.
If it isn’t cooling, first check the thermostat and airflow, then consider calling a pro for more in-depth issues.
Can I clean the evaporator coils myself?
If the coils are accessible from the back or underside, you can dust them gently with a soft brush. Do not use water directly on electrical components. If you’re unsure, consult the manual or a professional.
Coils can be delicate; if you can access them safely, lightly dust them. If unsure, skip and call a pro.
How often should I clean the door seals?
Inspect seals during routine cleaning and replace if you notice cracks or gaps. Cleaning yearly or biannually is usually sufficient, but more frequent checks help detect wear early.
Check the seals during regular cleanings and replace worn ones as needed.
Is a glass refrigerator more energy-efficient?
Energy efficiency depends on overall design and operation, not just the glass doors. Look for an energy rating, proper insulation, and seals in good condition to maximize efficiency.
Efficiency depends on many factors, including insulation and door seals—not just the glass.
Watch Video
Top Takeaways
- Inspect door seals regularly and replace worn gaskets.
- Clean glass surfaces weekly to prevent fingerprints and streaks.
- Ensure drainage paths are clear to prevent water buildup.
- Plan routine maintenance to extend the life of a glass refrigerator.