Where Are Refrigerator Filters? A Homeowner's Guide
Learn where refrigerator filters live, how to identify the correct replacement, and step-by-step guidance to replace and maintain filters for clean ice and water with How To Refrigerator.

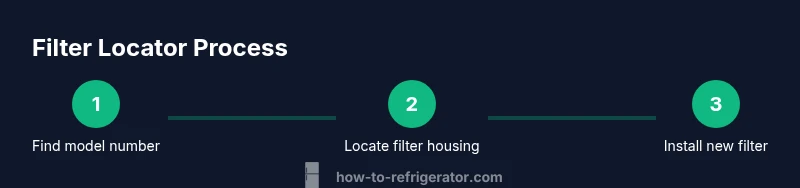
To find your refrigerator filter, start by checking the model number and owner’s manual. Common locations are behind the front grille, at the bottom kickplate, or inside the fridge on the back wall. Once identified, remove the old filter and replace it with the correct replacement; run water and reset the indicator if your model includes one.
What are refrigerator filters and why location matters
Refrigerator filters are cartridge-like components that purify water and remove particulates before it reaches your ice maker and dispenser. The location of these filters varies by model and brand, which means locating them can be confusing for new owners. Knowing where the filter is located saves time, avoids unnecessary disassembly, and reduces the risk of damaging seals. According to How To Refrigerator, common locations are in front of the fridge, behind a grille, or inside the interior at the back wall; confirming location before replacement helps ensure you purchase the correct cartridge and avoid leaks.
When you’re troubleshooting water quality or ice taste, the exact spot where the filter sits matters as much as the filter’s age. A proper fit prevents leaks, ensures optimal filtration, and keeps your ice crisp. Homeowners who understand the layout of their model can plan the replacement more efficiently and minimize disruption to daily kitchen routines.
Common filter locations by fridge type
Most refrigerators place the filter in one of a few spots. For many top-freezer and side-by-side models, the filter sits behind the front grille at the bottom of the refrigerator. French-door models often hide the filter inside the right-door panel or behind a dedicated compartment near the dispenser. Some compact or counter-depth fridges tuck the filter behind a lower kickplate or inside the crisper area. Always check your owner’s manual and the label on your old filter to confirm the exact location for your model.
Knowing these patterns helps you skip unnecessary disassembly. If you’re unsure, locate the model number and browse the manufacturer’s site or your manual for the exact filter designation.
How to identify the correct replacement filter
Filter cartridges are designed for specific models. Start by locating the model number on the fridge’s identification label (often on the interior wall, near the hinge, or behind the crisper drawer). Then read the existing filter or its packaging for the part number or cartridge style (e.g., push-in, twist-lock). Use that information to search for a compatible replacement from a reputable retailer or the manufacturer’s site. If you’re unsure, contact customer support with your model number.
Verify whether the filter is a standard 1/4-turn, a push-in cartridge, or a twist-lock design, as mismatches can compromise water flow and filtration efficiency. Keep a small record of model numbers and filter types for future maintenance.
Locating filters in popular fridge styles
- Side-by-side: Most often behind the bottom grille or inside the left-door dispenser panel.
- French-door: Frequently behind a small panel in the right door or at the back of the refrigerator interior.
- Bottom-freezer: Usually behind the lower kickplate; sometimes in the back wall.
Use a flashlight to inspect dark crevices, and look for the filter icon or a small door with a seam. If you see a cap with a colored ring or a square tab, you’re likely near the right spot.
Replacing the filter safely: quick overview
- Step-check: Turn off or pause water flow if your model has a filter alarm.
- Remove: Twist counterclockwise or press the release button to remove the old cartridge.
- Install: Align the new cartridge with the slot and twist or push until it clicks.
- Clean and test: Wipe any drips, run water for a minute, and check for leaks at the seal.
If the housing is stiff, avoid forcing it. A gentle turn and a proper seal prevent leaks and ensure full filtration.
Signs your filter needs replacement
- Taste or odor changes persist after cleaning the dispenser
- Reduced water flow or dispenser speed
- Filter indicator light turns on or blinks
- Visual gunk on the cartridge or in the reservoir
Addressing these signs promptly helps maintain water quality and appliance reliability.
Maintenance tips to extend filter life
- Replace on schedule per manufacturer’s guidance (usually every 6–12 months)
- Keep a simple log of replacement dates
- Store spare filters in a cool, dry place
- Use the freshest water source and avoid contaminating the filter housing during replacement
Regular maintenance reduces the risk of hard-to-clean residue and keeps both ice and water tasting fresh.
Authority sources
- Energy.gov — Refrigerator maintenance and efficiency tips: https://www.energy.gov/energysaver/refrigerators
- EPA ENERGY STAR — Refrigerators and filtration guidance: https://www.energystar.gov/products/refrigerators
- Consumer Reports — Refrigerator maintenance and filter replacement guidance: https://www.consumerreports.org/cooling/refrigerators/maintaining-your-refrigerator/
Tools & Materials
- Owner’s manual for your refrigerator(Helpful to identify filter type and location)
- New replacement filter(Make sure it’s the correct type for your model)
- Clean cloth(For wiping surfaces and spills)
- Gloves(Protect hands during replacement)
- Flashlight(To inspect dark compartments and corners)
- Screwdriver (flat-head or Phillips)(Some panels require removal to access the filter)
- Bucket or towel(Catch drips during filter change)
- Model number and serial(Helps verify compatibility and find the right filter)
Steps
Estimated time: 20-25 minutes
- 1
Gather model information
Locate the refrigerator’s model number and serial on the identification label (often inside the fridge near the hinge or on a side wall). Write these down or photograph them. This ensures you buy the correct filter and reduces the chance of ordering the wrong part.
Tip: Have the manual handy and confirm the exact filter part number before purchasing. - 2
Locate the filter housing
Explore common spots based on your fridge style: beneath the front grille, inside the door panel, or behind the kickplate. Use a flashlight to inspect tight spaces and look for a filter icon or a label.
Tip: If you can’t see anything, check the user manual for the model-specific city of the filter. - 3
Identify the filter type
Check the current filter’s shape and labeling to determine push-in, twist-lock, or cartridge. Matching the design ensures a proper seal and filtration.
Tip: Take a photo of the old filter to reference during replacement. - 4
Remove the old filter
Release the old filter by turning counterclockwise, pulling straight out, or pressing a release button depending on the design. Keep a towel handy for any residual water.
Tip: Do not force the filter; if it won’t budge, re-check the manual for the correct release method. - 5
Install the new filter
Insert or align the new cartridge according to the model’s orientation; twist or press until it clicks and is snug. Wipe away any drips.
Tip: Avoid overtightening, which can damage threads or seals. - 6
Test the installation
Run water for about 60 seconds to purge air and check for leaks around the housing. If a leak appears, reseat the filter and re-check the seal.
Tip: If your model has a reset button for the filter indicator, perform the reset after the test.
FAQ
Where are refrigerator filters typically located?
Locations vary by model, but common spots include behind the front grille at the bottom, inside the door panel, or behind a kickplate. Check your owner’s manual or look for a filter icon.
Most fridges hide the filter behind a grille, under the door panel, or behind a kickplate. Check your manual for the exact spot.
Do all refrigerators use the same filter?
No. Filters are designed for specific models and brands. Use your model number to confirm the correct replacement before purchasing.
Filters aren’t universal; match the model number to the exact cartridge.
How often should I replace my fridge filter?
Most manufacturers recommend changing filters every 6 to 12 months, depending on usage and water quality. Follow your model’s guidance.
Typically every six to twelve months, but check your model’s manual.
What tools do I need to replace a fridge filter?
Usually none; you can replace with just your hands. Some models may require a screwdriver or pliers to remove a panel.
Usually you don’t need tools, but a screwdriver might help for stubborn panels.
What if I can’t locate the filter after checking the manual?
If the location remains unclear, contact the manufacturer with the model number or consult an authorized service center.
If you still can’t find it, ask the manufacturer using your fridge’s model number.
How do I reset the filter indicator after replacement?
Many models require holding a reset button or navigating the control panel to reset the indicator. Check the manual for exact steps.
Reset usually involves holding a button or selecting an option on the display.
Watch Video
Top Takeaways
- Identify filter location quickly by model style
- Always verify filter compatibility before replacement
- Run water and test for leaks after installation
- Reset the indicator if your model supports it
- Keep a maintenance log for future replacements