When to Replace Refrigerator Door Seal: A Home Guide
Learn how to tell when your refrigerator door seal needs replacement, how to test for leaks, how to choose a gasket, and step-by-step replacement tips to save energy and keep food fresh.

Goal: determine when to replace your refrigerator door seal and stop energy waste from a leaky gasket. You’ll learn warning signs, how to test the gasket, and a practical replacement checklist with essential tools and safety steps. This guide helps homeowners assess seal wear, choose the right option, and replace confidently to keep the fridge efficient.
Signs Your Door Seal Needs Replacement
The door seal, or gasket, is the fridge’s first line of defense against warm, humid air. When it starts to fail, you’ll notice signs that can creep up over weeks or months. How To Refrigerator notes that most homeowners notice higher energy bills, more frost buildup, or interior temperature fluctuations long before the fridge stops cooling entirely. Look for cracks in the gasket material, a compressed or warped seal at the door edge, a door that won’t sit flush, or visible gaps when the door is closed. Even small gaps around the door can let in enough warm air to interfere with cooling. If your kitchen ambient is consistently warmer near the fridge, or you can feel air escaping when you run your hand along the seal, treat this as a wake-up call to inspect the gasket. Also check for condensation along the perimeter and for frost forming along the back wall, which can signal persistent leaks. Addressing these signs early can prevent more expensive repairs later and keeps your refrigerator operating efficiently.
How to Test Your Fridge Door Seal
Testing a door gasket is straightforward and can be done without specialized equipment. Start by closing the door on a piece of paper or a dollar bill placed mid-height on the door. If you can pull the paper out easily without resistance, the seal isn’t making full contact all the way around. Repeat at the top and bottom. For a more thorough check, look for air leaks with a flashlight at night; if you see a bright glow or feel drafts around the edge, the gasket may be stretched, torn, or loose. Gaskets can also lose flexibility with age, making it harder for the door to seal. In some cases, food residue or grime prevents a clean seal, so clean the gasket with warm soapy water and a soft cloth, then re-test. At this point, you’ll have a good sense of whether the wear is superficial or requires a gasket replacement. The How To Refrigerator team emphasizes testing under typical door operation with a full load of food, not just by inspecting a dry gasket.
Choosing the Right Replacement Door Seal
If the tests show the gasket is failing or warped beyond restoration, replacement is the most reliable fix. Start by locating your fridge model number and the gasket type: full-length door seal, or a hollow-core gasket that clips into the frame. Some brands offer universal gaskets, but compatibility matters more than price. Consider hinge orientation (left or right) and whether the seal is screw-in or snap-on. Inspect the door frame for warping or bent hinges, as these issues can create leaks even with a new gasket. When shopping, select a gasket designed for your exact model or a compatible universal option with precise measurements. It’s worth checking warranty terms if your appliance is still covered; sometimes a door seal replacement may be included at no cost if it’s a manufacturing defect. The How To Refrigerator approach combines model-matching accuracy with practical fit suggestions, so you don’t end up with a loose corner or a folded edge.
Step-by-Step: Replace a Refrigerator Door Seal
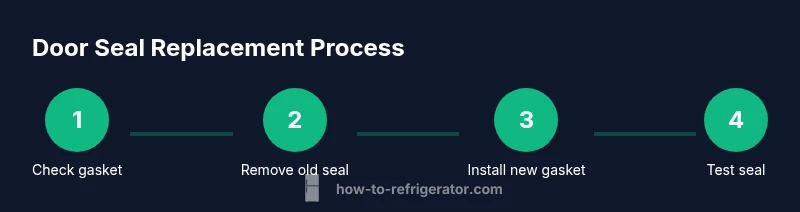
This section provides a practical overview of the replacement process. While the detailed, step-by-step instructions are in the dedicated STEP-BY-STEP block, it helps to know what to expect. You’ll remove the old gasket, clean the mounting surface, dry it thoroughly, and align the new gasket before snapping or screwing it into place. Expect to test the seal after installation and make minor adjustments as needed. If you encounter stubborn adhesive or a gasket that won’t stay seated, you may need a helper to hold the door while you secure the seal. The goal is a continuous, full-contact seal around the door edge to prevent warm air from seeping in and to maintain consistent internal temperatures.
Common Mistakes and How to Avoid Them
Common mistakes include selecting the wrong gasket size, misaligning the gasket so that it interferes with the door’s closing, and failing to clean the mounting surface before installing the new seal. Also, applying chemical cleaners to a gasket can degrade rubber compounds. For best results, handle the gasket gently, avoid stretching it around corners, and verify the door closes squarely. If you’re replacing a gasket with screws, ensure screws are snug but not overtightened, which can distort the frame. The How To Refrigerator team suggests taking photos during removal for reference, and always unplug the fridge if you need to access electrical components inside the door area.
Prevention and Maintenance to Extend Seal Life
Even a new door seal won’t last forever if misused. Regular cleaning prevents grime from reducing seal flexibility, and periodic inspection helps catch wear early. Wipe the seal with a mild soap solution, remove debris from the door frame, and ensure the door closes squarely. Keep the fridge away from heat sources and excessive humidity, which can degrade gasket materials more quickly. If you notice stiff or brittle edges, consider replacing the gasket sooner rather than later, especially if you frequently open and close the door. The How To Refrigerator guidelines emphasize routine maintenance as a low-cost way to boost energy efficiency and prolong the life of your appliance.
Energy Savings and Safety Considerations
A good seal is essential for energy efficiency. When the gasket seals well, the fridge operates more efficiently, reducing compressor workload and electricity use. Leaky gaskets can also allow moisture to enter, promoting mold growth and odors in the fridge. If you notice frost buildup along the gasket area or moisture on the door, address the issue promptly. Use a clean, dry cloth to wipe away condensation and ensure the seal is dry before closing the door. A proper seal also reduces the risk of food spoilage due to temperature fluctuations, especially in warm kitchens. The How To Refrigerator team highlights that maintaining a tight door seal can improve overall kitchen energy use and reduce long-term repair costs.
When to Call a Pro
If, after replacement, you still experience leaks or temperature inconsistencies, it’s time to consult a professional. A trained technician can verify hinge alignment, door frame integrity, and proper gasket seating, and can identify underlying issues such as warped frames or faulty hinges. Even with a new gasket, a misaligned door can prevent a tight seal. The How To Refrigerator team notes that a pro assessment is often a safe and cost-effective option when DIY efforts fail or when the refrigerator is older or has other mechanical concerns.
Tools & Materials
- Replacement refrigerator door gasket (model-specific or universal)(Match model number and hinge side; verify compatibility)
- Measuring tape(Confirm gasket length and fit)
- Mild soap and warm water(For cleaning mounting surface and gasket)
- Soft cloth or sponge(Gentle cleaning; avoid scratching surfaces)
- Isopropyl alcohol (optional)(Use to remove adhesive residue if present)
- Screwdriver set (Philips/Flathead)(Only if screws are used to secure gasket)
- Masking tape or painter's tape(To hold gasket in place during test fit)
- Cleaning brushes or old toothbrush(For cleaning small crevices around the frame)
Steps
Estimated time: 45-75 minutes
- 1
Verify gasket compatibility
Confirm model compatibility by checking the refrigerator’s model number and the gasket type. Measure door width and hinge orientation to ensure a proper fit before ordering.
Tip: Take photos of the existing gasket for reference. - 2
Disconnect power if needed
If your fridge has electronics or wiring around the door area, unplug the unit to reduce electrical risk before you start removing parts.
Tip: Never work with a powered appliance around water. - 3
Remove old gasket
Gently release or unscrew the fasteners holding the gasket. Detach the seal from the door and frame, taking care not to damage the door surface.
Tip: Document how the gasket attaches for easier reattachment. - 4
Clean mounting surface
Wipe the door frame with warm soap solution and dry completely. Remove any adhesive residue to ensure a clean, flat surface for the new gasket.
Tip: A clean surface helps the new gasket seal evenly. - 5
Position and test-fit the new gasket
Lay the new gasket around the door opening to check alignment. Make sure it sits evenly without twisting or bunching at corners.
Tip: Use masking tape to hold in place during initial test fit. - 6
Attach the new gasket
Secure the gasket per your model’s method—clips, screws, or snaps—working from corners toward the center for a tight seal.
Tip: Avoid overtightening screws to prevent frame distortion. - 7
Test seal and adjust
Close the door firmly and check for even contact around the edge. Re-adjust if you see gaps at any corner or along the door edge.
Tip: Press along the entire edge to confirm a full seal.
FAQ
How do I know if my door seal is bad?
Look for cracks, stiffness, gaps, and frost near the door. These indicate wear. If the door doesn’t close completely, test and compare with a new gasket.
Check for gaps, cracks, and frost; a poor seal means you should inspect or replace the gasket.
Can I repair a gasket instead of replacing it?
Minor tears or cracks can sometimes be repaired, but most issues require a full replacement for a reliable seal.
Usually replacement is best for a reliable seal.
Are universal door gaskets reliable?
Universal gaskets can work but must match your clearance and hinge orientation. Expect some trimming or adjustments.
They can fit, but may need adjustments to seal well.
How long does replacement take?
Most replacements take about 30-60 minutes depending on the model and your familiarity with the steps.
Plan on about an hour.
Do I need to unplug the fridge before replacing?
Yes, unplug the unit to avoid electrical hazards while you handle the gasket area.
Unplug the fridge before starting.
What if the door still leaks after replacement?
Check hinge alignment and door frame integrity; consider professional help if leaks persist.
If leaks persist, call a pro to check hinges and frame.
Watch Video
Top Takeaways
- Identify signs early and act fast.
- Test the seal rather than guessing.
- Choose the correct gasket for your model.
- Clean mounting surfaces to ensure a flush seal.
- If unsure, consult a professional.