What to Clean Refrigerator Coils With: A Homeowner’s Guide
Learn what to clean refrigerator coils with, plus tools, step-by-step methods, safety tips, and maintenance routines to keep your fridge running efficiently.

Learn how to clean refrigerator coils safely and effectively. This guide explains what to use, how to access the condenser coils, and a clear, step-by-step process to improve cooling performance and energy efficiency. Follow these practical, homeowner-friendly steps to reduce frost buildup, extend your fridge’s life, and avoid unnecessary service calls.
Understanding why coils get dirty
Condenser coils sit on the back or beneath your refrigerator and work by releasing heat from inside the cabinet. Over time, dust, pet hair, cooking grease, and humidity cling to the fins, reducing airflow and forcing the compressor to work harder. If you’re wondering what to clean refrigerator coils with, the safe answer is simple: use non-abrasive tools, warm water, and a mild cleaning solution. This reduces strain on the motor, lowers energy use, and keeps temperatures steadier. According to How To Refrigerator, regular coil maintenance should be part of a homeowner’s routine, especially in homes with pets or high dust levels. The consequences of neglect aren’t immediate, but you may notice longer cooling cycles, frost at the evaporator, or a rise in your utility bill. Understanding the science behind coil cleanliness helps you decide when and how often to service. In most homes, semi-annual checks are adequate, while busy kitchens may benefit from quarterly attention.
What to clean coils with: materials and safety
Before you pick up any tool, map out a safe plan. Use tools that won’t bend or cut the delicate aluminum fins, and keep the area dry. A vacuum with a brush attachment, a soft brush, microfiber cloths, and a mild soap solution are typically enough. For safety, unplug or switch off the fridge at the breaker to avoid any electric shock. How To Refrigerator research emphasizes avoiding aggressive chemicals or water jets that could saturate electrical components. Gather a towel to catch drips and a spray bottle with warm water. Optional items include a soft toothbrush for tight gaps and a step stool if the coils are behind a tall unit; keep pets and kids away while you work.
Step-by-step approach and best practices
Coil cleaning should be done carefully; never use high-pressure water from a hose; Dismantling parts can void warranty; Always identify the panel behind the fridge's back or underneath the unit. The condenser is often behind a grille; Some fridges have a sealed compressor cover; The main risk is water near electrical components; Keep a dry towel handy; If you're uncertain, call a pro. Based on How To Refrigerator research, take your time and ensure all metal surfaces are dry. Regular upkeep reduces dust buildup and helps maintain efficient cooling performance.
Maintenance, troubleshooting, and keeping coils clean
Maintenance after cleaning is as important as the cleaning itself. Schedule coil checks twice a year in dusty environments or homes with pets, and more often in high-traffic kitchens. If you notice longer cooling cycles or warm interior temperatures after a cleaning, recheck the connections, ensure the rear grille is properly reinstalled, and verify the unit has adequate clearance for airflow. The How To Refrigerator team recommends documenting your maintenance and using gentle tools to protect the fins. For readers seeking external guidance, authoritative sources emphasize avoiding harsh chemicals and ensuring electrical safety during any cleaning task.
Tools & Materials
- Gloves (nitrile or rubber)(Protect hands from dust and cleaning solutions)
- Safety goggles(Optional for splash protection)
- Non-abrasive brush(Soft-bristled brush to loosen grime)
- Vacuum with brush attachment(Remove loose dust from coils)
- Microfiber cloths(For wiping and drying)
- Mild dish soap(Dilute in warm water (1–2 tsp per liter))
- Warm water spray bottle(Used for rinsing and dampening)
- Old towel or drop cloth(Protect floor and catch drips)
- Soft toothbrush (optional)(For tight corners)
- Step stool or stable ladder (optional)(Use only if needed to reach higher units)
Steps
Estimated time: 45-60 minutes
- 1
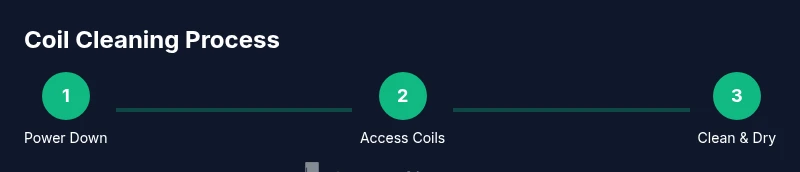
Power down and prep
Unplug the fridge or switch off the breaker to eliminate any risk of electric shock. Move items away from the back and clear a dry, well-lit workspace. Place towels on the floor to catch drips and protect surfaces.
Tip: Take a quick photo of any panels or screws before you disconnect anything to ease reassembly. - 2
Access the coils safely
Locate the condenser grille or rear panel. If your model has a removable cover, gently pry it open with a screwdriver or your hands, taking care not to bend fins. Confirm there is no active water source nearby that could splash onto electrical components.
Tip: Work in a well-ventilated area; dust can be irritating to breathe in. - 3
Remove loose dust with vacuum
Attach the brush nozzle to your vacuum and slowly vacuum the grille and exposed fins. Keep the nozzle at a slight angle to avoid bending the delicate metal fins.
Tip: Vacuum in short, steady passes; never press hard against the fins. - 4
Gently scrub with soap solution
Mix a mild soap solution and dampen your microfiber cloth or brush. Gently wipe across the coil fins from top to bottom, using a light touch to avoid damage. For stubborn grime, use a soft toothbrush in small circular motions.
Tip: Avoid saturating the coils; use damp rather than dripping wet cloths. - 5
Rinse and dry thoroughly
Wipe away any soap residue with a clean damp cloth, then dry the area with a dry microfiber cloth. Make sure the fins and surrounding components are completely dry before reassembling.
Tip: Leave the panel open for a few extra minutes to ensure complete dryness. - 6
Reassemble and test
Replace the back panel or grille, reconnect power, and monitor the fridge for 24 hours to confirm it’s cooling normally. Ensure there is adequate clearance around the unit to maintain airflow.
Tip: If you notice unusual noises or temperature fluctuations, power down and double-check connections.
FAQ
Do I need to unplug the fridge before cleaning the coils?
Yes. Always unplug or switch off the breaker before beginning any cleaning of the coils to prevent electric shock or damage to electrical components.
Yes—unplug or switch off the breaker before you start.
Can I use water directly on the coils to rinse them?
You can use a damp cloth or light spray, but avoid soaking or direct high-pressure water, which can infiltrate electrical parts.
Use a damp cloth or light spray, not a lot of water.
How often should I clean refrigerator coils?
Most homes benefit from coil cleaning every 6–12 months, adjusted for dust levels, pet exposure, and kitchen traffic.
About every 6 to 12 months, depending on dust and pets.
What signs indicate dirty coils?
Longer cooling times, frost buildup, an occasional warm spot inside, or higher energy bills can indicate dirty coils.
Longer cooling times, frost, or higher energy use can signal dirty coils.
Will cleaning coils affect my warranty?
Cleaning coils with standard homeowner methods typically does not void a warranty, but avoid disassembly of sealed refrigerant parts unless instructed by the manufacturer.
Usually it won’t void your warranty, but don’t tamper with sealed parts.
Watch Video
Top Takeaways
- Unplug before cleaning to stay safe.
- Use non-abrasive tools and mild soap only.
- Don’t saturate coils; dry thoroughly before reassembly.
- Regular maintenance improves cooling and energy efficiency.
- Document maintenance to stay on schedule.