How to Clean Refrigerator Coils Without Brush: A Homeowner's Guide
Learn brush-free methods to safely clean condenser coils on your refrigerator. This guide uses common tools to restore airflow, improve cooling, and extend appliance life without a specialized coil brush.

By using a vacuum with a brush attachment and optional compressed air, you can clean condenser coils without a traditional coil brush. Start with safety: unplug the fridge, access the coils, and work from top to bottom. After dust is removed, recheck airflow and plug back in to test cooling. This method minimizes risk while preserving coil integrity.
Why cleaning refrigerator coils matters
Your refrigerator relies on condenser coils to dissipate heat from the refrigerant. When dust, pet hair, and kitchen grease accumulate on the fins, airflow is restricted and the unit must work harder to reach the desired temperatures. This not only raises energy bills but shortens the appliance’s lifespan. If you’ve ever wondered how to clean refrigerator coils without brush, you’ll discover that there are safer, brush-free methods that maintain coil integrity and avoid damaging delicate fins. In this guide, we explain the science behind coil cleanliness and the signs you should look for that indicate a cleaning is overdue: visible dust buildup on the back or beneath the unit, decreased cooling efficiency, frost forming on evaporator coils, and unusually warm airflow near the front vents. Before you begin, unplug the fridge to ensure safety, then gather your tools and set up a workspace with good lighting. Position the fridge away from walls to give yourself room to work, and consider placing a drop cloth or old towel to catch any dust. Remember, even minimal moisture on electrical components can cause shorts, so proceed with dry tools and controlled cleaning motions.
Safety first: unplugging and prepping
Safety is the foundation of any coils-cleaning effort. Begin by unplugging the fridge and moving it just enough to access the rear or underside where the condenser coils live. Wear safety glasses and disposable gloves to protect your eyes from dust and sharp fins. Keep a dry rag handy to wipe spills and a tray or towel to catch debris. If the fridge rests on a non-level surface, level it before replugging to avoid vibrations that could loosen components. A quick inspection for obvious signs of wear—damaged insulation, frayed cords, or corroded connectors—lets you decide if professional help is warranted. This prep minimizes the risk of electrical shock or water intrusion and sets a controlled environment for the cleaning process.
Locating the coils: back or under
Condenser coils come in two common layouts: behind a rear access panel at the bottom of the unit or along the back underside. If you see a metal grille or a removable panel, you’re likely looking at the coils. Some models have the coils tucked behind the kickplate; others may require removing a back panel. Use a flashlight to spot dust buildup on fins and between rows. It’s normal to see dust and lint here, especially in kitchens with high debris or pet hair. Avoid prying or bending fins—gentle handling preserves heat transfer surfaces and keeps the unit running efficiently. If you’re unsure about the panel removal, consult the owner’s manual or manufacturer site for model-specific instructions.
Vacuuming coils: best practices
A vacuum with a soft brush attachment is ideal for loosening and extracting loose dust from coil fins. Start at the top of the coil bank and work downward, using short, sweeping motions to prevent bending the fins. Keep the vacuum nozzle close but not pressed into the fins to avoid damage. If you encounter stubborn dust wedged between fins, apply a light, indirect blast from the vacuum or pause to wipe with a microfiber cloth. Do not use scrapers or metal tools that can scratch or deform the delicate metal surfaces. This step reduces particulate buildup, improving airflow and cooling efficiency.
Using compressed air effectively
Compressed air is a powerful ally when dust clings stubbornly to coil surfaces. Use a can of dry, clean compressed air and hold the nozzle at a slight angle to avoid forcing dust deeper into the unit. Short, controlled bursts are better than long blasts that can drive debris into seals or electronics. Always aim away from your face and eyes, and perform this step in a well-ventilated area or outdoors if possible. If you don’t have canned air, a portable air blower can be a suitable alternative. Remember: moisture and electricity don’t mix—keep air dry and avoid spraying liquids.
Cleaning and reassembly: wipe and secure
After you’ve removed most of the visible dust, wipe down surrounding surfaces with a damp microfiber cloth to pick up residual grime. Wring the cloth well to avoid dripping water into electrical areas. Once the coils appear clean and dry, reattach any panels or grilles securely. Return the fridge to its original position, ensuring it sits level and away from walls to maintain optimal airflow. Plug the unit back in and listen for the fan. If you hear unusual noises or if the coils still feel hot, stop and reassess—excessive heat buildup may indicate a deeper issue.
Post-cleaning checks and test
With the fridge reconnected, give it time to stabilize—this can take 30–60 minutes depending on ambient temperature. Check the front vents for warm air only briefly; persistent heat could signal insufficient airflow or a coil problem beyond surface dust. Monitor internal temperatures using the fridge thermometer, and compare against normal ranges (typically around 35–38°F for the fridge and 0°F for the freezer). If temperatures stay high, inspect door seals for leakage, ensure proper door alignment, and verify the condenser fan is operating. A successful cleaning should yield cooler back coils and more consistent interior temperatures.
Maintenance tips to reduce future dust
Regular maintenance helps keep coils cleaner longer. Schedule a light check every 3–6 months, especially in dusty or pet-friendly homes. Place the fridge away from heat sources and high-traffic cleaning zones to minimize debris. Consider replacing or cleaning air filters if your model includes them, and keep the surrounding area tidy to reduce particles that can be drawn into the coils. By integrating these habits, you reduce energy usage and extend the appliance’s lifespan. Remember, brush-free coil care is a practical, safer approach for most homeowners.
Tools & Materials
- Vacuum with brush attachment(Use a hose attachment to reach behind coils)
- Soft microfiber cloth(Damp for final wipe, hex-free finish)
- Flashlight(Illuminate dust between fins)
- Safety glasses(Protect eyes from dust)
- Disposable gloves(Keep hands clean and dry)
- Canned compressed air(Dry bursts to dislodge stubborn dust)
- Drop cloth or old towel(Catches debris near the floor)
- Mild dish soap and warm water(For light cleaning of nearby surfaces)
Steps
Estimated time: 25-40 minutes
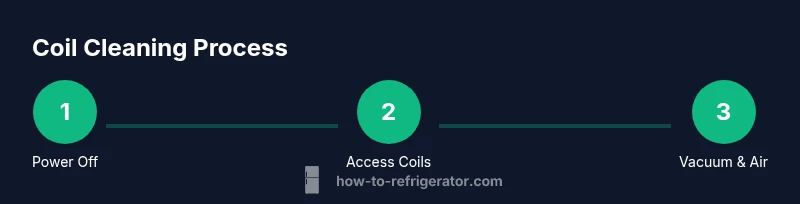
- 1
Power off and unplug
Safely disconnect the fridge from power to prevent shocks and moisture contact with electrical components. Move the unit slightly if needed to access the coil area. This ensures you’re cleaning with the risk of electric shock minimized.
Tip: Keep the power cord away from water and moisture during the process. - 2
Access the coils
Identify whether your coils are at the back or under the appliance. Remove any rear panel or kickplate per the model’s design. Gently loosen screws without forcing panels that seem stuck to avoid damaging seals.
Tip: Consult the manual if you’re unsure about panel removal to avoid warranty issues. - 3
Vacuum loose dust
Use a vacuum with a brush attachment to gently sweep dust from the coil fins, moving from top to bottom in short strokes. Do not press hard against the fins to prevent bending them.
Tip: If you can’t reach a tight spot, use a microfiber cloth to lift debris before vacuuming. - 4
Blast dust with air
Apply short bursts of dry compressed air at an angle to dislodge stubborn dust between fins. Keep a safe distance to avoid bending fins or pushing dust into seals. Let the area dry before proceeding.
Tip: Work in a well-ventilated space or outdoors if possible. - 5
Wipe and inspect
Wipe surfaces with a damp microfiber cloth to remove any remaining grime. Inspect fins for damage (bent fins can reduce airflow resilience). If needed, you can carefully straighten minor bends with a specialized fin comb.
Tip: Never use metal tools to adjust fins; use plastic or dedicated tools. - 6
Reassemble and reconnect
Secure panels back in place and ensure there are no loose screws. Reconnect the power cord and plug the fridge back into the outlet. Ensure the appliance is level to promote even airflow across coils.
Tip: Take a quick photo of panel placement before removal for easy reassembly. - 7
Test cooling and airflow
Allow the unit to run for 30–60 minutes while monitoring interior temperatures and airflow. A successful clean should show stable temperatures and unaffected fan noise. If temperatures remain high, reassess seals and fan function.
Tip: Document temperatures for a week to track changes after cleaning.
FAQ
Is it safe to clean condenser coils without using a brush?
Yes. A vacuum with a brush attachment plus compressed air is a safe, brush-free method to remove dust from condenser coils when the fridge is unplugged and kept dry.
Yes. You can safely clean condenser coils with a vacuum and compressed air while the fridge is unplugged.
What if I can’t access the coils from the back?
If back access is blocked, you may need to remove the kickplate or rear panel as described in your manual. Do not force panels; consult model-specific guidance.
If the back is blocked, check the manual for how to access the coils or call a professional.
Do I need to remove all dust or is some dirt okay?
Removing most dust is beneficial; visible dust should be targeted first. Minimal residual dust won’t dramatically harm performance, but excessive buildup reduces efficiency over time.
Aim to remove the bulk of the dust; some light residue is usually okay, but you should remove as much as possible.
How often should I clean refrigerator coils?
Frequency depends on environment; in dusty homes, every 3–6 months is reasonable, whereas low-dust environments may allow 6–12 months between cleanings.
Every few months in dusty spaces, otherwise twice a year is often enough.
What should I do if the fridge still isn’t cooling after cleaning?
If cooling doesn’t improve after cleaning, inspect seals, fan operation, and temperature settings. There could be a refrigerant or compressor issue that requires a technician.
If cooling doesn’t improve, check seals and fan, and consider professional service.
Can I use water to wash the coils directly?
Avoid spraying water directly on coils or electrical components. Dry-cleaning methods using vacuum and air are safer and effective for coil cleaning.
No, avoid direct water contact with coils and electrical parts—use dry methods instead.
Watch Video
Top Takeaways
- Unplug and prep the area before starting
- Use vacuum + compressed air instead of a brush
- Avoid bending copper fins; handle coils gently
- Reassemble securely and test cooling after cleaning
- Schedule regular light cleanings to maintain efficiency