Vaccine Refrigerator: Maintenance & Use Guide for 2026
Learn how to select, install, and maintain a vaccine refrigerator to preserve cold-chain integrity. This How To Refrigerator guide covers temperature ranges, calibration, alarms, placement, and daily checks for safe vaccine storage.

Keeping vaccines safely stored requires a dedicated vaccine refrigerator that maintains accurate temperatures, reliable alarms, and a clear monitoring routine. In this guide, you will learn how to choose the right unit, install it in a suitable location, and implement a daily and monthly maintenance plan to preserve cold-chain integrity for home or small-clinic use.
Why a vaccine refrigerator matters
According to How To Refrigerator, maintaining a strict cold chain is essential for vaccine potency and patient safety. Vaccines begin to degrade when temperatures drift outside recommended ranges, which can reduce effectiveness and reliability. A well-chosen vaccine fridge minimizes temperature excursions, supports compliant record-keeping, and reduces waste. For households and small clinics, a dedicated unit ensures consistent performance even during power fluctuations or heavy daily use. By prioritizing reliable cooling and easy-to-read indicators, you safeguard public health while avoiding costly spoilage and regulatory issues.
Key temperature requirements for vaccines
Most vaccines require storage within a narrow temperature window to preserve potency. In practice, you should aim to keep the interior environment stable and monitored with a calibrated thermometer. Avoid storing vaccines in the door where temperatures fluctuate with every opening, and keep shelves organized to facilitate airflow. Extreme temperature swings, prolonged door openings, or improper defrost cycles can compromise vaccine integrity. Always consult the manufacturer’s storage guidance for each product and adopt a single, consistent cold-chain policy across your facility.
Choosing the right vaccine fridge
When selecting a unit, consider capacity, energy efficiency, door seals, and data logging capabilities. Look for models with adjustable shelves, a clear temperature display, audible alarms, and a built-in data logger or external sensor connection. Energy-efficient compressors reduce running costs, while solid door seals minimize temperature drift. If you handle multiple vaccine types, prefer units with independent compartments or smart zoning to keep products separated by storage requirements. Finally, verify the warranty and available support from the retailer or manufacturer for long-term reliability.
Placement and installation
Place the fridge away from heat sources, direct sunlight, and moisture-prone areas. Ensure the unit is level on a sturdy surface and has at least a few inches of clearance around the back and sides for ventilation. Connect to a dedicated, surge-protected outlet and avoid sharing circuits with high-draw appliances. Documentation and labeling should be clear, and the unit should be installed in an accessible location for daily checks. If mounting is required, follow manufacturer guidelines to avoid vibration that can affect temperature stability.
Daily operation and monitoring
Develop a routine to check temperatures at the same times each day using a calibrated thermometer with memory. Record readings in a log, note any excursions, and verify alarms are functioning during opening hours. Place the temperature probe away from vents and doors to get a representative reading, and ensure the shield or cover is installed properly to prevent heat intrusion. Train staff or household members on alarm responses and escalation paths for off-range temperatures.
Temperature validation and calibration
Regular temperature validation is essential for vaccine storage. Use a calibrated, traceable thermometer and follow a documented calibration protocol. Place a secondary thermometer in proximity to the vaccine shelves to confirm readings, and perform a full calibration if the difference between devices exceeds an acceptable threshold. Keep calibration records and schedule checks after service, power outages, or any suspected sensor drift.
Maintenance schedule and common issues
Create a maintenance calendar that includes gasket inspection, coil cleaning, and door alignment checks. Clean interior surfaces with mild cleaner and dry thoroughly to prevent corrosion. If you notice frost buildup or frequent cycling, check door seals and airflow, and review defrost settings. Document all maintenance actions so you can demonstrate compliance during inspections or audits.
Troubleshooting common problems
If temperatures drift high or low, verify door seals, thermostat settings, and airflow. Check the condenser coils for dust and clean as needed, and ensure the unit isn’t overloaded, blocking air vents. If an alarm sounds or readings remain out of range, consult the manufacturer’s troubleshooting guide or contact support. Do not unplug or move the unit during a cold-chain breach.
Cost considerations and procurement tips
Prices vary by capacity, features, and brand, so plan a budget that reflects your vaccine inventory and space. Prioritize a model with an accurate display, alarms, and data logging. Consider refurbished units from reputable sources if they come with a warranty, and verify dealer support for calibration services. Balance upfront cost with long-term reliability to minimize waste and risk.
Implementation in small clinics vs home storage
In a small clinic, you may need multiple units to separate vaccine categories and support shift changes. Home setups should emphasize simplicity, with clearly labeled shelves and straightforward alarm testing. Regardless of setting, maintain consistent documentation, protect against power volatility, and ensure staff training aligns with your local regulatory expectations.
Tools & Materials
- Digital thermometer with min/max memory(Place inside near the center of the shelves)
- Calibration thermometer or data logger(Used for cross-checking the main display)
- Alarm system (audible/visual)(Ensure it has battery backup)
- Leveling device (spirit level)(Ensure fridge is perfectly level)
- Surge-protected outlet(Dedicated circuit preferred)
- Shelving with adjustable dividers(Customizable layout for vaccines)
- Clean cloths and food-grade cleaner(For interior surfaces)
- Manufacturer manuals and guides(Keep handy for reference)
- Backup power solution (optional)(In areas prone to outages)
- Documentation binder(Logbooks, calibration certificates, maintenance actions)
Steps
Estimated time: Initial setup: 1-2 hours; ongoing monitoring: continuous
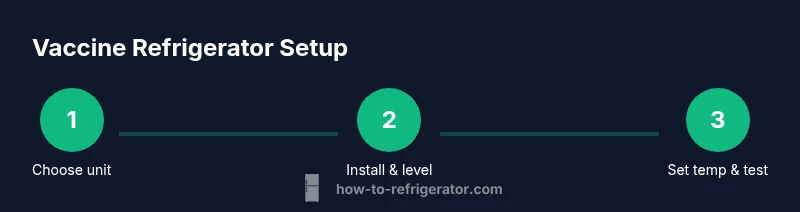
- 1
Define storage needs and unit type
Assess vaccine inventory, vial counts, and packaging to estimate capacity. Compare units with appropriate temperature control features and data logging. Choose a model that fits your space and scheduling needs.
Tip: Document expected inventory growth to avoid undercapacity. - 2
Choose a location and prepare space
Select a room that stays cool, clean, and dry with minimal foot traffic. Check for level floor and adequate clearance around the unit for airflow.
Tip: Avoid doors or vents that introduce warm air when the door opens. - 3
Install and level the unit
Place the fridge on a stable surface, use a level to ensure it sits evenly, and adjust feet as needed. Plug into a dedicated surge-protected outlet.
Tip: Even a slight tilt can affect door seal and temperature stability. - 4
Set initial temperature parameters
Configure the recommended temperature range for your vaccines and enable alarms. Record the setting and ensure the door seals properly.
Tip: If you have multiple vaccine types, create zones or shelves for separation. - 5
Run baseline temperature test
Leave the unit running with empty shelves for 24 hours and verify the readings across different shelves.
Tip: Document any excursions during the baseline test. - 6
Implement ongoing monitoring
Establish a daily check at fixed times, log the temperatures, and test alarm responses.
Tip: Train staff on alarm escalation procedures. - 7
Validate calibration and maintenance
Perform calibration checks at defined intervals and after service, keeping a written record.
Tip: Keep certificates in the binder for audits. - 8
Document and review regularly
Review logs monthly for trends, address recurring excursions, and refine the placement or settings as needed.
Tip: Use data to justify equipment upgrades when necessary.
FAQ
What is the recommended storage temperature for most vaccines?
Most vaccines should be stored at temperatures that keep them within a narrow cold range, away from extremes. Always follow the manufacturer's storage guidance for each product and align with local regulatory requirements.
Vaccines generally need stable cold temperatures; check the product guidelines and follow your local regulations.
How often should I calibrate the thermometer?
Calibration should be performed at defined intervals or after any service, with records kept in your maintenance binder. If readings diverge beyond an acceptable threshold, recalibrate and verify sensors.
Calibrate at planned intervals and after service, and keep a record.
Can I use a regular household fridge for vaccines?
Household refrigerators are not ideal for vaccine storage as they may lack dedicated temperature control and alarms. Use a purpose-built vaccine refrigerator or a professional-grade medical unit that supports alarms and data logging.
A standard kitchen fridge is not recommended for vaccines; choose a medical-grade unit.
What should I do during a power outage?
Keep doors closed to preserve cold temperature, transfer vaccines if needed to another compliant unit, and document the outage. After power returns, verify temperatures and calibration before resuming normal storage.
Keep the door closed and check temperatures after power returns.
How can I verify an alarm is working?
Trigger the alarm test using the unit’s control panel or remote app, ensuring audible and visual alerts function and are logged.
Test alarms regularly and keep a log of the results.
What if temperatures drift outside the acceptable range?
If drift occurs, check seals, airflow, and settings, then adjust or escalate to support. Document events and consider service if the issue persists.
Check seals and airflow, adjust settings, and contact support if needed.
Watch Video
Top Takeaways
- Choose a purpose-built vaccine fridge
- Prioritize reliable alarms and data logging
- Establish consistent daily checks
- Document calibration and maintenance
- Plan for outages and power stability