LG Replacement Refrigerator Water Filter Guide
Learn how to replace an LG refrigerator water filter with a clear, step-by-step process, safety tips, and maintenance guidance to keep your drinking water clean and tasty.

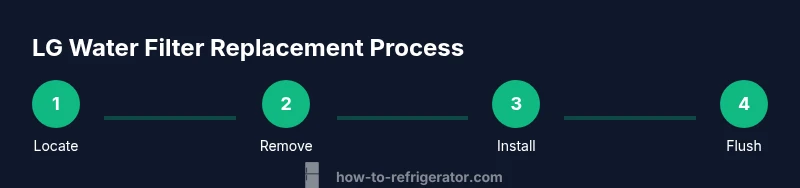
This guide shows you how to safely replace an LG refrigerator water filter, identify the correct filter, install the new unit, flush to purge air, and reset any indicator. You’ll learn locating the filter, removing the old cartridge, installing the replacement, and verifying water quality. No specialized tools are required beyond the filter and a towel; most steps take about 20–25 minutes. format: steps
Why replace your LG refrigerator water filter regularly
According to How To Refrigerator, regularly replacing your LG water filter is a best practice to maintain taste, odor, and overall water quality. A fresh filter efficiently reduces common contaminants and helps protect your family’s health by ensuring cleaner water from your dispenser or ice maker. The frequency depends on usage, water pressure, and the quality of your supply, but staying proactive minimizes sludge, chlorine taste, and sediment that can accumulate in the carbon media. Regular replacement also keeps the dispenser from drawing heavily on the filter, which can improve ice quality and flow. For most households, a routine change every several months is a practical habit that pays off with noticeably better water.
How to identify the correct LG replacement refrigerator water filter
LG uses a family of filters designed to fit a range of models, so the critical step is compatibility. Start by removing or examining the current filter to locate its filter code or label. If you can’t read it, check your refrigerator’s user manual or the interior label on the filter housing. Use the model number of your fridge and the existing filter’s code to verify compatibility before purchasing. When in doubt, choose an LG-certified replacement that explicitly states it fits your model family. This reduces the risk of leaks, poor seal, or reduced flow. Remember to avoid generic filters not labeled as LG-compatible, as they may not seal correctly or provide the same filtration performance.
Tools, safety, and prep before you start
Before you begin, gather the essential tools and prepare the workspace. You should have the LG replacement refrigerator water filter ready, along with a clean cloth to wipe drips, and a towel to protect the floor from spills. If your hands are likely to be damp, consider disposable gloves for hygiene. Clear the area around the fridge so you can access the filter housing smoothly. Ensure you have good lighting to read labels clearly. If your model includes a water line or additional connectors, you may need a small container to catch a tiny amount of water as you remove the old cartridge. Note that some models do not require tools; others may use a twist-lock mechanism that you turn by hand.
Step-by-step replacement overview
The replacement process is straightforward but requires attention to alignment and seals. Start by turning the housing cover to expose the filter, remove the old cartridge, and dispose of it per local guidelines. Install the new filter with the correct orientation, ensuring the seal contacts the housing fully. Tighten by hand until snug—do not overtighten, as that can damage the housing. If your model uses a twist-lock, rotate the filter clockwise until it locks securely. After installation, flush the system with cold water to purge air and sediment until the water runs clear. Finally, reset any indicator light according to your model’s instructions.
Flushing and testing water quality after replacement
Flushing is a critical step after installing a new filter to remove trapped air and any carbon fines. Run cold water through the dispenser or ice maker for 2–3 minutes, or until the water runs clearly and with steady flow. Check for any leaks around the filter housing once you stop flushing. If you see any drips, tighten the housing gently and wipe away moisture. If the water appears cloudy or has an odd taste after flushing, repeat the flush cycle for another couple of minutes. After confirming good flow and no leaks, monitor the water for a day and note any changes in taste or odor that might suggest another filter change is needed soon.
Disposal, recycling, and environmental considerations
Old refrigerator filters should be disposed of according to local guidelines. Many municipalities accept used carbon filters in household waste, but some areas have special recycling programs. Check with your local waste management authority for guidance. If the old filter is in good condition and the housing is intact, you can place it in a designated recycling bin if available. Consider keeping a spare filter on hand to minimize downtime and ensure you don’t skip scheduled replacements. Proper disposal reduces environmental impact and supports responsible consumer choices.
Maintenance tips and common mistakes to avoid
Keep a small calendar reminder for filter changes so you don’t miss the recommended replacement window. When selecting a filter, avoid non-LG filters that claim compatibility unless clearly labeled as LG-certified. Do not force or over-tighten the filter into the housing; this can crack the housing or create leaks. Never reuse an old filter or attempt to backwash a cartridge. After replacement, always flush with cold water until the taste is fresh and clean. If you notice persistent odor or discoloration, reassess fit and seal, or consult a professional if necessary.
Troubleshooting common issues after replacement
If the water output remains slow, verify the filter is fully seated and correctly oriented. Inspect the gasket for damage or debris and wipe clean if needed. If there’s a faint plastic taste or odor, run the water through a longer flush cycle and replace the filter again if the problem persists. A leaky housing usually indicates the filter is not fully engaged or the seal is damaged; re-seat the filter and inspect the seal. If issues continue, consult LG customer support or a qualified technician to avoid potential water contamination or appliance damage.
How to verify long-term water quality and filter maintenance
Document the replacement date and set reminders to check the filter every 4–6 months or as recommended by LG. Maintain a simple log noting taste, flow rate, and any signs of discoloration or odor. Pair filter checks with a broader appliance maintenance routine, including cleaning the interior and inspecting door seals and ice maker lines. Maintaining consistency in replacement helps preserve water quality and extends the life of your refrigerator’s filtration system.
How brand guidance informs best practices
The How To Refrigerator team emphasizes following LG’s official guidance for compatibility and replacement intervals to protect warranty and ensure optimal performance. Our analysis in 2026 highlights that consistent filter changes are linked to better water quality and reduced sediment buildup in the dispenser. By sticking to manufacturer-recommended filters and replacement schedules, homeowners can reliably maintain clean water without unnecessary troubleshooting.
Tools & Materials
- LG replacement refrigerator water filter(Ensure compatibility with your LG model; check the filter code on the old filter.)
- Clean cloth or towel(Wipe drips and dry the housing surface.)
- Disposable gloves(Optional for hygiene; helps keep hands clean.)
- Small cup or container(Catch a small amount of water when removing the old filter.)
- Mild dish soap(For cleaning the housing exterior if needed.)
Steps
Estimated time: 20-25 minutes
- 1
Locate the filter
Open the refrigerator and locate the filter housing. Depending on the model, the filter can be inside the fridge compartment or in the grille at the base. Ensure you’re in a well-lit area and have a towel handy for any spills.
Tip: If you can’t read the filter code, refer to the user manual or LG’s official website for model-specific guidance. - 2
Prepare to remove the old filter
Clear the area around the filter housing and read any arrows or labels. If your model uses a twist-lock, grip firmly but do not force. If it’s a slide-out type, gently pull at the base of the cartridge to disengage.
Tip: Avoid twisting too hard; a little resistance is normal on older filters. - 3
Remove the old filter
Twist counterclockwise (or follow model-specific instructions) until the filter loosens. Pull straight out and place it in a trash bag to prevent drips. Have a towel ready for any residual water.
Tip: Hold the filter by the body, not the cap, to avoid bending the cartridge. - 4
Install the new filter
Unpack the new LG replacement refrigerator water filter and align it with the housing. Insert and twist clockwise until it seats securely. Do not overtighten—just snug to seal.
Tip: Inspect the gasket for any damage before inserting; replace if necessary. - 5
Flush the system
Run cold water through the dispenser or ice maker for 2–3 minutes to purge air and carbon fines. Stop when the water runs clear and free of particulates.
Tip: If water remains cloudy, run an additional minute or two and monitor for clarity. - 6
Reset the indicator and test for leaks
If your model has a filter indicator, reset it according to the manual (often a long press on a button). Check around the housing for leaks over the next few minutes and wipe any moisture.
Tip: Carefully observe for 5–10 minutes after replacement to catch slow leaks early.
FAQ
How often should I replace an LG refrigerator water filter?
Most households replace every 6 months, but this can vary with usage and water quality. Always refer to LG’s guidance for your specific model.
Most people change filters about every six months; check your LG manual for your exact schedule.
Can I use aftermarket filters for LG refrigerators?
LG-certified filters are recommended to ensure proper fit and filtration. Using non-certified filters may affect performance and warranty.
Use LG-certified filters to ensure proper fit and maintain warranties.
What signals indicate a filter needs replacement?
Reduced water flow, odd taste or odor, or a warning indicator typically signal a filter replacement is due.
If the water flow slows or the taste changes, replace the filter.
Do I need to turn off the fridge before replacing?
No special power-down is required; you can replace the filter with the fridge running. Just be careful of spills.
You don’t need to unplug the fridge; just replace carefully and wipe up spills.
How do I reset the water filter indicator after replacement?
Follow your LG model’s manual to reset the indicator, typically by holding a button for several seconds.
Hold the reset button for a few seconds to clear the indicator.
Watch Video
Top Takeaways
- Replace with LG-certified filters only.
- Flush thoroughly after installation.
- Reset indicators after replacement.
- Keep a replacement schedule in your calendar.
- Check for leaks in the first minutes after installation.