Filter for Refrigerator LG: Replacement & Maintenance Guide
Learn how to identify, replace, and maintain the filter for refrigerator LG to improve water taste and flow. A homeowner-friendly, step-by-step guide with safety tips and maintenance advice.

You're about to learn how to locate the correct LG refrigerator water filter, verify its compatibility, and replace it safely to restore water flow and taste. We'll cover filter model numbers, step-by-step replacement, handling common symptoms (slow filtering, off-tastes, leakage), and maintenance tips to extend filter life. Follow these actionable steps to keep drinking water fresh.
Why LG Refrigerator Filters Matter
LG refrigerators rely on replaceable water filters to remove particulates, improve taste, and maintain consistent water pressure. A fresh filter ensures fewer contaminants reach your glass and helps protect downstream components from buildup. Over time, filters lose efficiency, which can lead to slower flow, noticeable taste changes, or odors. Regular maintenance, using the correct LG filter model, minimizes these issues and prolongs the life of your appliance. According to How To Refrigerator analysis, timely filter changes correlate with clearer ice, better flavor, and reduced mineral deposits. Homeowners who stay on top of filter maintenance report fewer service calls and more reliable daily use. This guide will help you pick the right filter, replace it safely, and set a practical maintenance rhythm.
How to Identify the Right LG Filter Model
Finding the correct filter starts with confirming your fridge’s model and the exact filter cartridge your unit requires. Look for a label inside the fridge near the filter housing or consult the user manual for the model number. Most LG refrigerators use one of a few common cartridge shapes, but compatibility is model-specific. If you don’t have the manual handy, you can also check the manufacturer’s support site with your model number. Once you know the model, purchase the LG replacement water filter that matches that cartridge type. Avoid generic filters that aren’t certified for LG; mismatches can cause leaks or reduced filtration.
Compatibility and Sizing: Avoid Leaks and Poor Fit
Filters come in various heights, threading, and seal designs. A misfit filter can leak, void the warranty, or fail to filter effectively. Always verify the filter’s thread type and gasket size against your fridge’s housing. Some LG models use a bottom-mounted filter accessed via a grille or door panel, while others hide the filter behind a pull-out tray. If you notice unusual looseness, it may indicate an incorrect model. In general, always opt for the exact LG replacement filter recommended for your unit and replace seals if they show wear. Proper sizing ensures a tight seal and optimal filtration performance.
Signs Your Filter Needs Replacement
Pay attention to taste and odor changes, slower water flow, or an illuminated indicator on the control panel warning about filter life. A clogged filter is the leading cause of reduced water pressure and poor filtration. If you detect a musty taste, a faint chlorine aroma, or sediment in water, schedule a replacement. Leaks or damp cabinetry around the filter housing are a clear red flag that the fit is off or the seal is damaged. While some symptoms are obvious, others are subtle; regular filter replacement according to your model’s guidelines helps prevent surprises.
Tools and Materials You’ll Likely Need
Before you begin, assemble a few common tools and the LG replacement filter. You’ll typically need a clean towel or small bucket to catch drips, a soft cloth for wiping the housing, and possibly a pair of clean pliers if the filter is stubborn. Always have the new filter ready so you can complete the swap in one go. If your model uses a quick-connect or a special locking mechanism, refer to the user manual for the exact removal and installation method. Handling the filter gently preserves the seal and avoids cracking the housing.
Post-Change Steps: Flushing and Verification
After installing a new filter, run water through the dispenser for several minutes to purge air bubbles and clear any loose carbon particles. This flushing period helps you confirm the flow returns to normal and taste is clean. Inspect the area around the filter housing for any signs of leakage during the process. If you notice droplets or dampness, re-tighten the housing or reseat the filter and recheck. Finally, reset the filter indicator if your model includes one. This routine verification ensures you maximize the filter’s effectiveness from day one.
Maintenance Rhythm: Scheduling and Record-Keeping
Create a simple schedule to replace LG refrigerator filters every 6–12 months, depending on usage, water quality, and your unit’s indicator. Keep a small log or label the filter with the installation date to track replacement timing. In households with higher demand or well water, more frequent changes may be warranted. Regular maintenance not only keeps water quality high but also protects the appliance’s water system from mineral buildup. Use a consistent replacement cadence to avoid surprises.
Common Mistakes to Avoid
Avoid using non-LG-certified filters, which can compromise fit and filtration. Do not overtighten the filter or housing, as this can crack seals and cause leaks. Never force a filter into a housing that isn’t aligned; misalignment damages threading and seals. Finally, skip the flushing step after installation—the initial water may contain carbon fines that can affect taste and clarity. Following model-specific guidelines ensures safe, effective operation.
How to Verify Water Quality Post-Replacement
After replacement and flushing, monitor the water for taste and clarity over the next few days. If you detect persistent off-flavors, odors, or visible particulates, consider repeating the flush or checking for filter compatibility issues. Document the replacement date and any symptoms you noticed to guide future service or support calls. Routine checks contribute to long-term satisfaction with your LG refrigerator’s water system.
Tools & Materials
- LG replacement water filter cartridge (model-specific)(Confirm model number from the fridge or user manual before purchase)
- Clean towel or small tray(Catch any drips during replacement)
- Soft cloth(Wipe housing and seals to remove dust and moisture)
- Optional: small bucket or cup(Contain water if the housing leaks during removal)
- Gloves (optional)(Keep hands dry and clean during replacement)
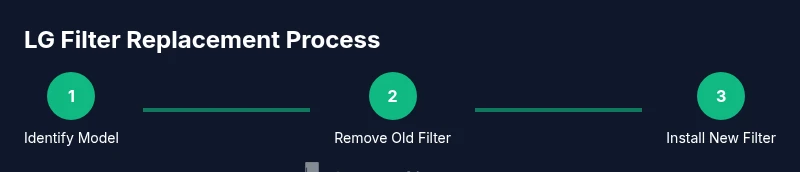
Steps
Estimated time: 15-25 minutes
- 1
Power down and prep
Clear the area around the refrigerator and place a towel beneath the filter housing. If your model has an indicator light, note its current state. This prep prevents slips and helps you track the process.
Tip: Have a buddy hold the towel so drips don’t reach the floor. - 2
Locate the filter housing
Open the fridge door and locate the filter housing. Depending on the model, you may need to open the grille or remove a small panel to access the cartridge.
Tip: If you’re unsure, consult your model’s manual or search the model number online. - 3
Remove the old filter
Twist the filter counterclockwise (or release a locking mechanism) to free it from the housing. Pull straight out once it’s released.
Tip: Do not force; if it’s stubborn, rotate slightly and try again to avoid damage. - 4
Prepare the new filter
Unpack the new LG filter and remove any protective caps. Remove the seal if the packaging indicates a new seal is included with installation.
Tip: Rinse the new filter quickly under cold water to remove any loose particles. - 5
Install the new filter
Insert the new filter into the housing and twist to lock in place or align with the locking mechanism. Ensure a snug fit to prevent leaks.
Tip: Line up arrows or indicators on the filter with the housing for correct orientation. - 6
Flush and rinse
Run cool water through the dispenser for 2–3 minutes to purge air and carbon fines. This step ensures clean-tasting water from the first glass.
Tip: If your unit has a reset function for the filter indicator, wait to reset until after flushing is complete. - 7
Check for leaks and reset
Inspect the housing area for any signs of leaks. If dry, reset the indicator (if present) to reflect the new filter life.
Tip: Wipe away any residual moisture to prevent mold growth around the housing. - 8
Dispose and document
Dispose of the old filter per local guidelines and note the replacement date in a simple maintenance log or label.
Tip: Keep the receipt or packaging until you confirm the next replacement date.
FAQ
How do I know which LG filter model I need for my refrigerator?
Check the model number inside the fridge or in the user manual. LG uses a few standard cartridge shapes, so verify compatibility before purchase. If in doubt, contact LG support with your model number.
Check your fridge label or manual for the exact model, then match it to LG’s replacement filter catalog. If unsure, contact support with your model number.
Why is water flow slow after replacing the filter?
New filters can take a moment to settle and purge air. If the flow remains slow after flushing for a few minutes, verify you installed the correct filter and that the housing is sealed properly.
Run the dispenser for a few minutes to purge air. If flow stays slow, recheck the filter fit and seal.
Can I reuse an old LG filter?
No. Reusing a filter is not recommended. Used filters can harbor bacteria and reduce filtration effectiveness. Always use a new, manufacturer-approved LG filter.
Don’t reuse filters—install a new LG-approved one for safety and quality.
How often should I replace the LG water filter?
Most households replace every 6–12 months depending on usage and water quality. Use the fridge’s indicator if available to guide timing.
Typically every 6 to 12 months, or when the indicator signals replacement.
What should I do if I see a leak after replacement?
First, ensure the filter is fully seated and the housing is tightened to the correct snug fit. If leaks persist, remove and reseat the filter or consult support.
If you see a leak, reseat the filter and tighten gently. If it continues, seek help.
Is it safe to run hot water through the new filter?
No. Run cold water through the dispenser after replacement to avoid scalding and to prevent steam buildup inside the housing.
Always use cold water for flushing after a filter change.
Watch Video
Top Takeaways
- Identify the exact LG filter model before purchase
- Install with a snug, not over-tightened, seal
- Flush the system after replacement to purge air
- Maintain a replacement schedule and log dates
- Check for leaks and reset indicators if applicable