How to Replace Water Filter in Frigidaire Refrigerator
Learn how to replace the water filter in your Frigidaire refrigerator with a clear, step-by-step approach. Includes compatibility checks, tools, and post-install flushing tips for clean, fresh-tasting water.

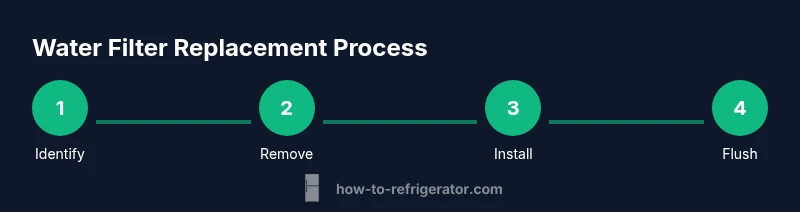
Replacing the water filter in a Frigidaire refrigerator is straightforward when you have the right filter. Identify the model, remove the old cartridge, install the new one, and flush the system by running water for a few minutes. Expect this 15–25 minute task to keep your ice and water tasting fresh.
Why replacing the water filter in a Frigidaire refrigerator matters
This guide explains how to replace water filter in frigidaire refrigerator and keep your drinking water clean. Replacing a saturated filter improves taste and odor, maintains water pressure, and ensures the ice you dispense is safe. According to How To Refrigerator, sticking to a regular replacement schedule protects your appliance and your family. Most Frigidaire units use a twist-in or snap-in cartridge that’s easy to swap with minimal tools. Before you begin, verify your refrigerator model so you buy the correct filter. Check the label on the current filter or your owner’s manual to confirm the exact replacement interval. The right filter is designed for your fridge’s water system, including flow rate and filtration media. The goal is to replace a saturated filter before it compromises flavor or pressure. If you notice a change in water taste, slower dispensing, or a warning light on the control panel, it’s time to replace. This task is a common DIY fix and typically takes about 15–25 minutes when you have the right filter on hand. Planning a quick maintenance window—such as after a grocery run—keeps your routine smooth and minimizes waste.
Understanding filter families and compatibility
Frigidaire refrigerators use several filter families including PureSource, PureSource Ultra, and EveryDrop lines. The exact filter type depends on the model and the water system design. Always confirm compatibility by checking the label on the current filter or your owner’s manual. Mismatched filters can reduce filtration efficiency or cause leaks. When shopping, look for filters labeled specifically for Frigidaire or for your model family. If you’re unsure, contact customer support or consult the How To Refrigerator guide for model-specific advice. Understanding compatibility saves you time and prevents unnecessary trips to the store.
What filter you need for Frigidaire machines
Locate the filter housing inside the refrigerator, typically in the fresh-food compartment near the back wall or behind a small access panel on the grille. If the filter isn’t labeled, read the data plate on the inside wall of the fridge to confirm the exact model family. Use that information to choose a compatible filter—either a standard replacement or a higher-adsorption carbon block variant. For most households, a standard replacement cycle is every 6 months, but the actual interval depends on water usage and water quality. Always refer to the model’s replacement schedule and select a filter that matches the stated requirements. Keeping a spare that fits your model ensures you won’t be without clean water when you need it.
Step-by-step prep: tools and safety considerations
Before you begin, gather the tools and materials you’ll need and clear the area around the fridge. Have a towel handy for drips and a sink nearby for easy disposal of used filters. Confirm you have a compatible replacement filter on hand and any optional tools your model may require (such as a filter wrench or gasket lube). While most Frigidaire replacements don’t require disconnecting the water supply, you may choose to shut the fridge’s water line if accessible to minimize spills. This preparation reduces mess and speeds up the replacement, so you stay on track without creating a bigger cleanup.
The core replacement steps (concise overview)
The replacement process can be summarized in a simple sequence: locate and release the old filter, remove it, prepare and insert the new filter, and reseat the housing. After installation, flush the system by running cold water for several minutes to clear air and any loose particles. If your fridge has a filter indicator, reset it according to your model’s instructions. This overview helps you plan the actual, step-by-step actions that follow. Remember, the exact steps may vary slightly by model, but the general approach is the same for most Frigidaire units. With a little practice, you’ll be able to complete the task quickly and confidently.
Post-install checks and flushing the system
After installing the new filter, turn the water supply back on if you opened it, and run water through the dispenser for 2–3 minutes or until the water runs clear. Check the filter housing for leaks with the doors closed and ensure the filter is seated properly. If you notice any moisture around the housing, re-seat the filter and inspect the O-ring for damage. Keep a quick log of replacement date and model for future reference. Regular flushing helps remove air pockets and ensures the filter is primed for optimal filtration.
Maintenance, indicators, and best practices
Regular maintenance includes replacing the filter on schedule and watching for indicators on the control panel. A good habit is to reset the indicator after each replacement and keep the filter in its original packaging until you’re ready to install it. Store replacement filters in a cool, dry place away from direct sunlight to prevent degradation. For homes with hard water or higher sediment levels, consider slightly shorter intervals between changes. If you detect unusual taste, odor, or reduced flow after replacement, perform an additional flush or replace sooner than planned. According to How To Refrigerator, maintaining a predictable schedule reduces the risk of tasting contaminants and keeps your ice refreshing.
Authoritative sources
- https://www.epa.gov/ground-water-and-drinking-water
- https://www.cdc.gov/healthywater/drinking/index.html
- https://www.fda.gov/food-safety
Tools & Materials
- Replacement water filter compatible with your Frigidaire model(Check filter label or manual to ensure compatibility with your fridge family)
- Clean towel or rag(For catching drips and keeping the area tidy)
- Small bowl or container(For disposing of old filter debris)
- Optional filter wrench or gasket lubricant(Only if your model specifies these tools)
- Owner’s manual or model documentation(Helpful for locating the correct filter type)
Steps
Estimated time: 15-25 minutes
- 1
Identify location and model
Locate the filter housing inside the fridge, typically in the fresh-food compartment or behind a front cover. Read the model family from the data plate or current filter to confirm compatibility. This ensures you buy the correct replacement before you begin.
Tip: If you’re unsure, take a photo of the current filter and housing to compare with product listings. - 2
Shut off water supply (if accessible)
If your installation area has an accessible shut-off valve, close it to minimize drips during replacement. Some models don’t require this, so skip if there’s no valve. This step helps prevent accidental leaks.
Tip: Keep a towel handy in case any drips escape during valve adjustment. - 3
Open filter housing
Access the filter by opening the housing cover or twisting off the cap depending on the model. Do not force the cover; rotate counterclockwise until it loosens. A small twist releases the seal and allows the old filter to be removed.
Tip: If you hear a hiss when the cap is opened, relieve any built-up pressure slowly and quietly. - 4
Remove old filter
Pull the old filter straight out once the housing is open. Some filters have a twist-lock; rotate them a quarter turn counterclockwise to release. Set the used filter aside for disposal.
Tip: Inspect the O-ring on the housing for cracks or deformation before installing the new filter. - 5
Prepare the new filter
Unpack the new filter and remove any protective caps. Check the O-ring for intact seals and prime the filter by rinsing it under cold water for a few seconds (if recommended by the manufacturer).
Tip: Do not touch the filter media with bare hands to avoid contamination during handling. - 6
Install new filter
Insert the new filter into the housing, aligning any tabs, and twist or snap it into place per your model’s design. Ensure the gasket sits evenly to prevent leaks. Re-seat the housing cover securely.
Tip: Turn firmly but do not overtighten; overtightening can damage the housing or gasket. - 7
Restore water supply and flush
Open the water valve (if you shut it earlier) and run water through the dispenser for 2–3 minutes, or until the water runs clear of air and particulates. This removes air pockets and any loose resin from the new filter.
Tip: Place a cup under the dispenser during the first few cycles to monitor flow and leaks. - 8
Reset indicator and record
If your model has a filter indicator, reset it according to the user manual. Note the replacement date in a log for future reference.
Tip: Mark a calendar reminder for roughly 6 months or your model’s recommended interval.
FAQ
Do I need to shut off the water supply when replacing the filter?
In many Frigidaire models, turning off the water supply is optional. If accessible, shut the valve to minimize drips; otherwise, you can proceed without closing it. Always check your model’s manual for exact guidance.
Shut off the water supply if you can, but many Frigidaire models don’t require it. Check your manual for model-specific steps.
How do I know which filter to buy for my Frigidaire?
Check the current filter label or the fridge’s data plate to identify the correct filter family (e.g., PureSource, EveryDrop). Use filters labeled for Frigidaire or your specific model family to ensure compatibility.
Look at the filter label or data plate on your fridge to pick the right Frigidaire-compatible filter.
How long does replacement take?
Most replacements take about 15 to 25 minutes, depending on model design and your familiarity with the process. Having the right filter on hand speeds things up.
Usually around 15 to 25 minutes with the right filter ready.
How often should I replace the water filter?
Typically every 6 months, or sooner if your water quality is poor or your indicator signals replacement. Hard water or high sediment areas may require more frequent changes.
Most people replace every 6 months, or when the indicator tells you to.
What if there’s a leak after replacement?
Leaks usually mean the filter isn’t seated properly or the O-ring is damaged. Re-seat the filter and inspect the gasket; replace if necessary. If leaks persist, consult a professional.
If it leaks, re-seat the filter and check the O-ring, then retry. If it continues, get help.
Watch Video
Top Takeaways
- Verify model compatibility before buying.
- Install the new filter and flush before use.
- Reset the indicator and log the replacement date.
- Inspect seals if leaks occur.