How to Clean Mold in Refrigerator: Safe Home Guide
Learn safe, step-by-step methods to remove fridge mold, prevent recurrence, and protect your family’s health with practical, non-toxic cleaning tips.

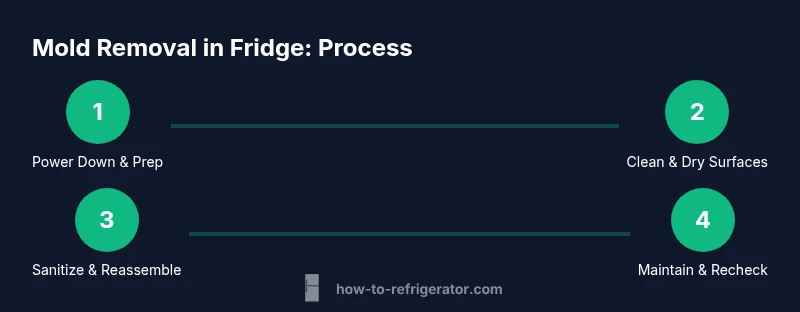
Learn the essential steps to remove mold from your refrigerator safely: unplug and empty the unit, remove shelves, scrub with mild detergent and vinegar or baking soda, rinse, dry completely, and reassemble. This guide shows how to clean mold in refrigerator with non-toxic cleaners; gather gloves, a mask, spray bottle, microfiber cloths, a sponge, and a disposal bag before you start today.
Why Mold Grows in Refrigerators
Mold thrives in kitchens where moisture, organic residue, and warmth combine. In a fridge, this often starts with spilled drinks, spoiled leftovers, or damp gaskets that trap humidity. The result is a fuzzy growth that can appear green, black, or white and may spread quickly to shelves and drawers. According to How To Refrigerator, mold growth is common when moisture and residue are left untreated, especially in areas that are rarely cleaned or exposed to temperature fluctuations. Understanding these conditions helps you act quickly and avoid spreading spores to stored foods. If you’re wondering how to clean mold in refrigerator, the key is to act fast, stay safe, and use non-toxic cleaners whenever possible.
Safety First: Protect Yourself and Your Family
Mold exposure can irritate the respiratory tract and skin, so start with personal protection and good ventilation. Put on nitrile gloves, a mask (N95 or equivalent), and safety goggles, then open a window or turn on a fan to create airflow. Keep kids and pets away from the cleaning area, and unplug the unit to prevent accidental shocks or startup during scrubbing. The goal is to reduce exposure while you remove contaminated materials and apply cleaners safely. As recommended by How To Refrigerator, protect yourself with PPE and good ventilation.
Cleaning Agents: What Works and What to Avoid
For most fridge mold, a mild dish soap solution with warm water is a gentle but effective starting point. White distilled vinegar can help kill many mold species on non-porous surfaces, while baking soda acts as a mild abrasive and deodorizer. Hydrogen peroxide (3%) is another option for sanitizing, but test a small area first on finished surfaces. Avoid using bleach on food-contact surfaces, and never mix cleaners with ammonia or other chemicals, which can create dangerous gases. How To Refrigerator analysis shows that non-toxic methods are usually sufficient for household mold cleanup and reduce risk to food items.
Prep Work: Clear Out and Ventilate
Before you touch the fridge, remove all items and place them in a cool space or cooler. Take out shelves and drawers and set them on a clean towel. Wipe the interior walls with a dry microfiber cloth to remove loose spores, then ventilate the kitchen to minimize exposure. These steps reduce cross-contamination and make the cleaning process smoother.
Surfaces and Techniques: Scrub, Rinse, Sanitize
Apply your cleaning solution to moldy areas and scrub with a non-abrasive sponge or bristle brush. For tight corners and around gaskets, use an old toothbrush. Wipe residue with a clean microfiber cloth, rinse with a small amount of clean water, and repeat if needed. If you’re unsure how to clean mold in refrigerator, this scrubbing approach works well on non-porous surfaces.
Dealing with Shelves, Drawers, and Door Seals
Shelves and drawers absorb moisture and can harbor hidden mold. Wash them with warm, soapy water, rinse thoroughly, and dry completely before returning them. For door seals, wipe with a mild soap solution and dry; use a soft brush to remove debris along the seam. Ensure seals are dry and not cracked to prevent future mold entry.
Drying Thoroughly and Sanitizing
After cleaning, dry all surfaces completely. Leave the door open or prop it ajar in a well-ventilated space if possible to speed up drying. If you used vinegar or hydrogen peroxide, follow with a final rinse of water and a final wipe; allow to air-dry fully before restocking. Keeping the interior dry is the most important step to prevent mold from returning.
When to Replace Components or Seek Help
If mold returns after cleaning, if you notice persistent odor, or if seals are deformed or moldy beyond cleaning, consider replacing gaskets or consulting a professional. Persistent moisture problems may indicate larger issues with drainage or insulation. In some cases, replacing seals can resolve recurring mold problems more reliably.
Final Checks and Routine Maintenance
Before you restock, wipe down the internal walls one last time and verify there is no moisture left. Set the fridge to the proper temperature (about 37-40°F/3-4°C) and run a quick check for condensation. Schedule a light cleaning every 1-3 months or immediately after spills to keep mold from returning. The How To Refrigerator team recommends establishing a cleaning habit to protect your food and health.
Tools & Materials
- Nitrile gloves(Protect hands from contaminants)
- Face mask (N95 or equivalent)(Block inhalation of spores)
- Safety goggles(Shield eyes from splashes)
- Dish soap(Mild detergent for initial cleaning)
- White distilled vinegar(Non-toxic disinfectant on non-porous surfaces)
- Baking soda(Deodorizer and gentle abrasive)
- Spray bottle(Apply cleaning solutions evenly)
- Microfiber cloths(Lint-free wiping)
- Sponge(Non-abrasive scrubbing)
- Old toothbrush(Clean crevices around gaskets)
- Trash bag(Dispose contaminated items safely)
- Hydrogen peroxide (3%)(Optional sanitizing alternative)
- Bleach (optional)(Use only on non-food-contact areas)
Steps
Estimated time: 45-60 minutes
- 1
Power down and remove perishables
Unplug the refrigerator and remove all food items to a cooler or safe area. This minimizes contamination risk and keeps food safe while you clean.
Tip: Have a small cooler handy for perishables. - 2
Remove shelves and drawers
Take out all removable components and wash them separately with warm, soapy water. Dry thoroughly before reinserting to avoid trapping moisture.
Tip: Place components on a towel to prevent slips. - 3
Inspect surfaces for mold growth and seals
Check walls, corners, and door gaskets for visible mold and lingering odors. If mold is extensive, you may need to repeat cleaning steps or replace seals.
Tip: Use a flashlight to spot hidden mold in corners. - 4
Prepare cleaning solution
Mix a mild dish soap solution or a 1:1 vinegar-and-water spray in a labeled bottle. For tougher stains, sprinkle baking soda and rub with a damp sponge.
Tip: Test a small area first to ensure no surface damage. - 5
Scrub and sanitize
Apply cleaner to moldy areas and scrub with a sponge or soft brush; wipe away residue with a microfiber cloth. Rinse lightly and wipe dry.
Tip: Avoid splashing cleaning solution onto food zones. - 6
Dry, reassemble, and monitor
Dry all surfaces completely, reassemble shelves, restock food items, and monitor for moisture or odors over the next few days.
Tip: Keep the door slightly ajar for 15-30 minutes after cleaning if space allows.
FAQ
Can I use bleach to clean mold in the fridge?
Bleach is not recommended for food-contact surfaces inside a refrigerator. If used, it must be thoroughly rinsed and only on non-food areas. Non-toxic options like vinegar or baking soda are safer and effective.
Bleach is not the best choice for fridge mold. Use vinegar or baking soda and rinse well.
Is vinegar effective for fridge mold?
White vinegar can kill many mold species on non-porous surfaces and leaves a fresh scent. It should not be mixed with other cleaners and must be rinsed from porous areas.
Yes, white vinegar helps on non-porous surfaces; rinse afterward.
How long should the fridge air out after cleaning?
Allow the fridge to air out with the door open for a few minutes to let any remaining odors dissipate and to ensure all moisture dries.
Open the door and let it air out for several minutes.
What about mold on door seals?
Gaskets can harbor mold; clean with soapy water and a soft brush, then dry completely. If seals are cracked, replace them to prevent future mold.
Clean the seals; replace if cracked.
How often should you clean the fridge to prevent mold?
Clean spills promptly and perform a thorough interior wipe-down every 1-3 months, or sooner if you notice odors or visible mold.
Do quick cleanups after spills and a thorough wipe every 1-3 months.
Watch Video
Top Takeaways
- Identify moisture sources and fix them promptly.
- Prioritize non-toxic cleaners for food-contact areas.
- Dry every surface completely to prevent recurrence.
- Inspect and replace compromised gaskets when needed.