Change Air Filter on LG Refrigerator: A Homeowner Guide
Learn how to safely change the air filter in LG refrigerators, maintain cooling efficiency, and keep foods fresher with our homeowners-first, step-by-step guide tailored for DIY maintenance.

In this guide you will learn how to change the air filter on an LG refrigerator to maintain cooling efficiency, improve air quality, and prevent odors. You will need the correct LG air filter, a clean workspace, and basic kitchen-safe tools. Follow the step-by-step instructions to complete the task safely.
Why changing the air filter matters for LG refrigerators
The air filter in many LG refrigerators helps trap dust, pet dander, and kitchen odors before they circulate through the fridge. Over time, the filter becomes clogged, reducing airflow, which can cause uneven cooling, higher energy use, and lingering smells. For homeowners, changing the filter is a straightforward maintenance task that preserves performance, prevents frost buildup around coils, and keeps your fresh foods inside tasting and smelling cleaner. When you change the filter, you’re not just replacing a disposable part—you’re renewing the air path that supports the condenser and evaporator. In practice, keeping the filter fresh helps the refrigerator operate at its designed efficiency, which can translate to steadier temperatures and longer component life. If you notice a drop in airflow or a noticeable change in odor even with a clean filter, inspect for vacuum leaks, clogged vents, or other airflow restrictions. Remember: a clean filter is one of the simplest, most impactful steps in DIY refrigerator care.
LG filter types and compatibility
LG refrigerators use a variety of air filtration configurations depending on the model and year. Some units use a compact rectangular cartridge hidden behind a lower grille, while others place the filter inside an interior wall panel. The most reliable way to ensure compatibility is to consult your owner’s manual or the model label inside the fridge and purchase an LG-approved filter designed for that model. Orientation matters: some cartridges have an arrow or direction indicator that must point toward the airflow. If you replace with an incorrect filter, you may experience poor fit, leaks, or reduced airflow. When in doubt, contact LG support or a trusted appliance retailer to confirm compatibility before buying. Keeping filters labeled by replacement date helps you track maintenance and prevents overdue changes.
What you’ll need before you begin
Before you start, gather a clean workspace and the replacement parts and tools. Clear a counter or table, unplug the area if you feel safer doing so, and have a soft cloth handy for wiping. Make sure you have an LG-approved replacement air filter compatible with your model. Check the packaging for compatibility notes and confirm the correct orientation before removing the old filter. Having a flashlight can help you inspect the filter housing for debris or moisture that could affect seating. Finally, if your fridge has a filter indicator, know where it is and whether it requires a reset after replacement.
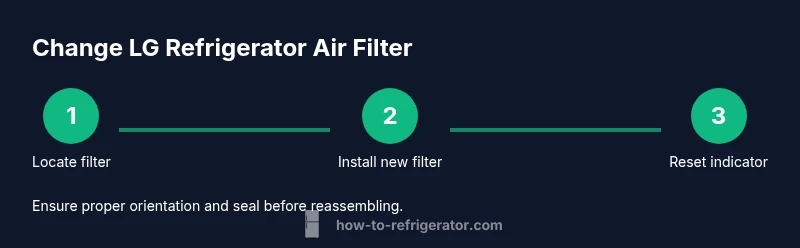
Locate the filter compartment on LG refrigerators
Filter placement varies by model. For many LG units, the filter sits behind the bottom grille on the front of the fridge or on the interior wall near the door hinge. Visual cues include a small cap or cartridge with a pull tab, or a cartridge-slot with a protective cover. If your model uses a door-sealed housing, gently press or slide the panel to reveal the cartridge. Use your manual to confirm the exact location, and avoid forcing panels open. Taking a moment to locate the correct compartment reduces the risk of damaging plastic parts and ensures you access the filter correctly.
Remove the old filter and inspect the housing
Carefully twist or pull the old filter straight out, depending on the model, and place it in a trash bag for disposal. As you remove it, inspect the housing for debris, moisture, or mold that could affect seating. A quick wipe with a microfiber cloth helps remove dust and any condensation that may have accumulated. If you notice cracks or warping in the housing, do not reuse the area—check with service if needed. This step also gives you a moment to verify there are no obstructions in the filter slot that could hinder the new cartridge.
Prepare and install the new filter correctly
Unpack the new filter and remove any protective seals or caps per the instructions on the packaging. Align the filter with the housing’s orientation marks—if there is an arrow, point it in the direction of airflow. Slide or twist the cartridge into place until it seats firmly; a secure fit prevents leaks and air bypass. If the model uses a locking mechanism, engage it fully. Once seated, gently wipe away fingerprints and ensure the housing closes smoothly without binding.
Reattach the panel, reset indicators, and test
Close the access panel or grille securely. If your LG refrigerator has a filter indicator, reset it according to the manual. Plug the unit back in if you unplugged it, and allow the fridge to run for a short period to re-establish airflow. Listen for normal compressor sounds and check that air is circulating from the vents inside the fresh-food compartment. If you notice abnormal noises, leaks, or poor cooling after replacement, recheck the filter orientation and seating to resolve the issue.
Post-change maintenance and best practices
Mark the replacement date on the filter cartridge and schedule a future change based on usage, environmental factors, and odor indicators rather than a fixed calendar date. Store spare filters in their packaging to prevent contamination until you’re ready to use them. Regularly wipe the exterior and the grille area to prevent dust buildup. Finally, keep a small notes section in your fridge manual or a digital record so you can track when you last changed the air filter and when the next change is due.
Troubleshooting and common issues after replacement
If the new filter doesn’t seat properly or you notice leaks, double-check orientation and ensure the cartridge aligns with the slots and locking mechanism. A loose seal can cause airflow inefficiency and odors. If there is no airflow after change, inspect for blocked vents, verify the door seals are intact, and confirm that the filter is LG-approved for your model. If problems persist, consult customer support for guidance and consider replacing with a freshly packaged filter.
Quick maintenance checklist after replacement
- Confirm the filter is LG-approved for your model and seated firmly.
- Reset any indicator if your unit has one.
- Run the fridge for 20–30 minutes and check vent airflow.
- Clean the grille and filter housing to remove dust.
- Record the replacement date for your maintenance log.
Tools & Materials
- LG refrigerator air filter cartridge(Use an LG-approved replacement filter compatible with your model)
- soft microfiber cloth(For wiping the housing and removing dust after removal)
- gloves (optional)(Keep hands clean and protected when handling filters)
Steps
Estimated time: 15-25 minutes
- 1
Locate the filter location
Identify where the filter sits for your LG model, typically behind a lower grille or inside a rear interior wall. If you are unsure, consult the owner’s manual or LG support to confirm the exact location. This helps ensure you access the correct cartridge and avoid unnecessary disassembly.
Tip: Have your model number handy to verify compatibility and location quickly. - 2
Power down or set safety precautions
If you can safely access the filter without interrupting fridge operation, you may leave it powered. For extra safety, unplug the unit and wait a few minutes before touching any electrical components. This reduces any risk of electric shock while you work.
Tip: Unplug only if it’s convenient and safe; many tasks can be done with the unit running. - 3
Open the access panel
Gently open the access panel or grille that covers the filter area. Some panels have a simple snap or hinge; others require a small amount of force to release. Do not pry aggressively to avoid cracking plastic parts.
Tip: Use a soft tool or your fingers; avoid metal tools that could scratch surfaces. - 4
Remove the old filter
Twist or pull the old cartridge straight out, following the model’s orientation. Dispose of it in a trash bag. If there’s any visible moisture or debris in the slot, wipe it clean before installing the new filter.
Tip: Place the old filter in a sealed bag to minimize dust during disposal. - 5
Prepare the new filter
Unpack the new filter and remove any protective coverings. Inspect the cartridge for damage and verify the orientation marks align with the housing. Do not force the filter into a misaligned slot.
Tip: Check the packaging for any installation arrows indicating airflow direction. - 6
Install the new filter
Insert the new filter into the housing with the orientation mark pointing toward the airflow path. Push or twist until it seats firmly. If your model has a locking feature, engage it to secure the filter.
Tip: Ensure you don’t leave gaps around the seal; a loose fit can compromise performance. - 7
Close the panel and reset indicators
Reattach the access panel and ensure it sits flush. If your model has a filter indicator, reset it according to the manual. This helps you track replacement intervals going forward.
Tip: Double-check that the panel is fully closed before powering the unit back on. - 8
Test airflow and operation
Plug the unit back in (if you unplugged it) and wait for the compressor to stabilize. Check that air is circulating from interior vents and that temperatures remain stable. Listen for unusual noises and address if needed.
Tip: Give the fridge 20–30 minutes to reestablish proper airflow before relying on the readings.
FAQ
Do I need to unplug the fridge to replace the air filter?
In most cases you can replace the air filter without unplugging the unit. If you prefer, you can unplug for extra safety, then perform the replacement and plug back in. Always follow your model’s safety guidance from the manual.
You usually don’t need to unplug the fridge, but you can unplug for extra safety if you’re comfortable doing so.
How often should I replace the LG refrigerator air filter?
Check the filter indicator or manual to determine replacement timing. Typically, replacement is based on usage and odor indicators rather than a fixed schedule. If the airflow seems reduced or odors persist, replace the filter.
Refer to the indicator or manual to decide; replace when airflow drops or odors return.
Can I clean a washable filter instead of replacing it?
Some filters are designed to be washable, but many LG models use disposable cartridges. If your model specifies washable, follow the cleaning instructions exactly. When in doubt, replace with a new LG-approved filter.
Only wash if your model says it’s washable; otherwise, replace with a new filter.
What if the new filter doesn’t fit properly?
Double-check model compatibility and the orientation marks. If alignment seems off, remove the filter and reinsert with the correct orientation. If you still can’t seat it, contact LG support or a technician.
If it won’t fit, check orientation and compatibility; contact support if needed.
Where is the filter reset indicator and how do I reset it?
Many LG models include a reset option on the water/ice control panel or inside the menu system. Consult your manual for the exact steps. If your model lacks a reset option, the indicator may automatically reset after a few days of normal operation.
Check the manual for the reset steps; some models reset automatically after use.
Will replacing the filter improve ice quality or cooling speed?
A fresh filter helps maintain proper airflow and refrigerant efficiency, which can positively affect overall cooling. It may indirectly improve ice quality if airflow was restricted. For best results, replace with LG-approved filters and monitor performance after replacement.
A new filter can help restore airflow, which supports better cooling and ice quality over time.
Watch Video
Top Takeaways
- Replace the filter with LG-approved parts
- Confirm correct orientation before seating
- Reset indicators after replacement
- Test airflow and cooling after change
- Keep a maintenance log for future changes