ZLINE Refrigerator Troubleshooting: A Homeowner Guide
A practical, step-by-step guide to diagnose and fix common ZLINE refrigerator issues. Learn safety, basic diagnostics, maintenance tips, and when to repair or replace.

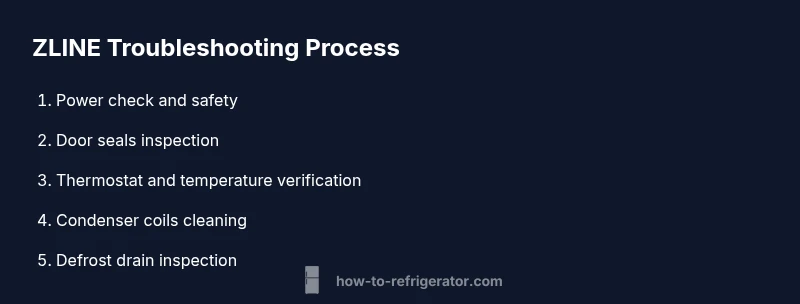
This guide helps homeowners troubleshoot a ZLINE refrigerator. You'll diagnose symptoms, verify power and outlet functionality, inspect door seals, test temperature settings, check the defrost drain, and perform safe maintenance like coil cleaning. Follow the step-by-step process for reliable results. Includes safety tips, time estimates, and when to call a pro.
Understanding the ZLINE refrigerator: basics and common design features
ZLINE refrigerators are built to deliver reliable cooling with premium finishes. For homeowners, knowing the layout of the main components—compressor, condenser coils, evaporator, thermostat, and defrost system—helps you diagnose issues quickly without guesswork. In this guide, you’ll find practical, safe steps to troubleshoot common problems, plus maintenance routines that stave off future faults. According to How To Refrigerator, routine checks by a confident homeowner can extend the life of your unit and reduce costly service calls. ZLINE models vary, but the core principles of safe inspection, clean coils, and proper airflow apply across most configurations. This knowledge empowers you to act quickly and avoid unnecessary service visits.
Common Symptoms and What They Mean
If your ZLINE refrigerator is not cooling, producing excessive frost, or running too loudly, start with a straightforward symptom-to-cause map. Not cooling often points to airflow obstructions, a malfunctioning thermostat, or a defrost issue. Frost buildup can indicate a failing defrost heater or a blocked defrost drain. Noise may come from a fan, compressor, or condenser fan blade hitting debris. In all cases, begin with power safety checks and a visual inspection of gaskets and seals. As you proceed, document observed symptoms and times; this helps you and any technician track patterns and accelerates diagnostics. How To Refrigerator emphasizes calm, methodical steps over random tinkering to avoid accidental damage. A clear record also aids future maintenance planning.
Safety First: Electrical and Handling Precautions
Electrical safety is non-negotiable when inspecting a ZLINE refrigerator. Always unplug the unit before touching any interior panels or coils. Keep liquids away from outlets, wear non-slip gloves, and use a flashlight to avoid guesswork in dim areas. If you detect buzzing, burning smells, or overheating, stop immediately and seek professional help. These precautions protect you and your home while you diagnose typical cooling or defrost issues. The How To Refrigerator guidance stresses caution because unplugging and replugging can reset electronics, but improper handling may cause short circuits.
Diagnostic Checklist for ZLINE Refrigerators
Start with power and temperature controls, then move to airflow and seals. Verify the outlet works by plugging another device into the same circuit. Check the door gaskets for cracks or deformations that could cause cold air leakage. Inspect condenser coils for dust and debris visibility; loose debris can hinder heat exchange. Feel for frosting on the back panel—excess frost often signals defrost problems. Use a multimeter to test the thermostat wiring if temperatures stay inconsistent. Keeping a short checklist like this helps you stay organized and repeatable, reducing unnecessary trips for service.
Cleaning, Maintenance, and Extending Lifespan
Regular maintenance maintains efficiency and prolongs life. Clean condenser coils every 3–6 months using a brush or vacuum to remove dust without bending fins. Wipe the interior shelves with a mild solution to prevent odors and ensure sanitary conditions. Inspect door seals monthly and replace if you notice cracks or stiffness. Clear the defrost drain with a flexible pipe cleaner or warm water to prevent blockages that cause water leaks. These practices promote steady cooling and fewer spikes in energy use, a point emphasized by How To Refrigerator.
Energy Efficiency Considerations and Seasonal Prep
Seasonal shifts can affect performance. Keep the fridge away from heat sources, ensure proper air intake clearance, and avoid overloading shelves that impede airflow. Set the thermostat between 37–40°F (3–4°C) for fresh food and 0°F (-18°C) for frozen items, adjusting gradually to seasonal changes. When doors are opened frequently, every extra minute of airflow loss costs energy. Regular coil maintenance and proper door alignment noticeably improve efficiency over time, a finding echoed by the How To Refrigerator team.
Repair vs Replacement: Making the Call
Some faults are economical to repair, while others justify replacement. If the compressor is failing, the defrost heater is burned out, or the evaporator fan is worn beyond repair, weigh repair costs against a new unit’s price and energy efficiency gains. For older ZLINE fridges with frequent cooling cycles, replacement often offers better reliability and warranty protection. Remember to factor in potential downtime and installation costs when deciding. How To Refrigerator emphasizes a balanced approach to avoid unnecessary risk or expense.
Quick Weekend Maintenance Routine You Can Do Now
This practical routine keeps a ZLINE refrigerator operating smoothly without professional help. First, unplug, inspect door gaskets for wear, and clean the condenser coils. Next, check the interior temperature with a thermometer and adjust the thermostat if needed. Then, flush the defrost drain and inspect the drip pan for clogs or spills. Finally, plug back in and monitor for 24 hours to confirm stable cooling. The How To Refrigerator team recommends documenting any changes and scheduling quarterly quick checks to catch issues early.
Tools & Materials
- Gloves (rubber or nitrile)(Grip and protection when handling coils)
- Screwdriver set (Phillips and flat-head)(For panels and access doors)
- Multimeter(Test thermostat wiring and outlets)
- Soft brush / vacuum with brush attachment(Clean condenser coils safely)
- Mild detergent and microfiber cloths(Interior cleaning and odor removal)
- Defrost drain cleaner or pipe cleaner(Unblock drain if needed)
- Flashlight(Inspect hard-to-see areas behind panels)
- Measuring thermometer(Verify internal temperatures)
Steps
Estimated time: 1.5–2.5 hours
- 1
Power down and safety check
Unplug the refrigerator and move it away from walls if possible to access coils and panels. Verify dry hands and work area before touching any components. This initial step prevents shocks and accidental damage as you inspect.
Tip: Wait 60 seconds after unplugging before removing access panels to allow capacitors to discharge. - 2
Inspect door seals and gaskets
Visually inspect for cracks, tears, or stiff spots in the gaskets. A poor seal can cause cold air loss and frost buildup. Gently run a sheet of paper between door and gasket to test for air leakage.
Tip: Replace damaged gaskets promptly to restore efficiency. - 3
Check temperature settings
Use a calibrated thermometer to verify interior temperatures. If readings are off, adjust the thermostat incrementally and allow 2–6 hours to stabilize. Document the target range for future reference.
Tip: Avoid rapid temperature changes; small adjustments are more reliable. - 4
Clean condenser coils
From the grille or rear panel, remove dust and debris from condenser fins using a soft brush or vacuum. Do not bend fins; if you see significant clogging, proceed carefully and consider a pro if resistance is high.
Tip: Clean once or twice a year for most homes to maintain airflow. - 5
Inspect defrost system and drain
Check the defrost drain for clogs and clear with warm water or a pipe cleaner. If frost persists on evaporator coils, the defrost heater or timer could be faulty. Recheck after cleaning.
Tip: Never pour hot water directly on electrical components. - 6
Test airflow and fan operation
Listen for the evaporator and condenser fans; ensure smooth rotation without rubbing. If you hear unusual noises, stop and inspect for obstructions or loose components. Proper airflow is critical for steady cooling.
Tip: A simple cleaning can fix many noise-related issues. - 7
Reset controls and power cycle
After inspections, plug back in and allow 24 hours to confirm stable temperature. If electronics behaved oddly before, a reset can clear minor faults. Note any persistent error codes.
Tip: Keep a log of settings and error codes for service calls. - 8
Evaluate need for professional service
If cooling remains uneven, or you detect refrigerant leaks, call a licensed technician. Some problems, like significant compressor or sealed-system faults, require authorized service.
Tip: Do not attempt refrigerant handling yourself.
FAQ
What are the most common signs my ZLINE refrigerator needs service?
Most common signs include not cooling, frost buildup, unusual noises, and frequent cycling. Start with checking seals, airflow, and defrost functionality. If issues persist, test electrical components and consider professional service.
Common signs are not cooling, frost buildup, and odd noises. Start with seals and airflow, then check the defrost system before calling a technician.
Should I unplug the fridge to perform troubleshooting?
Yes. Always unplug before inspecting internal components to avoid shock hazards. Replug only after panels are securely in place and areas are dry.
Yes. Unplug before inspections to stay safe, then replug only after everything is dry and secured.
How often should condenser coils be cleaned on a ZLINE refrigerator?
Most households benefit from cleaning coils every 3–6 months, depending on environment. More dusty or pet-filled spaces may require more frequent cleaning.
Clean coils every 3 to 6 months, more often if you have dust or pets nearby.
What is the proper temperature range for ZLINE refrigerators?
Aim for 37–40°F (3–4°C) for fresh food and 0°F (-18°C) for frozen storage. Fine-tune within this range to balance energy use and safety.
Keep your fresh food at 37 to 40 degrees, and frozen items at zero degrees.
Can a clogged defrost drain cause water leaks inside the fridge?
Yes. A clogged defrost drain can cause water to back up and leak inside. Clear the drain and ensure the drip pan is positioned correctly.
A blocked defrost drain can lead to leaks; clear it and check the drip pan.
When should I replace a ZLINE refrigerator instead of repairing it?
If the repair cost rivals a new unit, or reliability and energy efficiency are poor, replacement is often the smarter long-term option.
If repairs are costly or the unit is unreliable, consider replacement.
Watch Video
Top Takeaways
- Follow a safe, structured diagnostic path.
- Regular coil cleaning boosts efficiency and lifespan.
- Know when to repair vs replace based on cost and reliability.
- Document symptoms to streamline any future service.