wsr57r18dm Refrigerator Error: Quick Fix & Diagnostic Guide
Investigate and resolve wsr57r18dm with a practical, homeowner-friendly guide that covers quick fixes, diagnostics, step-by-step repairs, safety tips, and professional help when needed.

wsr57r18dm signals a fault in the refrigerator's control or temperature sensing system. The most common quick fixes are a power reset (unplug for 60 seconds), inspecting sensor wiring, and validating sensor readings with a basic test. If the code persists, follow the diagnostic flow below or contact a professional for a precise sensor or control-board replacement.
What wsr57r18dm Means for Your Refrigerator
wsr57r18dm signals a fault in the refrigerator's control or temperature sensing system. According to How To Refrigerator, this code typically points to the sensing circuit or the main control board rather than a simple door seal issue. The How To Refrigerator team emphasizes that the code is a warning, not a guarantee of a single faulty part, so you should approach it with a systematic diagnostic mindset.
In practical terms, treat wsr57r18dm as a call to inspect the sensor harness, verify connections, and assess whether readings are within expected ranges. If readings are off, the sensor or its wiring is the likely culprit. If the readings are normal but the error persists, the control board may be the root cause. This nuance matters because replacing the wrong component can waste time and money.
The goal now is to separate transient errors from genuine faults. Start with a safe reset, then proceed through a structured flow that prioritizes user safety and clear, testable checks. If you are uncomfortable with electrical testing or if your fridge is still under warranty, contact a professional to avoid voiding coverage or causing further damage.
With the right approach, you can determine whether the fix is a quick homeowner reset, a sensor replacement, or a board-level repair.
Immediate Quick Fixes to Try
Before diving into disassembly, try these urgent, low-risk steps to see if the fault clears:
- Power reset: unplug the refrigerator for 60 seconds, then plug back in and wait 5 minutes for the compressor to stabilize.
- Check door and temperature: verify doors seal properly and the interior temperature is set within the recommended range (typically 35–38°F / 2–3°C).
- Inspect visible wiring: at the rear panel, reseat any loose connectors or unplug-then-plug back in plugs; ensure there are no exposed wires.
- Clear obvious airflow blockages: dust condenser coils and ensure fans can spin freely; restricted airflow can trigger sensor anomalies.
If wsr57r18dm remains after these quick fixes, proceed with the diagnostic flow below. Persistent codes and warm temperatures warrant deeper testing or professional help. How To Refrigerator can help estimate repair costs and point you toward the right service if needed.
Diagnostic Flow Overview
Symptoms observed with wsr57r18dm vary, but common patterns include a non-responsive compressor, unusual frost buildup, or fluctuating temperatures. Potential causes, ranked by likelihood, include:
- Temperature sensor fault — high
- Control board malfunction — high
- Defrost thermostat or heater issue — medium
- Damaged wiring or connectors — medium
- Blocked airflow or dirty condenser — low
Fixes are typically aligned to these causes:
- Replace or reseat the temperature sensor wiring — easy
- Test or replace the control board — medium to hard
- Replace defective defrost components — medium
- Repair damaged wiring harnesses — easy to hard depending on access
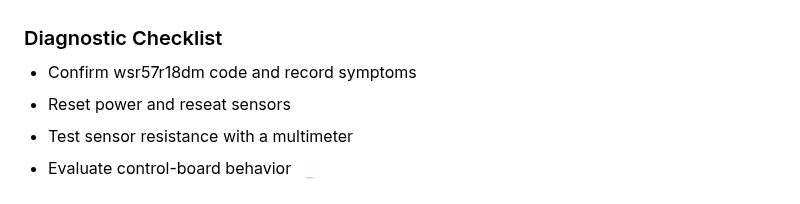
Step-by-Step Fix: Sensor and Controller Diagnostics
Below is a deeper, actionable guide focused on the most common cause: a faulty temperature sensor and/or control board. Follow these steps in order, only proceeding to the next step if the previous one did not resolve the issue. If you are unsure at any point, pause and seek professional help.
- Power down and unplug the unit to prevent any shock hazards. 2) Remove the rear access panel to locate the temperature sensor and its wiring harness. 3) Visually inspect for damaged wires or loose connectors; reseat all connections firmly. 4) With a multimeter, measure resistance of the sensor at room temperature and at fridge temperature; compare to the manufacturer’s specification. 5) If readings are out of range or if the sensor is physically damaged, replace the sensor. 6) After sensor replacement, reconnect the harness and power the unit back on; observe if the code clears. 7) If the code persists, test the control board by disconnecting non-essential sensors and performing a controlled reset to see if the board responds correctly. 8) Reassess cooling performance over 24 hours and keep a log of temperatures to determine if replacement was successful.
estimatedTime: 60-90 minutes
Steps
Estimated time: 60-90 minutes
- 1
Power down and access rear panel
Unplug the fridge and remove the rear access panel to reach the temperature sensor and wiring harness. This prevents electrical shocks and gives you visibility to connections.
Tip: Wear safety gloves and use a magnetic tray to hold small screws. - 2
Inspect sensor wiring
Look for loose, corroded, or damaged wires leading to the temperature sensor. Reseat connectors firmly and check for broken pins.
Tip: Take a quick photo before unplugging any connector to aid reassembly. - 3
Test sensor resistance
With a multimeter, measure resistance at room temperature and at fridge temperature. Compare readings to the manufacturer’s spec sheet.
Tip: If you don’t have a chart, note that drastic changes indicate a faulty sensor. - 4
Replace faulty sensor
If readings are out of spec or the sensor is damaged, install a new sensor following the manufacturer’s instructions for proper orientation and connector fit.
Tip: Power off during replacement and verify the new sensor is seated fully. - 5
Reset the system and power on
Reconnect all wiring, replace the rear panel, plug in the unit, and allow 10 minutes for stabilization.
Tip: Watch for the compressor starting normally; no unusual buzzing. - 6
Evaluate the control board
If the error persists, test the control board by isolating non-essential sensors and performing a controlled reset to observe board behavior.
Tip: Document error codes and timing for service diagnostics. - 7
Monitor performance
Over the next 24 hours, log interior temperatures and door behavior to determine if cooling has stabilized.
Tip: Keep perishables on the top shelf as a precaution. - 8
Decide on next steps
If temperatures remain unstable or codes recur, contact a professional service for board-level or sealed-system diagnostics.
Tip: Request a written estimate and ask about warranty coverage.
Diagnosis: Error code wsr57r18dm displayed, refrigerator not cooling properly
Possible Causes
- highTemperature sensor fault
- highControl board malfunction
- mediumDefrost thermostat/defrost heater issue
- mediumDamaged wiring or connectors
- lowBlocked airflow/dirty condenser
Fixes
- easyTest and replace temperature sensor if out of spec
- hardReset or replace control board if unresponsive
- mediumReplace defrost thermostat or heater if fault detected
- mediumRepair or replace damaged wiring harnesses
FAQ
What does wsr57r18dm mean on my refrigerator?
wsr57r18dm indicates a fault in the control or temperature sensing system. It usually points to the sensor wiring or the control board rather than a simple fix like a door seal. Follow the diagnostic steps to confirm the exact cause.
wsr57r18dm signals a control or sensor fault in your fridge. Start with a reset and sensor checks, then decide if you need a professional assessment.
Can I fix wsr57r18dm myself?
Some homeowner steps, like reset and sensor reseating, are safe to perform. More complex repairs, especially board replacements, should be done by a trained technician to avoid further damage or warranty issues.
Some fixes you can do, but for sensor or board replacements, call a pro.
What are typical costs for fixes related to this error?
Sensor replacement often ranges from a modest amount to a few hundred dollars, while control-board work can be higher. Labor costs vary by region and model, but expect a service call plus parts.
Expect sensor work to be cheaper than board replacements; get multiple estimates.
When should I call a professional?
If your unit remains warm after a reset, if you notice ice buildup or frost irregularities, or if you’re uncomfortable testing electrical components, contact a licensed appliance technician.
If it stays warm or you see frost issues, call a pro.
Is wsr57r18dm common across brands?
Error code formats vary by manufacturer. While the underlying fault type is similar (sensor or controller), the exact code name and recommended steps differ per brand.
Codes vary by brand; the general approach is sensor or controller checks.
Watch Video
Top Takeaways
- Identify wsr57r18dm as a sensor/board fault, not a door seal.
- Start with a safe reset, then test sensors before replacing parts.
- If the error recurs, consider professional sensor or board service.
- Keep a log of temperatures and technician notes for accuracy.