edr2rxd1 Error Code: Urgent Fridge Fix Guide
Urgent guide to edr2rxd1 fridge error code with fast diagnostics, step-by-step fixes, safety tips, and cost estimates. How To Refrigerator presents a crisp, action-oriented plan to restore cooling and prevent recurrence.

edr2rxd1 is a fridge error code that signals a fault in the cooling sensor, defrost system, or related controls. It typically appears with uneven temperatures, frost buildup, or ice in the freezer. Quick fixes include reseating sensors, inspecting for defrost-drain clogs, and running a controlled reset. If symptoms persist, call a professional from How To Refrigerator.
What EDR2RXD1 Means in Plain Language
edr2rxd1 is a diagnostic code that points to a fault in the fridge's sensing and defrost subsystems. In practical terms, this means the thermostat or thermistor may be reading incorrectly, the defrost heater isn't cycling as intended, or the control logic has detected an anomaly. According to How To Refrigerator, rapid temperature swings and persistent frost buildup are common indicators that the fault lies with sensors or defrost timing, rather than a simple door left ajar. Homeowners should treat this as urgent: if left unresolved, food safety can be compromised and energy use can spike. A quick visual check can reveal frost that indicates abnormal defrost behavior, while a malfunctioning sensor often manifests as inconsistent temperature readings on the fridge and freezer compartments.
Common symptoms include colder or warmer zones within the unit, ice buildup on evaporator coils, and erratic temperature control. If your unit maintains even temperatures but occasional frost appears, the code may reflect a sensor drift or a drift in defrost schedule rather than a total failure. In general, edr2rxd1 requires a methodical check of sensors, wiring, and the defrost system to restore reliable cooling. The How To Refrigerator team emphasizes safety first: unplug before poking around electrical components and never operate through visible electrical faults.
Typical Causes to Consider
The top suspects are (1) a defective thermistor or temperature sensor, (2) a clogged defrost drain leading to frost blockage and sensor misreads, and (3) a control board or defrost timer malfunction. The order reflects likelihood: sensors and drains are most common, boards are less frequent but heavier to replace. Each cause has distinct symptoms: a bad sensor often shows inconsistent readings, a clogged drain can cause frost that redirects airflow, and a faulty board may trigger multiple fault codes beyond edr2rxd1. For most homeowners, starting with the simplest, least invasive checks yields the fastest result. If you can confidently isolate the defrost drain and reseat connectors, you can save time and money and avoid unnecessary replacements.
Quick Checks You Can Do Safely
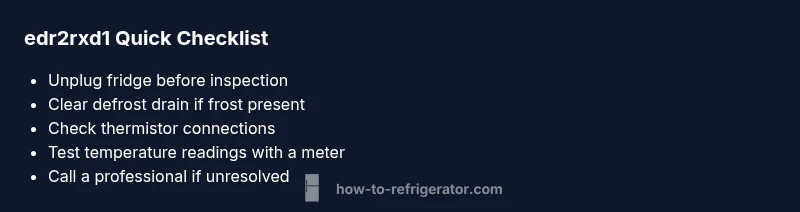
Before pulling components, ensure the unit is unplugged and the doors are closed. Start with non-destructive checks: verify door seals are intact, inspect the condenser coils for dirt buildup, and listen for abnormal fan noise. A visual inspection of the back of the fridge can reveal frost accumulation or condensation. If you notice frost near the evaporator or a frost-filled freezer cavity, the defrost system is a likely culprit. Reseating accessible connectors, checking thermistor connections, and clearing obvious blockages are safe first steps. Always document model numbers and symptoms to aid future diagnostics. If any step feels beyond your comfort level, stop and proceed to professional help to avoid safety risks.
In-Depth Diagnosis: The Most Likely Causes
With edr2rxd1, the two most probable culprits are a faulty sensor and a defrost drain issue. A failing thermistor can misread temperatures and trigger the control board to adjust cooling inaccurately. A clogged defrost drain can cause frost to pool and block airflow, making temperatures swing and the evaporator coil frost up. Less common but possible is a degraded control board or timer that mismanages defrost cycles. Each fix begins with simple tests: measure sensor resistance with a multimeter or perform a controlled defrost by turning the unit off for a short period. If the codes persist, it’s typically time to escalate to a professional.
Remember to handle items carefully if you need to move foods around; keeping a small cooler handy helps preserve perishables during diagnostic work. This is where How To Refrigerator’s guidance focuses on safety, accuracy, and efficiency so you can avoid unnecessary replacements and get back to normal cooling quickly.
Defrost-Drain Clearance: A Common Fast Fix
A clogged defrost drain is one of the quickest ways to set off frost buildup and sensor drift, triggering the edr2rxd1 fault in many units. Start by locating the defrost drain (usually a small pipe at the back of the fridge or bottom of the freezer) and clearing visible clogs. Flush with warm water and a non-abrasive pipe cleaner if needed. If frost remains or the drain hose is kinked, straighten the line and re-test. This procedure often resolves the issue without needing to replace components, and it is a favorite first step for DIY repairs—the kind of practical approach you’ll see in How To Refrigerator guides.
When to Go Pro: Safety, Costs, and Limits
If the drain is clear but temperatures remain unstable, or if you’re uncomfortable opening electrical panels, it’s time to call a pro. Professional service typically costs in a broad range depending on your region, parts required, and whether a diagnostic visit is included. Expect a general cost bracket that covers diagnosis plus labor; parts can add to the bill. In urgent cases, many homeowners see better results faster when a certified technician tests the sensor wiring, test leads, and the control board under load conditions. How To Refrigerator notes that investing in a quick, professional assessment can prevent further food spoilage and expensive part replacements.
Prevention: Simple Habits That Help EdR2rXd1 Stay Sorted
Preventive maintenance should become part of your routine: clean condenser coils every 3-6 months, ensure door gaskets seal tightly, and avoid overloading shelves which obstruct proper airflow. A regular defrost cycle, if your unit uses it, reduces frost buildup. Keep the interior clean and dry, and check shelves and air vents for obstructions. If you notice repeated frost or erratic temperature, address the underlying defrost or sensor issue promptly. The goal is to minimize frost formation and maintain stable temperatures, which reduces energy use and extends the life of compressor parts.
Steps
Estimated time: 90-120 minutes
- 1
Power down safely
Unplug the fridge and remove items from the top shelf if needed. Wait for 5-10 minutes to allow internal circuits to reset. This reduces the risk of electric shock when you begin inspection.
Tip: Always unplug before handling electrical components. - 2
Access the defrost drain
Open the freezer and locate the defrost drain line. Clear away any frost around the entry point with a hair dryer on low heat or a warm cloth, being careful not to melt plastic.
Tip: Use gloves; hot water can help loosen ice but avoid splashing water on electrical parts. - 3
Clear the drain and test flow
Flush the drain with warm water (and a mild cleaning solution if needed) until water flows freely. Reconnect the drain hose securely and check for leaks.
Tip: Ensure the drain hose is not kinked and that the freezer defrost drain is allowing proper drainage. - 4
Check the thermistor wiring
Inspect the thermistor sensor and its wiring for corrosion, loose connections, or damage. If you have a multimeter, test the resistance according to the service manual.
Tip: If you’re unsure about multimeter testing, skip to professional help. - 5
Reset and monitor
Plug the unit back in, set to a normal temperature, and monitor for several hours. Note any abnormal temperature swings or recurring frost.
Tip: Keep a log of temperatures in both compartments for 24-48 hours. - 6
Call a professional if unresolved
If the fault persists after the basic steps, schedule service with a qualified technician. Bring model information, error code, and a description of symptoms for faster diagnosis.
Tip: Costs often fall in a broad range; expect diagnostic fees plus parts and labor.
Diagnosis: Error code edr2rxd1 displayed on fridge control panel with erratic cooling
Possible Causes
- highClogged defrost drain causing frost buildup and sensor misread
- mediumFaulty thermistor or temperature sensor
- lowControl board or defrost timer malfunction
Fixes
- easyClear defrost drain and perform a controlled defrost cycle
- mediumTest/replace thermistor sensor
- hardInspect/replace control board or timer
FAQ
What does edr2rxd1 mean on my fridge?
EDR2RXD1 signals a fault in the fridge's sensor or defrost system. It usually accompanies temperature fluctuations or frost buildup. Start with safe checks and inspect the defrost drain and thermistor before considering board replacement.
EDR2RXD1 is a sensor or defrost fault. Check the drain and sensor first, and prevent further damage by unplugging before inspections.
Can I fix edr2rxd1 myself?
Basic fixes like clearing the defrost drain and reseating connectors can be DIY, but sensor tests and board repairs are best left to pros to avoid safety risks.
Some fixes are DIY, but sensors and boards should be handled by a pro.
What are the common signs of this code?
Uneven cooling, frost buildup around the evaporator, and odd temperature swings are common indicators that the defrost or sensor system is at fault.
Look for frost and temperature swings to confirm the issue.
How much does a repair typically cost?
Repair costs vary with parts and labor, but you can expect a broad range depending on your location and whether a diagnostic visit is included.
Costs vary; expect a broad range for diagnosis, parts, and labor.
When should I call a professional?
If basic checks don’t resolve the issue or you’re uncomfortable handling electrical components, call a licensed technician for a precise diagnosis and safe repair.
Call a professional if basic checks fail or you’re unsure.
Watch Video
Top Takeaways
- Act quickly to diagnose edr2rxd1 with sensor and defrost checks
- Prioritize simple fixes (drain clearance) before replacing parts
- Unplug and test safety steps before any repair
- Costs for repairs are estimates; expect ranges for labor and parts
- Engage a licensed pro when tests indicate board or refrigerant issues