Why Do Refrigerators Smell When Unplugged? Causes, Fixes, and Prevention
Discover why refrigerators smell when unplugged and learn practical steps to identify odor sources, clean safely, air out the cabinet, and prevent future musty smells.

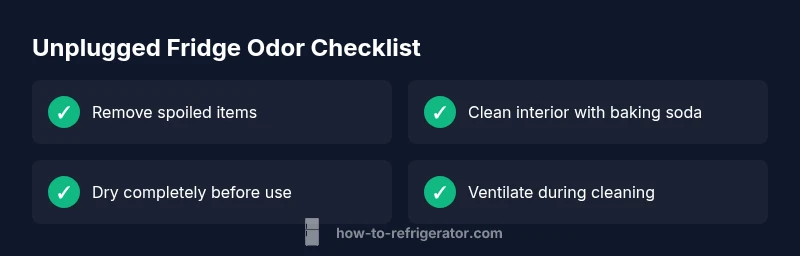
Unplugged refrigerators often smell due to spoiled food, mold, or stagnant moisture. Start by safely removing perishables, then clean the interior with a baking-soda solution, rinse, and dry completely. Air out the cabinet before replugging. If the odor returns, consult a repair professional for deeper inspection.
Why do refrigerators smell when unplugged
If you unplug your refrigerator and notice a strong odor, you’re not alone. The question most homeowners ask is why do refrigerators smell when unplugged, and what should be done about it quickly and safely? The short answer is that scents typically come from organic material left inside the cavity, mold or mildew in hidden corners, or moisture that encourages bacterial growth when the cooling system isn’t actively circulating air. According to How To Refrigerator, odors are usually the result of what has been kept inside the fridge rather than the appliance’s cooling components. Understanding this distinction helps you act fast without unnecessary repairs. When you’re dealing with a smell, you want practical steps you can take today, not vague advice. This guide is written for homeowners who need clear, actionable troubleshooting that emphasizes safety and predictable results. The goal is to identify odor sources, prevent them from returning, and restore fresh air inside your refrigerator as soon as possible.
Common odor sources inside an unplugged refrigerator
Odors after unplugging are typically linked to a few reliable sources. First, spoiled or partially eaten items—especially dairy, meat, and produce—that were forgotten or hidden in crisper drawers. These items release volatile compounds that become noticeable once air stops circulating. Mold and mildew on shelves, gaskets, or inside the drip pan are another frequent culprit, growing where moisture lingers. The absorbent plastic components inside shelves can trap odors if spills aren’t cleaned promptly. A third source is moisture buildup behind humid areas like door seals, especially if the fridge was left slightly damp during cleaning or maintenance. Finally, residues from spills or leaks can soak into plastic or fabric-like components, producing musty notes that remain even after some cleaning. By keeping an eye on these sources, you can spot odor origins more quickly and plan targeted cleaning.
How unplugging affects odor development
When a fridge is unplugged, cooling stops and the interior can warm to ambient room temperature, creating an environment ripe for odor amplification. Warm, stagnant air allows smells from spoiled food or mildew to spread more quickly throughout the cavity. Humidity levels can rise inside if doors remain closed for extended periods, promoting mold growth on gaskets or shelves. Condensation can collect in the drip pan or on interior surfaces, providing a microenvironment where bacteria thrive. The absence of a functioning evaporator fan means air exchange is slower, so odors linger longer than they would with normal operation. Understanding this dynamic helps explain why odors can become noticeable after unplugging even if the fridge was previously only mildly smelly.
Quick checks you can do before deep cleaning
Before you reach for cleaners, perform quick checks to narrow down odor sources. First, unplug the unit safely and remove all perishable items to inspect contents. Check shelves and drawers for spoiled foods or liquids and discard as needed. Inspect the door gaskets for cracks or grime that might harbor odor. Look at the drip pan and drain tube for stagnant liquid or mold. Smell each area separately to locate the strongest odor source. If a sour smell persists around the seals or behind panels, you may need to remove covers to inspect behind-the-scenes areas. Documenting what you find will help during deeper cleaning or when consulting a professional.
Cleaning and deodorizing: a practical approach (high level)
A thorough cleaning is the foundation of removing odors. Start by removing all removable shelves and drawers, then wash them with warm water and mild dish soap. Use a baking-soda solution (about 1/2 cup baking soda in a gallon of warm water) to wipe interior surfaces; rinse with clean water and dry thoroughly. For tougher odors, you can sprinkle baking soda on interior surfaces and let it sit for 15–60 minutes before wiping away. After cleaning, prop the doors open in a well-ventilated area to dry and air out. Avoid mixing cleaners—do not combine ammonia-based cleaners with bleach, as this can create hazardous fumes. Keeping the area ventilated during the process is essential. Once dry, reassemble and replug when you’re ready to resume use.
Inspect hidden odor sources and components
Not all odor sources are immediately visible. Behind the crisper and under shelves, moisture can accumulate and mold can take hold. Check the drip pan for standing liquid and a musty smell; clean or replace if necessary. If your freezer compartment is involved, ice buildup or frost can interact with odors and transfer them to the rest of the unit. Inspect door seals closely for hairline cracks that may trap food particles. If you notice persistent odors that can’t be traced to obvious spills, the issue may involve the evaporator coil or drain system, which typically requires professional service.
Prevention strategies to keep odors at bay
After you finish cleaning, establish simple prevention habits to minimize odors in the future. Regularly inspect for spoiled items and dispose of them promptly. Clean shelves and drawers at regular intervals, especially after spills. Keep baking soda or activated charcoal in the fridge when storing items with strong odors. Maintain good airflow by not overfilling the unit and ensuring door seals seal tightly. Finally, clean up spills immediately to prevent sticky residues from absorbing odors and transferring them to other foods. A proactive approach reduces the likelihood of smells returning.
When to contact a professional and safety reminders
If you notice persistent odors after thorough cleaning, or if you suspect mold behind panels, investigate a possible drain issue, or suspect a refrigerant-related problem, contact a professional appliance technician. Do not attempt to open sealed refrigeration components or pressurize lines yourself. For safety, unplug the appliance whenever you are inspecting or cleaning interior components, wear gloves, and use eye protection if you are using cleaners. If there is any sign of a refrigerant leak, evacuate the area and seek emergency help. The How To Refrigerator team emphasizes safety and stepwise troubleshooting to avoid damage or injury.
Steps
Estimated time: 60-90 minutes
- 1
Power down and prepare
Safely unplug the fridge and clear the surrounding area. Gather cleaning supplies, towels, and a trash bag. This initial step ensures you can work comfortably and safely while the unit is off.
Tip: Wear gloves to protect your hands from cleaning solutions and any hidden residues. - 2
Remove contents and shelves
Take out all perishable foods and removable shelves. Place items in a cooler if you need to use the cabinet briefly. Having a clean slate helps you locate the odor source more easily.
Tip: Label shelves to speed reassembly later and avoid misplacing items. - 3
Inspect for spoiled items
Check every item’s smell, color, and texture. Toss anything spoiled and wipe or rinse containers before returning them to the unit later. This step reduces the source of future odors.
Tip: Dispose of food promptly to prevent cross-contamination. - 4
Clean interior surfaces
Wipe walls, corners, and shelves with warm soapy water, then rinse. Use the baking-soda solution for stubborn spots. This neutralizes acids and reduces lingering odors.
Tip: Avoid abrasive scrubbers that could scratch interior surfaces. - 5
Deodorize and dry
Sprinkle baking soda or set out activated charcoal for several hours to absorb odors. Rinse again if needed and dry all surfaces thoroughly to prevent new mildew growth.
Tip: Keep doors open slightly to accelerate drying in a well-ventilated area. - 6
Reassemble and replug
Return shelves, drawers, and items to the fridge. Ensure gaskets are clean and aligned. Plug the unit back in and allow it to reach normal temperature before restocking fully.
Tip: Avoid loading the fridge immediately; give it time to stabilize. - 7
Test and monitor
Close the door and monitor for any persistent smells. If odors persist, consider repeating the cleaning cycle or extending airing-out time. Document findings for future reference.
Tip: If odors return, schedule a professional assessment. - 8
Safety wrap-up
Never mix cleaners such as bleach and ammonia. If you suspect a refrigerant issue or visible mold behind panels, contact a professional. Maintain safe work practices at all times.
Tip: Keep a clear exit path in case of fumes or spills. - 9
Final checks and prevention
Do a final wipe-down, ensure the unit is completely dry, and stock perishable items with proper rotation. Implement regular maintenance to prevent future odors.
Tip: Create a simple routine: monthly wipe-downs and quarterly deep clean.
Diagnosis: Fridge smells after unplugging
Possible Causes
- highSpoiled or decaying food inside fridge/freezer
- highMold or mildew growth on shelves, gaskets, or drip pan
- mediumMoisture trapped behind panels causing musty odor
- lowResidues from spills absorbed into plastics
Fixes
- easyRemove all items and sanitize interior with baking soda solution; discard spoiled food
- easyInspect and clean drip pan and rubber door seals; wipe with mild cleaner
- easyAir out the unit with doors open in a ventilated area for several hours
- mediumIf odor persists or you suspect behind-panel issues, consider professional service
FAQ
Why does a refrigerator smell after unplugging even if I cleaned it recently?
Odors can recur if hidden mold, spoilage, or moisture sources weren’t fully addressed. Unplugging can amplify these smells as air stops circulating. A thorough check of shelves, gaskets, and the drip pan usually resolves most cases.
If you unplug and still smell something, check for hidden mold and ensure all surfaces are clean and dry.
Is unplugged fridge odor dangerous to health?
Most odors come from mold, mildew, or spoiled food. While the smell itself isn’t dangerous, mold exposure can irritate the lungs. Ventilate the area and clean thoroughly; seek professional help if you suspect widespread mold.
Odors can indicate mold growth, so ventilation and cleaning are important; consult a professional if symptoms persist.
Should I throw away all food before cleaning?
Yes—remove all perishable items to inspect for spoilage and to prevent contaminating fresh food. You can store non-perishables safely for later use while you clean.
Take out perishable items first to avoid spreading odors or mold while you clean.
How long should I air out the fridge after cleaning?
Air out for several hours, ideally with doors open in a well-ventilated area until the interior is completely dry and odors have dissipated.
Give it time to dry and ventilate; longer airing usually means fewer lingering smells.
Can I use bleach or strong cleaners inside a fridge?
Strong cleaners shouldn’t be used inside a fridge as residues can contaminate food. Use mild cleaners or a baking-soda solution and rinse well.
Stick to mild cleaners like baking soda solutions to keep foods safe.
When should I call a professional?
If the odor persists after thorough cleaning, or you suspect hidden mold behind panels or a refrigerant issue, contact a professional appliance technician.
If odors persist after cleaning or you fear a refrigerant issue, seek professional help.
Watch Video
Top Takeaways
- Act quickly to remove spoiled items
- Clean with a baking-soda solution for safe, effective deodorizing
- Ventilate and dry thoroughly to prevent mold
- If odors persist, seek professional help promptly