Turbo Air Refrigerator Troubleshooting and Maintenance
Learn how to diagnose and fix common issues with turbo air refrigerators. This step-by-step guide covers symptoms, safe troubleshooting, maintenance tips, and when to call a pro.

A turbo air refrigerator uses enhanced airflow and high-efficiency components to cool faster and maintain stable temperatures. Common signs of trouble include uneven cooling, frost buildup, or unusual noises. This guide covers quick checks, safe diagnostics, and maintenance steps you can perform at home to improve performance.
What is a Turbo Air Refrigerator?
Turbo air refrigerator is a term used to describe models that emphasize enhanced airflow and efficient cooling cycles. The design relies on a more robust evaporator, additional fans, and optimized ducting to push cold air evenly through compartments. The goal is to reduce temperature variations, shorten pre-cooling times, and keep foods fresher with less energy. The How To Refrigerator team found that turbo air design analyzes airflow paths to maximize cooling efficiency while limiting compressor cycling when doors are opened frequently. Real-world results depend on vent placement, door seals, and coil cleanliness. For homeowners, understanding this helps diagnose temperature inconsistencies, frost buildup, and odd noises. In the sections that follow, you’ll find practical, step-by-step guidance you can perform at home to improve performance without expensive repairs.
Common Symptoms and Causes
Not all turbo air refrigerators perform identically, but several issues recur. If any shelf areas are noticeably warmer than others, or if frost forms on the evaporator, this points to airflow or defrost problems. Uneven cooling often happens when door gaskets are loose or dirty, obstructed vents restrict airflow, or condenser coils are clogged. Unusual buzzing, humming, or rattling can indicate a failing fan motor or a loose component. Water leaks around the base or inside shelves may signal a blocked defrost drain or a clogged condensate path. Based on How To Refrigerator research, most performance issues stem from airflow restrictions, faulty defrost cycles, or dirty coils. Early diagnosis reduces the risk of more serious failures and guides safe DIY fixes or timely professional service.
Safe Troubleshooting Steps
Before touching any components, unplug the unit and allow the compressor to rest for a few minutes. Then perform safe, non-invasive checks that do not require refrigerant handling. Inspect door seals for cracks or gaps and replace worn gaskets if necessary. Look inside the condenser coils (usually on the back or bottom) and clean away dust with a soft brush or vacuum. Check for frost buildup on the evaporator; if frost is present, a defrost issue is likely. Listen for the evaporator fan when the freezer is opened; if you don’t hear it, the fan may be faulty or blocked. Verify the thermostat and temperature control settings are correct and not set to the highest temperature. Ensure air vents are unobstructed by items inside the fridge. After each check, plug the unit back in and test whether temps stabilize. If problems persist, stop DIY checks and contact a technician.
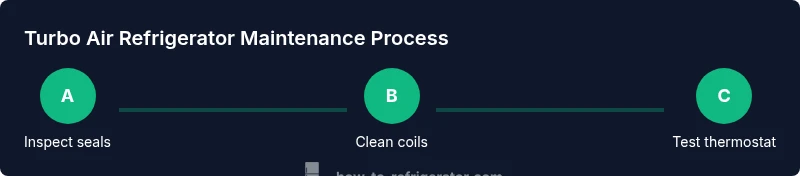
Maintenance and Practical Repairs You Can Do
Regular maintenance improves reliability and efficiency. Schedule monthly coil cleaning, especially in households with pets or heavy usage. Wipe door seals with a damp cloth and inspect for wear; replace gaskets that show cracking or deformation. Keep the interior organized so air can circulate freely. Replace the air filter if your model uses one, and ensure the drain pan and drain line are clear. Calibrate interior temperatures using a basic thermometer placed in the middle shelf area, and adjust the thermostat slowly if needed. Document any recurring symptoms to help a technician diagnose faster later on. Remember, simple fixes performed correctly can extend the life of a turbo air refrigerator without costly repairs. The goal is steady temperatures and energy-efficient operation.
When to Seek Professional Help
If your self-checks do not restore even cooling, or you hear persistent noises, a licensed technician should inspect the system for refrigerant issues, compressor health, or faulty defrost components. Do not attempt to recharge refrigerant or replace the compressor yourself; these tasks require specialized tools and training. In many regions, timely service can prevent larger problems and loss of food. Keep your model’s manual handy and note error codes or indicators since this information speeds up diagnosis and repair. A professional service visit may still be warranted for turbo air refrigerators with persistent temperature gradients or recurring frost outgrowth. Ongoing maintenance, however, remains the best defense against future problems.
Tools & Materials
- Phillips head screwdriver(for removing panels and screws)
- Flathead screwdriver(for prying plastic covers gently)
- Nut driver set(to tighten/loosen connectors)
- Multimeter(to test thermostat/controls and electrical components)
- Soft cloths(for wiping dust and coils)
- Vacuum with narrow nozzle(to clean condenser coils)
- Small flashlight(to inspect tight spaces and coil areas)
- Safety gloves(protect hands during inspection)
- Towels or a shallow tray(catch water during defrost checks)
Steps
Estimated time: 60-90 minutes
- 1
Power down and unplug
Unplug the refrigerator and wait a few minutes before touching anything. This reduces the risk of electric shock and lets the compressor settle. If you must move the unit, unplug again after any relocation to avoid cord strain.
Tip: If you need to unplug from behind a wall, consider using a cord length extension temporarily and ensure it does not create a tripping hazard. - 2
Inspect door seals
Close the doors firmly and inspect gaskets for cracks or deformation. A worn seal can let warm air in, causing temperature fluctuations. Clean seals with mild soap and water; replace warped gaskets promptly.
Tip: A simple test is to close the door on a piece of paper; if it slides out easily, the seal may be worn. - 3
Clean condenser coils
Locate the condenser coils (back or bottom). Gently vacuum or brush away dust and debris until they shine. Dirty coils force the compressor to work harder, reducing cooling efficiency.
Tip: Do not use water directly on electrical components and avoid bending delicate fins. - 4
Check evaporator frost and defrost system
Look for frost build-up on the evaporator; excessive frost indicates a defrost problem. If frost exists, set a safe defrost restart by following the owner's manual or temporarily warming the area to aid melt-off. Do not attempt to manually thaw refrigerant lines.
Tip: A frost-free model should clear frost within a few hours after a proper defrost cycle. - 5
Test evaporator fan operation
With the freezer door open, listen for the evaporator fan running when air should be circulating. If you don’t hear it, the fan may be faulty or blocked by ice. Inspect for loose connections behind the panel.
Tip: If safe to do so, rotate the fan blades by hand to check for resistance. - 6
Check thermostat and temperature controls
Ensure the thermostat is set to a cold enough level and that the temperature control knob is functioning. A faulty control can prevent proper cooling; replacing the control board or sensor is often the fix.
Tip: Record the current settings before attempting adjustments so you can revert if needed. - 7
Verify airflow paths and vent clearance
Ensure air vents inside the fridge aren’t blocked by groceries. Rearrange items to maintain airflow and avoid heat pockets. Blocked vents can cause warm spots even with a cold compressor.
Tip: Place taller items to the rear so they do not obstruct airflow near the evaporator. - 8
Reassemble and run a temperature test
Reconnect any panels, plug the unit back in, and monitor temperatures for several hours. Use a fridge thermometer to verify that the air is circulating evenly and that both compartments reach target ranges.
Tip: Keep food safely stored during the test and avoid opening the doors excessively. - 9
Document symptoms and plan next steps
If issues persist, log dates, temperatures, noises, and observed frost areas. This helps a technician diagnose quickly and correctly. Prepare a brief summary to share during service.
Tip: Share photos of frost and seal wear to speed up the inspection.
FAQ
What is a turbo air refrigerator?
A turbo air refrigerator uses enhanced airflow and efficient cycles to cool quickly and maintain even temperatures. This design relies on additional fans and optimized ducting to improve performance.
A turbo air fridge cools faster and more evenly thanks to better air circulation.
Why is my turbo air refrigerator not cooling evenly?
Uneven cooling is usually caused by a worn door seal, blocked vents, or dirty condenser coils. The defrost system can also fail, creating frost in unexpected places.
Uneven cooling often comes from doors, vents, or coils being blocked or dirty.
How can I tell if the defrost system is failing?
Look for frost buildup on the evaporator, ice accumulation in unusual spots, or water pooling inside the fridge after defrost cycles. These are common signs of defrost issues.
Frost where it shouldn't be is a sign the defrost system may be failing.
Is it safe to operate with frost buildup?
Small frost buildup is normal during use, but large or persistent frost reduces efficiency and can indicate a defrost or airflow problem. Address it promptly.
A lot of frost isn’t normal and should be checked.
Can I fix a noisy turbo air refrigerator myself?
Some noises stem from loose panels, a blocked fan, or debris in the condenser area. Others involve the compressor or refrigerant, which require a pro.
If it’s a buzzing or rattling from the fan area, check the fan first; serious compressor noises need a tech.
When should I replace a turbo air refrigerator?
Replacement may be considered if persistent cooling problems recur after professional service, or energy costs remain high despite maintenance.
If problems keep coming back after service, replacement could be more economical.
Watch Video
Top Takeaways
- Identify the root cause by noting temps and frost patterns
- Regular coil cleaning improves efficiency
- Check door seals and vents first for most issues
- Call a pro for refrigerant or compressor problems