Sub Zero Refrigerator Repair: DIY Troubleshooting Guide
Learn to diagnose and fix common Sub Zero refrigerator issues with practical, homeowner-friendly steps. This guide covers safety, defrost drains, door seals, condenser coils, sensors, and guidance on when to call a pro.

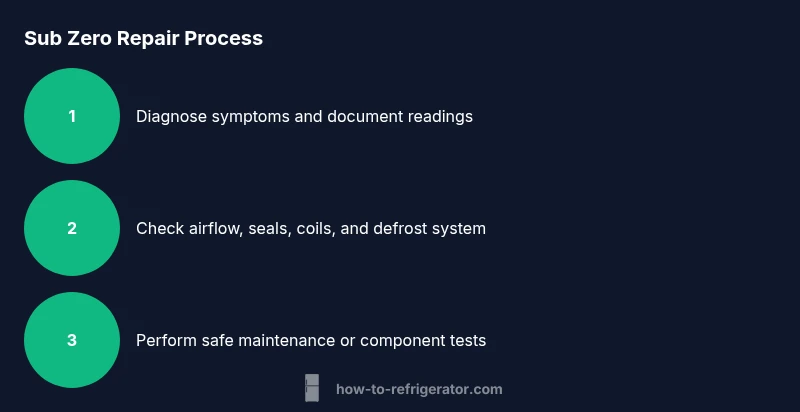
With this guide, you’ll diagnose and troubleshoot common Sub Zero refrigerator repair issues, from frost buildup to not cooling, and learn safe, homeowner-friendly steps before calling a pro. You’ll verify power, inspect coils and seals, test sensors, and perform light maintenance. This quick start helps you decide if a DIY fix is feasible or if professional service is needed.
What makes Sub Zero refrigerators unique
Sub Zero refrigerators are renowned for their dual cooling systems, tight door seals, and sophisticated electronic controls. This combination delivers precise temperature management and excellent humidity control, but it also means failure modes can be more nuanced than standard models. According to How To Refrigerator, homeowners should approach Sub Zero repair with a clear diagnostic plan rather than guessing. Common issues include inconsistent cooling, frost buildup on evaporator coils, condensate drainage problems, and unusual fan noises. Because the systems are engineered with sensors and microcontrollers, a careful, methodical approach reduces risk and increases the likelihood of a successful DIY fix. In this section we’ll outline typical failure patterns and the initial checks you can perform safely before deciding whether a professional service is necessary. This approach emphasizes safety, documentation, and incremental testing to avoid unnecessary part replacements.
Safety and planning before you begin
Safety is the foundation of any appliance repair, especially with high-end systems like Sub Zero. Before touching any components, unplug the unit or switch off the dedicated circuit and allow the compressor to come to a rest. Wear non-slip footwear and use insulated gloves when handling sharp edges or metal panels. Keep a clear workspace and arrange tools within arm’s reach. Document model numbers, warranty status, and recent maintenance. If your unit uses refrigerant lines or sealed systems, avoid opening sealed components unless you are trained to handle refrigerants. In short, plan your workflow, minimize risk, and work in a well-lit, ventilated area so you can monitor any unusual smells or noises without hazard. Remember, if you feel uncertain at any step, pause and seek professional guidance.
Diagnostics: cooling vs frost and why it matters
Not cooling and frost buildup aren’t the same problem and require different checks. Start by confirming power is present to the unit and that the display is active. Next, check the evaporator coils for frost buildup; heavy frost usually indicates a defrost issue or sealed system problem, whereas no frost with warm compartments points to airflow or thermostat faults. Listen for the condenser fan running smoothly; a grinding or humming sound can indicate motor wear or obstruction. Use a thermometer to verify compartment temperatures and compare them to the manufacturer’s specification. Document your readings, including date and time, to track patterns over a few days. This structured approach helps you determine whether you’re facing a simple airflow issue or a deeper refrigeration system fault.
Visual checks and measurements you can safely perform
A careful visual inspection often reveals the easiest fixes. Inspect door gaskets for cracks or deformations that prevent a proper seal, and note any gaps around hinge areas. Check the condenser coils for dirt or dust buildup from the back or bottom access area and remove debris with a soft brush or cloth. Look for ice accumulation in the freezer compartment that might indicate a defrost heater problem. Use a flashlight to inspect wiring at the control board edges for loose connectors or burn marks, and unplug before touching any terminals. Finally, verify that drip pans and drainage tubes are clear of obstructions. These routine checks help you identify issues without replacing parts prematurely.
Defrost system basics: heater, timer, and drain
Frost in the evaporator often signals a defrost system fault. The defrost cycle relies on a timer or a control board to periodically heat the evaporator and melt frost. If frost appears during normal operation, the defrost heater, defrost thermostat, or timer may be malfunctioning. Inspect the defrost drain for clogs that cause water to pool and refreeze. Be mindful that some Sub Zero models integrate electronic defrost controls that require diagnostic tools. If you notice frequent frost or pooling water, consider advanced checks or scheduling a professional evaluation, as tampering with defrost components can risk damage to cooling performance and safety.
Maintenance routines to prevent problems
Regular maintenance helps keep Sub Zero fridges running smoothly. Clean condenser coils every 3–6 months, especially in dusty environments, and replace air filters if your model uses them. Check door seals weekly for wear and replace if you observe cracking or stiff sections. Keep interior humidity in balance by organizing perishables, ensuring proper airflow around vents, and avoiding overpacking. Periodically test the temperature sensors and look for error codes on the display. Finally, maintain a service log for dates, readings, and any parts replaced so you can spot patterns early. Consistent maintenance reduces the likelihood of unexpected failures and extends the life of the appliance.
DIY vs pro: decision framework
Some Sub Zero repairs are appropriate for DIY, particularly non-sealed-system tasks like gasket replacement, coil cleaning, and fan inspection. More complex issues—refrigerant leaks, compressor failures, or electronics faults—typically require a licensed professional. Establish a threshold: if you can clearly identify a single failed component with no risk to refrigerant handling, you may proceed with caution. If the service requires opening sealed refrigerant lines, refrigerant recovery, or specialized test equipment, consult a certified technician. Use the diagnostic notes you collected to share a precise symptom description, history, and test results when you call for service. This approach minimizes downtime and ensures you’re addressing the right problem from the start.
How to plan your repair project for Sub Zero
Start by creating a simple project plan: define the problem, list known symptoms, gather essential tools, and identify replacement parts if needed. Translate your findings into a clear checklist with 8–12 concrete actions and estimated times for each. Schedule work during a low-usage period to minimize spoilage and ensure you have adequate lighting. If you anticipate a longer repair window, prepare a backup cooling option such as a cooler with ice packs. Finally, document every step, including readings and part numbers, so future maintenance is easier. This organized approach helps homeowners stay focused and reduces the chance of missing critical steps.
Authority sources and next steps
For evidence-based guidance, refer to established safety and appliance-handling resources. How To Refrigerator recommends checking model-specific manuals and safety advisories before opening any panels. How To Refrigerator Analysis, 2026 supports a methodical diagnostic workflow rather than guesswork. External authorities offer additional context on appliance safety, refrigerant handling, and energy efficiency. Key sources: https://www.energy.gov, https://www.consumer.ftc.gov/articles/how-to-keep-your-appliances-running, https://www.osha.gov. If you encounter issues beyond basic maintenance, contact a licensed technician for a professional assessment and avoid attempting repairs that involve refrigerants or high-voltage components without proper training.
Tools & Materials
- Screwdriver set (Phillips & flathead)(Assorted sizes; include a magnetic #2 Phillips and a 1/4 inch flathead.)
- Multimeter(For testing sensors and continuity.)
- Non-contact voltage tester(Verify power before touching any electrical components.)
- Soft cloth or microfiber towel(For cleaning and dry surfaces, avoid leaving fibers in coils.)
- Gloves and safety glasses(Protect hands and eyes during panel removal.)
- Flashlight (headlamp if possible)(Illumination for dark compartment areas.)
- Door gasket conditioner or replacement gasket(Optional if the seal is worn or cracked.)
- Soft brush or microfiber brush(Clean dust from condenser coils safely.)
Steps
Estimated time: 60-120 minutes
- 1
Power down and locate model information
Unplug the unit or switch off the dedicated circuit. Locate the model and serial numbers from the nameplate to ensure you buy compatible parts. This prevents misfit replacements and warranty voiding.
Tip: Take a photo of the model tag for quick reference later. - 2
Access critical panels safely
Remove any grille or door panels as required by your model to access coils and the evaporator area. Keep track of screws and their locations. Re-seat panels gently to avoid bending wires.
Tip: Work on a clear, uncluttered surface to prevent lost hardware. - 3
Check door seals and airflow
Inspect gaskets for cracks, tears, or deformation. Test door seals by closing the door on a dollar bill or a piece of paper; if you can pull it out easily, the seal needs replacement or adjustment.
Tip: A poor seal can dramatically affect cooling efficiency. - 4
Evaluate condenser and evaporator fans
Listen for smooth operation and look for ice or frost buildup on evaporator coils. If the evaporator is frosted, it may indicate a defrost system issue or a thermostat fault.
Tip: Disabled or dirty fans reduce airflow and cooling performance. - 5
Test sensors and thermostat
With a multimeter, test resistance values of the temperature sensors as per the model manual. Compare readings to normal ranges and verify the thermostat is cycling correctly.
Tip: If readings are wildly out of spec, replace the sensor or thermostat as needed. - 6
Inspect defrost components
Locate the defrost heater, timer or control board. Check for blown fuses or faulty timers, and inspect the defrost drain for clogs that cause water pooling and refreezing.
Tip: Defrost system faults often manifest as frost and water leakage. - 7
Clean and reassemble
Clean coils and vents, reassemble panels, and restore power. Wipe down interior surfaces and ensure no loose wires are present before powering up.
Tip: A clean, orderly rebuild reduces vibration and future issues. - 8
Test operation and document results
Plug in the unit, set temperatures to desired ranges, and monitor for a full cooling cycle. Record temperature readings, noises, and any abnormal behavior for future reference.
Tip: Keep a running log to spot trends and guide future maintenance.
FAQ
What are the most common Sub Zero repair issues for homeowners?
Not cooling, frost buildup, noisy fans, and door seal wear are frequent problems. Start with power checks, airflow, and gasket integrity before considering more complex repairs.
Common issues include not cooling, frost buildup, and noisy fans. Start with power and airflow checks before deeper inspection.
Can I fix a defrost drain problem myself?
Yes, clearing a clogged defrost drain is often DIY-friendly. Use a non-corrosive drain snake or flexible wire to clear the tube and recheck for standing water after a cycle.
You can usually clear a defrost drain with a flexible wire or drain snake and recheck after a cycle.
Is it safe to work on refrigerant lines if there’s a leak?
No, refrigerant work requires licensed certification and proper recovery equipment. Do not attempt to repair leaks yourself.
Refrigerant work should be left to licensed technicians with proper recovery equipment.
How often should I service a Sub Zero refrigerator?
Regular maintenance every 6–12 months helps prevent failures. Focus on coils, seals, and door alignment, plus monitoring temperatures.
Maintenance every 6 to 12 months helps prevent problems.
What tools do I need for basic maintenance?
A basic screwdriver set, a multimeter, a non-contact tester, and a microfiber cloth cover most DIY checks. Always unplug before starting.
You’ll want a screwdriver, multimeter, a voltage tester, and a cloth to start.
When should I call a professional?
If you identify a suspected refrigerant leak, compressor failure, or electronics fault, contact a licensed technician. DIY attempts may void warranties or cause further damage.
Call a professional for refrigerant leaks, compressor issues, or electrical faults.
Watch Video
Top Takeaways
- Plan before you touch any components
- Safety first: unplug, gloves, and good lighting
- Differentiate not cooling from frost to target the right fix
- Defrost issues are a common Sub Zero pitfall
- Only replace parts when tests point to a specific failure