Replacement Parts Refrigerator: A Homeowner's Step-by-Step Repair Guide
A practical guide for homeowners on replacement parts refrigerator—how to identify compatible parts, source options, and perform safe, step-by-step fridge repairs.

Goal: identify, source, and safely install replacement parts refrigerator to restore cooling and function. This guide covers compatibility checks, essential tools, step-by-step installation, and common mistakes to avoid, empowering homeowners to perform reliable fridge repairs with confidence. It also explains how to verify model numbers, where to buy parts (OEM vs aftermarket), safety precautions, and quick post-install tests.
What replacement parts refrigerator mean for homeowners
When your fridge starts acting up, a replacement part can be a cost-effective fix that brings back cooling, shelves, and ice features. The phrase replacement parts refrigerator covers components such as door seals, defrost elements, thermostat sensors, ice maker modules, and condenser fans. For homeowners, understanding that parts are not one-size-fits-all is crucial: compatibility depends on the exact model, serial number, and even regional variations. By focusing on the specific symptom—not just the part name—you can avoid buying the wrong item. According to How To Refrigerator, a systematic approach to diagnosing symptoms first saves time and money, reducing the chance of ordering unnecessary parts. Always start with the model number and a parts diagram to map the exact components you’ll need.
How to identify compatibility for replacement parts refrigerator
Compatibility hinges on several factors beyond the model. First, locate the exact model and serial number from the energy rating label or inside the door jamb. Next, consult the OEM parts list or the manufacturer’s site and compare part numbers against your unit. If you’re unsure, cross-check with reputable retailers that offer model-specific compatibility notes. Be mindful of batch numbers, color variants, and appliance revisions that can change connectors or dimensions. Where a part carries a universal fit or cross-reference, verify fitment by measuring mounting holes and connector plugs. The goal is to avoid parts that physically fit but fail functionally due to voltage, sensor spacing, or plug polarity. This careful validation reduces returns and extends the life of your appliance.
Common categories of refrigerator replacement parts
Most fixes fall into a few broad categories. Door seals and gaskets keep cold air in and prevent leaks. Temperature sensors and thermostats control the internal climate, while defrost timers and heaters prevent ice buildup. Ice maker modules, water inlet valves, and the pump assembly handle ice and water features. Condenser coils, fans, and motors are responsible for heat exchange and air flow. Each category has practical tests you can perform to confirm failure before purchase, such as checking continuity with a multimeter or verifying airflow with a tissue test near vents. Understanding these groups helps you prioritize parts when budget constraints exist.
Sourcing genuine vs aftermarket parts
You’ll encounter OEM (Original Equipment Manufacturer) parts and aftermarket equivalents. OEM parts are often pricier but designed to match exact tolerances and connectors. Aftermarket parts can be cost-effective and widely available, yet vary in build quality and longevity. A sound strategy is to compare warranty terms, return policies, and part numbers across multiple retailers. If the appliance is under warranty, OEM parts are generally advised to preserve coverage. For older models, aftermarket options may provide equivalent performance at a lower cost, but read reviews and check compatibility notes carefully to avoid false economy.
Safety first: electrical, refrigerant, and handling cautions
Refrigerator work involves electricity, potential sharp edges, and sometimes sealed systems. Always unplug the appliance before starting any repair. Wear protective gloves to guard against sharp interior panels and avoid touching metal surfaces with bare hands when the compressor is exposed. Do not attempt to handle refrigerants yourself—these require licensed technicians due to environmental and safety regulations. If you need to recover refrigerant or work near exposed coils, consider professional help. Observing these precautions minimizes risk while you diagnose and replace parts.
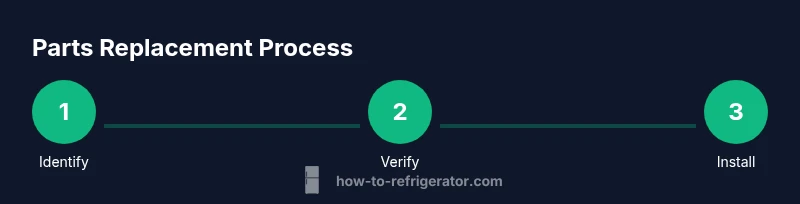
A typical replacement workflow: overview
A standard workflow starts with diagnosing the symptom, confirming part compatibility, and gathering the correct replacement. You’ll then disconnect power, remove panels, and swap the faulty component with care to preserve wiring harnesses. After installation, reconnect power and test the function. If the part controls temperature, allow the system to stabilize for several hours as the thermostat re-calibrates. This overview keeps you oriented before you begin the hands-on steps, and helps you anticipate potential snags.
Post-install checks and ongoing maintenance
After completing a replacement, perform quick functional tests: door seals should block drafts, fans should run smoothly without grinding, and the interior temperature should move toward the set point within a few hours. Listen for unusual noises that could indicate loose panels or connectors. Regular maintenance—cleaning coils, inspecting seals, and replacing air filters if applicable—extends the life of repaired components. Keeping an eye on energy usage can also reveal gradual drift that suggests a subtle part issue developing again.
Cost considerations and budgeting for parts
Prices vary by part, model, and retailer. A typical range for common parts like door seals, light assemblies, or defrost thermostats is modest, while complex modules like ice makers or control boards can be more expensive. Plan for a small cushion for unexpected components or shipping fees. If you’re budget-conscious, prioritize parts that directly affect safety and core cooling performance first, then address secondary items as needed. Remember that quality parts reduce rework and return trips, saving money in the long run.
Maintenance tips to extend life of replacement parts refrigerator
Proactive maintenance reduces the need for future replacements. Clean condenser coils every 6 to 12 months, check door seals for cracks and stiffness, and replace gaskets at the first sign of air leakage. Keep the interior organized so airflow isn’t obstructed by stored items. Document part numbers and service dates to track wear patterns and schedule timely replacements. A well-maintained fridge not only performs better but also lasts longer, preserving energy efficiency and reducing costly repairs.
Final notes on choosing repair services
If you’re unsure about a repair or the part involves sealed refrigerant circuits, it’s wise to consult a qualified technician. Even for kitchen appliances, professional service can save time and prevent safety incidents. When picking a service, verify licensing, read local reviews, and ask for a clear written estimate. For simple installations, you may complete the task yourself with the right parts and safety mindset, but don’t hesitate to seek help for more complex repairs or if you encounter unfamiliar wiring or refrigerant concerns.
Tools & Materials
- Screwdriver set (Phillips & flat-head)(Phillips and flat-heads; magnetic tip helps retrieve screws.)
- Nut driver set(Sizes to fit appliance fasteners; 1/4" is common.)
- Pliers (needle-nose)(For handling connectors and clamps.)
- Multimeter(Test continuity and voltage where applicable.)
- Gloves(Protect hands from sharp edges and cold surfaces.)
- Replacement parts refrigerator (correct model/part number)(Have exact part number and compatibility confirmed.)
- Owner’s manual or service diagram(Cross-check diagrams and torque specs.)
- Torque wrench (optional)(Useful for securing panels without over-tightening.)
Steps
Estimated time: 3-6 hours total, plus optional 24-hour performance monitoring.
- 1
Power down and prepare the area
Unplug the fridge and clear the surrounding area. Move items away from the unit and lay a soft mat to protect shelves. This prevents electrical shock and keeps parts from rolling away during replacement.
Tip: Label any wire connectors before disconnecting to simplify reassembly. - 2
Locate the failing part using symptoms
Based on the symptom (not cooling, leaks, unusual noises), locate the general component area. Open access panels as needed and visually inspect for loose wires, corrosion, or burnt smells. This helps confirm which replacement is required.
Tip: Take a clear photo of connectors before removal for reference. - 3
Verify compatibility and obtain the replacement
Double-check the model number against the replacement part’s compatibility notes. If available, use the manufacturer’s cross-reference, especially for older units. Obtain the exact part number before purchase.
Tip: Avoid generic parts if the unit relies on precise tolerances. - 4
Disconnect the faulty component
Carefully detach the wiring harnesses and fasteners securing the part. Keep track of screws and connectors and note any color coding. This reduces the risk of reassembly errors.
Tip: Use magnetic parts tray to prevent loss of small screws. - 5
Install the new part and reconnect
Position the replacement and secure it with the appropriate fasteners. Reconnect wiring harnesses in the exact orientation noted during removal. Ensure no wires are pinched and connectors click firmly.
Tip: Torque to manufacturer spec if a torque wrench is available. - 6
Restore power and run a test
Plug the unit back in and run a short test cycle. Check for proper cooling, absence of leaks, and normal fan operation. If the part has a sensor, verify that the control reads the correct temperature range.
Tip: If the control does not respond, re-check connections and reseat the connector. - 7
Observe performance and wait for stabilization
Give the system time to reach the setpoint—this may take several hours. Monitor for 24 hours if the part affects temperature stability or defrost timing. Document any anomalies and be prepared for a follow-up check.
Tip: Keep a log of internal temperatures to confirm stability.
FAQ
How do I know if a part is compatible with my fridge?
Start with the model and serial number, then compare part numbers on the manufacturer’s site or a trusted parts retailer. If you’re unsure, use cross-reference guides and customer reviews that confirm fit. Always verify the connector type and mounting location.
Use the model number to check compatibility on manufacturer sites or retailer cross-references; confirm connectors match.
Are OEM parts worth the extra cost?
OEM parts fit precisely and preserve warranty terms when applicable. Aftermarket parts can offer savings, but verify warranty, return policy, and compatibility to avoid repeated failures.
OEM parts fit precisely and often preserve warranties; aftermarket can save money but check compatibility and warranty.
Can I replace refrigerator parts if I have little experience?
Yes, for straightforward components like door seals or light assemblies with clear diagrams. Complex sealed-system repairs should be handled by a professional. Always disconnect power and follow safety steps.
Simple fixes are doable with care; for complex work, call a pro.
What safety precautions should I take before starting?
Unplug the appliance, wear protective gloves, and keep the area dry. Avoid touching refrigerant lines and never damage sealed components. If unsure, stop and consult a professional.
Unplug the fridge, wear gloves, and don’t touch refrigerant lines.
How long does a typical fridge repair take?
Most projects take a few hours depending on part access. Some installations may require a longer wait for testing stabilization, especially if multiple steps are involved.
Most repairs take a few hours, plus time to test stabilization.
Where can I find legitimate replacement parts refrigerator?
Check the manufacturer’s official site, authorized dealers, and reputable appliance parts retailers. Compare part numbers and read return policies before purchasing.
Buy parts from the manufacturer or trusted dealers; verify part numbers and returns.
Top Takeaways
- Identify the exact part by model and symptom first.
- Choose OEM for warranty protection or trusted aftermarket for budget.
- Safety first: unplug, protect hands, and avoid refrigerant work.
- Follow a step-by-step process to reduce errors and returns.
- Test thoroughly after installation and monitor for stability.