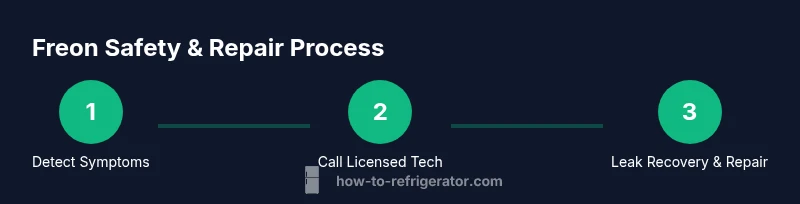
Refrigerator Freon Safety and Repair: A Homeowner's Guide
Learn how refrigerator freon works, identify leaks, and know when to call a licensed technician. This How To Refrigerator guide offers clear, step-by-step guidance for safe maintenance and practical prevention.

Refrigerator freon refers to the refrigerant used in cooling coils to absorb heat. Leaks can cause poor cooling, frost buildup, and higher energy use. DIY freon handling is dangerous and often illegal; do not attempt to recharge or repair a sealed system yourself. Hire a licensed technician for leaks and recharge, and practice safe maintenance practices you can do safely.
Understanding refrigerator freon and why it matters
Refrigerator freon is the liquid refrigerant circulated through a sealed refrigeration loop to absorb heat from the interior and release it outside the cabinet. In most modern refrigerators, the system relies on a controlled cycle of compression, condensation, expansion, and evaporation. When the system is intact, it keeps foods cold efficiently and minimizes energy use. However, freon leaks or improper servicing can compromise cooling, raise costs, and pose safety risks. The How To Refrigerator team emphasizes that freon management is not a DIY task; leaks require professional detection and repair to protect people and the environment. If you notice inconsistent temperatures, frost on the coils, or oily spots near fittings, treat that as a potential leak signal and contact a licensed technician promptly. We use the term refrigerator freon to refer to common refrigerants such as R-134a or newer low-GWP options, but identifying the exact refrigerant type is the technician’s job, not the homeowner’s.
How freon works in a modern refrigerator
Freon-based cooling relies on a closed-loop system where a compressor raises the pressure of the refrigerant gas, condenses it into a high-pressure liquid, and then allows it to expand and evaporate inside the evaporator. During evaporation, the refrigerant absorbs heat from the interior, cooling the cabinet. As it travels back to the compressor, it releases absorbed heat, returning to a gaseous state. This cycle repeats, maintaining stable temperatures for perishable foods. Modern units often use environmentally friendlier refrigerants with lower global warming potential (GWP), but the fundamental physics remains the same. A leak disrupts pressure, reduces cooling capacity, and can trigger frost buildup on the evaporator. For homeowners, understanding the cycle helps you recognize when something isn’t right and when professional guidance is needed.
Common signs of freon-related issues
Several telltale symptoms suggest a freon-related problem. If your freezer or fridge is not cooling adequately, you may see frost buildup on the evaporator coils or find oil residue around the compressor area. Warmer interior temperatures, uneven cooling, and ice formation inside the freezer can also indicate a leak or restriction in refrigerant flow. You may notice higher energy bills due to the compressor running longer to achieve the same cooling effect. While these signs point to a potential freon issue, they can also be caused by other failures such as a dirty condenser, faulty door seals, or a malfunctioning thermostat. A professional evaluation is essential to identify the root cause and determine if freon is involved.
Safety concerns and legal considerations
Freon handling and leak repair require specialized equipment and training. Attempting to recharge a refrigerant system yourself can expose you to toxic vapors and sharp components, and many jurisdictions regulate refrigerant handling to protect the environment. Always ventilate the area, wear appropriate PPE (eye protection, gloves), and never puncture or weld refrigerant lines unless you are a licensed technician with proper permits. The environmental and safety risks are why standard practice is to call a professional who is certified in refrigerant recovery and repair. Remember, freon is not a material you add or replace casually; leaks must be located, contained, and repaired by qualified personnel.
What homeowners can safely check and maintain
There are several safe maintenance tasks you can perform to reduce stress on the cooling system without handling freon. Regularly vacuum and dust condenser coils, especially if the unit is in a dusty area. Inspect door gaskets for cracks or gaps and replace them if needed to maintain airtight seals. Keep the surrounding area free of clutter to improve airflow around the appliance. Ensure the fridge is level so that doors seal properly and vibrations don’t stress connections. Check the interior thermostat setting and avoid frequent door openings. These steps help the system operate efficiently and can prevent conditions that lead to leaks, all without touching refrigerant.
Steps for working with a professional on freon leaks
If you suspect a freon leak, document the symptoms (temperature variance, frost on evaporator, oily residues) and note the model and serial number. Contact a certified technician who specializes in refrigerant recovery and leak repair. Arrange access to the appliance and question them about leak detection methods, the expected steps, and whether recharging is necessary. During the visit, expect them to perform a pressure test, refrigerant isolation, and a safe recovery process if freon is present. You should receive a written estimate with a scope of work, parts, labor, and disposal details. For visual guidance, technicians may refer to internal diagrams of the refrigerant circuit while explaining the leak’s location and the replacement parts needed.
Cost considerations and estimating a repair
Repair costs for freon-related issues vary widely depending on leak location, refrigerant type, and accessibility. Common factors include diagnostic time, refrigerant recovery, leak repair, and potential replacement of seals or hoses. Because these repairs involve environmental controls and compliance with regulations, prices may reflect service call fees, labor rates, and disposal costs. It is reasonable to expect a range rather than a fixed price, and to request itemized quotes from multiple technicians. The key takeaway is to balance the cost against the potential energy savings, extended equipment life, and peace of mind from professional assurance that the system is safe and compliant.
Preventive maintenance to reduce freon-related issues
Proactive maintenance can minimize freon-related problems over the appliance’s lifetime. Schedule annual professional inspections for refrigerant seals, connections, and overall system integrity. Clean condenser coils regularly, maintain proper airflow, and replace air filters to reduce load on the compressor. Keep the area around the fridge clear to prevent overheating and ensure doors seal correctly. If you notice changes in cooling performance, address them promptly rather than letting the issue worsen. A small, early intervention can prevent a larger, costlier repair later.
Final checklist for a freon issue
- Confirm symptoms and document observations (temperature, frost, oil around fittings).
- Verify the issue is not caused by doors, coils, or thermostat.
- Schedule a licensed refrigerant technician for testing and potential recovery.
- Ask for an itemized estimate covering diagnostics, repairs, and disposal.
- After service, monitor temperatures and energy use for a few days to confirm stability.
- Keep records of maintenance and technician visits for future reference.
Tools & Materials
- Safety goggles(Protect eyes from refrigerant fumes and debris)
- Chemical-resistant gloves(Wear when handling any refrigerant-related equipment or cleaning tasks)
- Screwdriver set(For removing access panels and shields)
- Multimeter(Test electrical components like thermostats and fans)
- Electronic leak detector or leak detector spray(Used to locate leaks without disassembling core components)
- Owner's manual(Refer to model-specific safety guidance)
Steps
Estimated time: Estimated total time: 1.5-3 hours
- 1
Power down and unplug
Begin by unplugging the refrigerator to ensure no electrical current is present. This reduces the risk of shock when you inspect the exterior and access panels. If the unit is hard-wired, switch off the circuit at the breaker and wait a few minutes before handling any components.
Tip: Always unplug first; never work on live circuits around refrigerant components. - 2
Inspect exterior for signs
Look for oily residues around fittings, hoses, and the compressor. These are potential indicators of a leak or loose connection. Note any hissing sounds or blue-green stains, which can be associated with refrigerant exposure. Document locations with photos for the technician.
Tip: Do not poke or pry at any joints; leaks require professional handling. - 3
Clean and assess airflow
Carefully vacuum and brush the condenser coils and surrounding area to ensure optimal heat dissipation. Blocked airflow forces the compressor to work harder, which can mask or worsen leak symptoms. Ensure the unit has clear space on at least 2-3 inches around the back and sides.
Tip: Use a soft brush attachment to avoid bending delicate fins. - 4
Check door seals and thermostat
Test door gaskets for gaps and perform a simple light-test (hold a flashlight to the door edges at night). Verify the thermostat is calibrated correctly and responding to temperature changes. These checks help confirm the problem is not caused by non-refrigerant faults.
Tip: Replace worn door seals promptly to reduce cooling load. - 5
Prepare for professional service
If signs suggest a refrigerant issue, collect model/serial numbers, warranty information, and a log of observed symptoms. Contact a licensed technician and schedule a diagnostic. Prepare to discuss potential leak locations, suspected causes, and the expected steps for recovery and repair.
Tip: Ask about refrigerant recovery procedures and any disposal fees upfront. - 6
Await professional assessment
A certified technician will use specialized equipment to locate leaks, recover refrigerant safely, and repair leaks or replace components as needed. They will provide a detailed written estimate before proceeding with any work beyond safety checks.
Tip: Do not approve partial repairs; ensure the scope includes recovery and post-repair testing. - 7
Post-service verification
Once repairs are complete, monitor temperature consistency for 24-48 hours and compare energy use to previous patterns. Confirm that frost issues do not reappear and that both compartments maintain set temperatures.
Tip: Keep service records for future maintenance and warranty eligibility.
FAQ
Is it legal to handle freon at home?
In many places, handling freon requires certification and proper recovery equipment. Home attempts to recharge or repair a freon system can be unsafe and violate environmental regulations. Always hire a licensed technician for leaks and recharge.
Freon handling often requires certification and specialized equipment. It’s safest to hire a licensed technician for leaks and recharge.
What are common signs of freon leaks in a fridge?
Common signs include warm interior temperatures, frost buildup on evaporator coils, oil residues near fittings, and higher energy consumption. These symptoms can also indicate other faults, so professional evaluation is recommended.
Look for warmth, frost, oil near connections, or rising energy use. Have a professional check it to confirm freon involvement.
Can I recharge freon myself to fix cooling?
No. Freon recovery and recharge require certified equipment and proper handling to prevent exposure and environmental harm. DIY recharge is unsafe and often illegal.
No—recharging refrigerant is dangerous and regulated. Hire a pro.
What should I ask a technician during a freon repair visit?
Ask about leak detection methods, expected steps, recovery procedures, and a detailed written estimate. Request post-repair testing to confirm cooling stability and a maintenance plan.
Ask how they locate leaks, what the repair involves, and when you’ll see post-repair test results.
Are there prevention steps homeowners can take?
Yes. Regularly clean condenser coils, ensure door seals are intact, and avoid overloading the unit. Regular professional check-ups can catch issues before they become leaks.
Keep coils clean, doors sealed, and get yearly checks to prevent leaks.
What is the typical cost range for freon-related repairs?
Repair costs vary based on leak location, refrigerant type, and time required. Expect variation between service visits, and request itemized estimates before work begins.
Costs vary a lot; get a detailed estimate before any work.
Watch Video
Top Takeaways
- Never DIY freon recharge—call a licensed pro.
- Recognize signs of leaks early to limit damage.
- Regular coil cleaning reduces compressor strain.
- Prepare details before technician visits.