Parts of the Refrigerator: A Homeowner's Troubleshooting Guide
Learn the essential parts of the refrigerator, how they work, and practical DIY troubleshooting steps. From the compressor to door seals, understand what to inspect and when to replace components for reliable cooling.

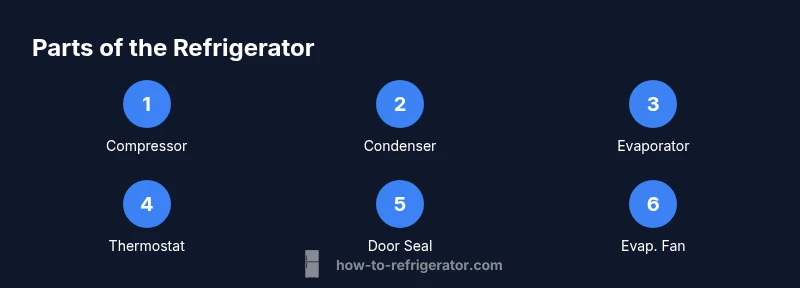
Identify the main components—compressor, condenser, evaporator, thermostat, and door seals—and learn basic electrical checks. This concise takeaway helps you decide between repair and replacement and sets the stage for the full step-by-step troubleshooting guide.
Overview of the main parts of the refrigerator
A modern refrigerator is a system of interdependent parts that work together to keep perishable items safe and fresh. At its core, you’ll find the cooling loop (compressor, condenser coils, and evaporator), temperature control (thermostat and sensors), airflow management (evaporator and condenser fans, vents), and the enclosure elements (door seals, shelves, and drawers). Understanding how each part contributes to cooling helps homeowners diagnose symptoms like frost buildup, warm compartments, or unusual noises. This section also clarifies common terminology, so you can spot the right part when reading manuals or shopping for replacements. As you read, keep in mind that the exact layout can vary by model, but the same principles apply across most residential refrigerators. The overarching idea is to trace symptoms back to a subsystem and test the most likely culprits first.
The cooling loop: compressor, condenser coils, evaporator
The cooling cycle hinges on three stages: compression, condensation, and evaporation. The compressor increases refrigerant pressure and drives it through the loop. Condenser coils expel heat to the surrounding air, typically at the rear or underside of the unit. The evaporator absorbs heat from inside the fridge, chilling the interior air. If any part malfunctions—blocked coils, a failing compressor, or a frozen evaporator—the temperature inside rises or frost forms on the surfaces. Dirt and dust on condenser coils reduce efficiency and cause overheating. Regular coil cleaning (every 6–12 months for most homes) with a soft brush can prevent many issues. When inspecting, power off the unit first and avoid touching live electrical components.
Temperature control and airflow: thermostat, damper, evaporator fan
Temperature control starts with the thermostat, which tells the system when to turn the compressor on or off. Damper controls regulate cold air flow between compartments, helping maintain the correct temperatures for fresh food and produce. The evaporator fan circulates the cooled air inside the cabinet. If doors stay cold on one shelf but warm elsewhere, or if there’s inconsistent cooling, the thermostat sensor or damper could be out of calibration, or the evaporator fan may be weak or blocked by frost. Calibrating the thermostat requires a stable ambient temperature and a reference thermometer. In many cases, cleaning the evaporator coils and ensuring unobstructed air paths resolves airflow problems.
Interior storage and seals: shelves, bins, humidification, seals
The interior layout—shelves, bins, and the crisper drawers—helps organize food while maximizing airflow. Humidity-controlled crisper drawers optimize produce preservation, but only if the seal around the door is intact. Worn or torn door gaskets can allow warm air to enter, forcing the compressor to run longer and increasing energy use. Inspect door seals while the door is open: look for cracks, stiffness, or gaps. Replace gaskets that don’t seal properly. Keep shelves level and avoid overloading doors, which can cause seals to wedge out of place. Proper interior organization reduces cold spots and frost buildup.
Exterior seals, hinges, and energy efficiency: door seals and seals maintenance
Door seals are your first line of defense against heat intrusion. A loosened seal around the door window or solid door can allow warm air to enter, causing frost and uneven cooling. Inspect hinges for proper alignment; misaligned doors can cause seal failure and air leaks. Cleaning the seals with warm, soapy water helps keep them supple. If a seal remains slack after cleaning, replacement is often the best option. Replacing a gasket is usually straightforward and cost-effective, preventing energy waste and protecting stored food. For best results, test the seal with a simple paper test: close the door on a sheet of paper; if you can pull it out easily without resistance, the seal is compromised.
Power, controls, and electrical components: wiring, control boards, and sensors
Behind access panels lie electrical components: wiring harnesses, control boards, and sensors that govern cooling cycles and alarms. Faults here can mimic mechanical problems, such as a non-cooling symptom that’s actually a faulty thermostat sensor or control board. Never probe live circuits; unplug the unit before inspecting or testing. When diagnosing, note any error codes displayed on digital panels, listening for unusual buzzing or clicking sounds, and observing any intermittent thermostat behavior. Modern refrigerators may also include smart features and energy-saving modes, which can affect performance. If wiring appears damaged, consult a professional or replace the harness to avoid a safety hazard.
Common failure scenarios by part: what to watch for and how to respond
Different parts fail in predictable ways. A failing compressor often makes loud noises or refuses to start. Frost on the evaporator can indicate a defrost issue, a stuck evaporator fan, or a thermostat fault. Dirty condenser coils lead to overheating and reduced cooling capacity. A damaged door seal causes air leaks and frost formation near the door frame. By cataloging symptoms—noise, warm shelves, frost, water leakage—you can narrow down culprits and decide whether a repair is feasible or a replacement part is needed. Always start with the simplest, least invasive checks.
Safe diagnosis and best practices: how to test parts without causing harm
Prioritize safety by unplugging the refrigerator before inspecting or testing any component that involves electricity. Use a flashlight to inspect coils and fans; avoid touching exposed metal or wiring. For basic electrical checks, a multimeter can verify continuity and voltage on accessible components. If you’re not comfortable with electrical testing, start by cleaning and reseating connectors, then test the unit's operation after reassembly. Maintain clear airflow around the condenser and keep the back away from walls to prevent overheating. Remember to label removed shelves and components to avoid reassembly mistakes later.
When to replace vs repair and sourcing parts
Deciding between repair and replacement depends on the component's role, cost, and availability. Small parts like door seals or crisper drawers are inexpensive and straightforward to replace, often extending the refrigerator’s life at a low cost. Major components—compressors or control boards—can be costly and may require professional service. If the unit is older than 10–15 years, or if multiple issues occur simultaneously, replacement might be the wiser choice. Always source parts through reputable channels, verify compatibility with your model, and consider warranties on parts and labor.
Preventive maintenance routines for long-term reliability
A proactive maintenance plan helps prevent many refrigerator problems. Clean condenser coils annually or semi-annually, test door seals every few months, and inspect wiring for signs of wear. Keep the interior organized to promote even airflow, and avoid blocking vents with items. Review your appliance’s manual for model-specific guidance and recommended maintenance schedules. Regular cleaning and careful monitoring reduce energy use, extend component life, and minimize unexpected breakdowns. A small, consistent effort today pays off with fewer surprises tomorrow.
Tools & Materials
- Multimeter(For testing continuity and voltage on major components)
- Screwdrivers (Phillips & flat-head)(Set includes small and large sizes)
- Flashlight(Bright, focused beam for coil and wiring visibility)
- Soft brush or microfiber cloth(For cleaning condenser coils and gaskets)
- Work gloves(Protect hands from sharp metal edges)
- User or service manual (PDF)(Model-specific guidance and wiring diagrams)
Steps
Estimated time: 60-90 minutes
- 1
Unplug and prepare
Power off the refrigerator and remove perishable items. This reduces risk when inspecting electrical components and prevents food spoilage during work.
Tip: Label shelves or doors so you can reassemble correctly. - 2
Access back panel and coils
Carefully remove the back panel or access cover as instructed by your model's manual. Use a flashlight to inspect condenser coils for dust, debris, or bent fins.
Tip: A soft brush is ideal for cleaning without scratching fins. - 3
Check door seals
Open the door and inspect gasket integrity around the entire frame. Look for cracks, stiffness, or gaps where air leaks could occur.
Tip: Perform a simple paper test to confirm a seal: close on a sheet of paper and pull; easy removal means a worn seal. - 4
Test thermostat and wiring
With the unit powered off, examine visible wiring harnesses for loose connections. If you know how to use a multimeter, test continuity on the thermostat sensor line.
Tip: Never probe live circuits; reattach any loose connectors securely before powering on. - 5
Inspect evaporator fan
Access the evaporator area to verify the fan blades spin freely without obstruction. Frost buildup can imply defrost issues or a blocked drain.
Tip: If the fan is frozen in ice, allow it to thaw with the compressor off before testing. - 6
Check defrost drain
Locate the defrost drain and inspect for clogs. A blocked drain can cause water to pool inside or lead to frost on the evaporator.
Tip: Flush with warm water or use a small brush to clear debris. - 7
Inspect power cord and outlet
Check the power cord for cracks or exposed wires. Test the outlet with a meter to confirm it supplies power consistently.
Tip: If outlet wiring is suspect, consult a licensed electrician. - 8
Reassemble and power on
Replace access panels and shelves, then plug the unit back in. Observe the cooling cycle and listen for normal compressor operation.
Tip: Note any abnormal noises or warm air coming from vents; these indicate ongoing issues. - 9
Test cooling performance
Set the thermostat to a mid-range temperature and monitor internal temperatures over several hours. Compare with the manufacturer's recommended range.
Tip: Allow the unit to reach steady state before making judgments about performance. - 10
Decide on repair or replacement
Based on the part tested and the overall age of the refrigerator, determine whether a repair is cost-effective or if replacement is a better option.
Tip: Document findings and keep receipts for future service or parts purchases.
FAQ
What are the essential parts of a refrigerator?
The essential parts include the compressor, condenser coils, evaporator, thermostat, and door seals. Understanding their roles helps you identify issues without guessing.
Key parts are the compressor, condenser, evaporator, thermostat, and door seals. Knowing their roles helps you diagnose issues accurately.
How can I tell if a refrigerator part is failing?
Common signs include warm interior temperatures, frost buildup, excessive noise, leaks, or an unstable thermostat reading. Start with the easiest checks like door seals and coil cleanliness.
Look for warmth inside, frost, leaks, or odd noises. Start with door seals and coil cleanliness.
Can I replace refrigerator parts myself?
Many replacement parts, such as door seals or shelves, are DIY-friendly. More complex components like compressors require professional service or guidance from the manual.
Some parts are DIY-friendly, like seals, but major components may need a pro. Always consult the manual.
What parts are common across most refrigerators?
Common parts include the door gasket, shelves, crisper drawers, condenser coils, thermostat, evaporator fan, and power cord. These elements appear in most models and are frequent sources of performance issues.
Most fridges share door seals, shelves, coils, thermostat, and fans.
How long do refrigerator parts typically last?
Lifespans vary by part: seals last several years, fans and thermostats a bit longer, while the compressor may last a decade or more with proper maintenance.
Seals usually last years; fans and thermostats longer; compressors often a decade with good care.
Should I unplug before inspecting components?
Yes. Always unplug the unit before inspecting electrical components and allow any stored ice or frost to melt first if you access the evaporator area.
Always unplug before inspecting electrical parts and let frost melt if you reach the evaporator.
When is it better to replace the refrigerator rather than repair?
If multiple major components fail or the appliance is older than 10–15 years, replacement may be more cost-effective in the long run.
If several major parts fail or the unit is old, replacement may be wiser.
Can a clogged defrost drain cause fridge problems?
A clogged defrost drain can cause frost buildup and water leaks. Clearing the drain and verifying the defrost cycle usually resolves the problem.
Yes, a clogged defrost drain can lead to frost and leaks; clearing it helps.
Watch Video
Top Takeaways
- Know the core parts: compressor, condenser, evaporator, thermostat, seals.
- Regular coil cleaning improves efficiency and cooling.
- Test door seals and airflow to diagnose common heat leaks.
- Use safe testing practices and avoid live circuits.
- Decide between repair and replacement based on age and scope.