Parts for GE Profile Refrigerator: A Homeowner's Replacement Guide
Learn how to identify, source, and replace common GE Profile refrigerator parts. A practical, data-driven guide for homeowners covering symptoms, sourcing, and when to DIY or hire a pro.

Parts for GE Profile refrigerators include key assemblies such as water inlet valves, ice makers, door seals, thermostat/defrost components, condenser coils, and shelves. Understanding these parts—how they fail, how to identify terminal symptoms, and where to source quality replacements—helps homeowners fix problems faster and extend appliance life. This guide also outlines DIY vs professional service considerations.
What parts for GE Profile refrigerators cover and why they fail
The GE Profile line uses modular components designed for reliability, but wear, moisture exposure, and improper maintenance can lead to failure. For homeowners troubleshooting a GE Profile refrigerator, understanding the landscape of common parts is essential. The most frequent culprits include water inlet valves that fail to fill or dispense water, ice maker assemblies that jam or stop producing ice, door seals that lose pliability and allow cold air to escape, and defrost systems that frost over due to thermostat or heater issues. Additionally, condenser coils can get dusty, reducing cooling efficiency, while shelves and lighting components degrade with use. When you know what each part does and what symptoms point to a fault, you can quickly isolate the likely cause and determine whether a replacement is appropriate. Remember that the goal of identifying parts is to restore proper cooling, humidity control, and food safety, all while avoiding unnecessary repairs.
Major part categories and typical symptoms you might notice
Parts for GE Profile refrigerators fall into several broad categories, each with telltale symptoms. Keep this quick diagnostic guide handy:
- Water inlet valve: Slow filling of the ice maker or water dispenser, or no water at all. Leaks around the valve are a red flag.
- Ice maker assembly: Little or no ice production, ice cubes that are hollow or misshapen, or unusual noises from the ice maker module.
- Door seals/gaskets: Condensation at the door, frost buildup near the seal, or warm air drafts when the door is closed.
- Defrost thermostat/heater: Frost accumulation in the freezer, despite a recent cycle; intermittent cooling loss.
- Condenser coils: Overly warm back of the fridge, increased run time, or reduced cooling efficiency.
- Shelves and lighting: Cracks, breakage, dim lighting, or misaligned shelves that affect storage.
For homeowners, recognizing these symptoms early helps in choosing the right replacement parts and avoiding unnecessary repairs. Always verify part compatibility with your exact GE Profile model because even within the same line, component specs can differ.
Sourcing and selecting replacement parts
Finding quality GE Profile refrigerator parts starts with a clear model reference and a plan for compatibility. Begin by noting the refrigerator’s model and serial numbers, which are usually found inside the fresh food compartment or on the back of the unit. Use this information when searching through authorized distributors, OEM parts catalogs, or reputable aftermarket suppliers. Prioritize new, genuine parts or well-reviewed aftermarket equivalents that carry warranty coverage. Before purchasing, compare multiple sources for price and lead time, and beware of deeply discounted remanufactured items that may not meet safety or performance standards. If you’re unsure about a part’s fit, reach out to a customer support line or a professional technician for a quick compatibility check. Finally, keeping a small parts kit (including fuses, o-rings, and basic gasket materials) on hand can simplify future fixes and reduce downtime.
Step-by-step diagnostic approach for GE Profile issues
A methodical diagnostic approach minimizes guesswork when diagnosing problems with GE Profile refrigerators. Start by verifying basic power and door status, then perform a quick visual inspection of visible components. Next, use simple tests: listen for running motors, check for frost on the evaporator coil, and inspect water lines for leaks. If visible issues aren’t obvious, read any error codes from the control panel and consult the owner’s manual or official support site for code meanings. When symptoms align with a specific part, source a verified replacement and document the repair steps. After installation, run a full test cycle (cooling, water, and ice functions) to ensure everything operates correctly and that airflow is balanced. Document the process with notes and photos for future reference. If problems persist, call a professional.
DIY repair workflow vs hiring a pro: decision framework
Not every GE Profile repair warrants a professional. For straightforward tasks—like replacing a worn door gasket, changing a water filter, or swapping a simple ice maker module—DIY can save time and money, provided you follow safety precautions and the manufacturer’s instructions. For more complex tasks—such as diagnosing cooling failures, testing defrost circuits, or replacing a cooling compressor—professional service offers expertise, specialized tools, and warranty protection. Consider factors like your comfort level, the tools required, potential harm from mishandling refrigerants, and the replacement part cost when deciding. If you choose DIY, work in a well-ventilated space, unplug the unit, and follow a step-by-step guide from trusted sources. When in doubt, consult a professional early to avoid causing additional damage.
Maintenance and preventive care to extend GE Profile parts life
Prevention is cheaper than repair. Regular cleaning of condenser coils, checking door seals for wear, and replacing the water filter on schedule can significantly extend the life of critical parts. Schedule an annual inspection to look for frost buildup, unusual noises, or leaks, and address small issues before they escalate. Keep the interior dry, avoid placing hot items directly on components, and store items away from vents. Document any replacements and track the model’s performance over time. A simple, proactive maintenance routine can help you get the most life out of your GE Profile refrigerator parts and reduce the frequency of emergency repairs.
Common pitfalls to avoid during part replacement
To minimize rework and ensure a reliable fix, avoid common mistakes such as mixing up parts for different GE Profile models, skipping the power-off safety step, and neglecting to vacuum or wipe away dust around the condenser. Don’t force-fit parts or ignore compatibility notes in the installation instructions. Keep a neat, labeled workspace and follow torque specs where provided. Finally, never bypass safety features or seals to hasten repair; this can cause electrical hazards and refrigerant leaks. By planning, verifying compatibility, and testing thoroughly, you can complete most GE Profile refrigerator part replacements with confidence.
Representative GE Profile refrigerator parts and typical work times
| Part Category | Common Symptoms | Estimated Replacement Time | Notes |
|---|---|---|---|
| Water inlet valve | Slow filling or no water/dispenser | 1-2 hours | Check for leaks and line kinks before replacing |
| Ice maker assembly | No ice production or jammed ice maker | 2-4 hours | Requires access to back panel and water line |
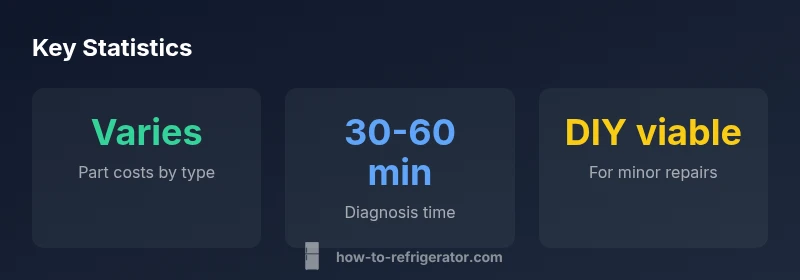
| Door gasket/door seal | Condensation or air leakage at door | 30-60 minutes | Inspect for cracks and pliability; replace if stretched |
| Defrost thermostat/defrost heater | Excess frost in freezer, intermittent cooling | 1-3 hours | Often requires disconnecting power for testing |
FAQ
What are the most commonly replaced GE Profile refrigerator parts?
The most commonly replaced parts include the water inlet valve, ice maker assembly, door seals, and defrost components. These parts frequently fail due to wear, mineral buildup, and door strain. Replacing them early can restore performance and prevent further issues.
The water inlet valve, ice maker, door seals, and defrost components are the most commonly replaced GE Profile refrigerator parts.
Can I replace a water inlet valve myself?
Yes, you can replace a water inlet valve yourself if you follow safety precautions, unplug the unit, and follow manufacturer instructions. Ensure you shut off the water supply and confirm there are no leaks after installation.
Yes, with safety steps and a proper guide, you can replace the water inlet valve yourself.
Where can I buy GE Profile parts that fit my model?
Buy from authorized distributors or OEM parts catalogs and verify model compatibility before purchasing. Avoid unknown sellers and check return policies and warranty coverage.
Purchase from authorized distributors or OEM catalogs and confirm model compatibility.
How do I know if a part is failing vs another issue?
Look for symptom patterns, check error codes, perform basic tests, and inspect the suspected part for visible wear or leaks. If symptoms persist after a replacement, reassess with a professional.
Check symptom patterns and error codes; replace the likely culprit and retest.
Is it cheaper to repair or replace a GE Profile refrigerator?
It depends on age, model, and repair costs. If multiple parts fail or the unit is older, replacement may be more economical in the long run. Always compute parts and labor against a like-new unit price.
Compare repair costs to the price of a replacement to decide.
“Understanding GE Profile parts and proper sourcing can dramatically reduce repair time and costs.”
Top Takeaways
- Identify the symptom first, then the probable part
- Source parts from verified distributors for compatibility
- Weigh DIY vs professional repair based on risk and cost
- Budget for repair and compare to potential replacement
- Maintain regularly to extend part life