krfc300ess Repair and Maintenance Guide
Comprehensive, step-by-step repair and maintenance guidance for the krfc300ess. Learn safe diagnostics, common failure modes, and practical fixes to keep your fridge running efficiently.

You will diagnose and repair the krfc300ess by verifying power, airflow, seals, defrost components, and electrical connections. Gather basic hand tools, a multimeter, a flashlight, and a service manual. Follow the detailed, step-by-step guide below to triage problems, perform safe tests, and restore proper cooling.
What is krfc300ess and common symptoms
According to How To Refrigerator, the krfc300ess is a compact French-door fridge known for energy efficiency and quiet operation. Homeowners typically encounter cooling problems, frost buildup, noisy fans, or ice-maker issues. This section outlines the most common symptoms and how they relate to root causes, so you can triage without unnecessary part replacements. The keyword krfc300ess helps framing the diagnosis, but the underlying principles apply to most modern residential refrigerators: check power, airflow, seals, and defrost systems first. If your unit not cold, or the freezer is frosty with warm air in the fresh-food section, start with the basics. Heavy usage, frequent door openings, or closely spaced items can accelerate wear on gaskets and impact cooling consistency. Understanding typical failure patterns helps you decide when to clean, reseat, or replace components.
For homeowners, the krfc300ess platform often shares design cues with other modern units, so the diagnostic approach described here translates across brands and models. You’ll learn to separate symptoms from root causes by focusing on power supply, venting paths, door integrity, and the defrost system. This reduces unnecessary repairs and helps you decide between a quick gasket swap or a larger compressor-related fix.
Safety first: essential precautions before repair
Repairing a fridge involves working with live electrical components and sharp metal edges. Before you touch anything, unplug the unit and pull it away from the wall to access the back and underside. Wear protective gloves and use a flashlight to inspect dark corners. Keep children and pets away, and never operate the compressor with wet hands. If you smell burning plastic or see damaged wiring, stop and call a professional. When in doubt, consult the krfc300ess service manual and follow local electrical safety guidelines. Always discharge capacitors safely and avoid touching exposed terminals. If you are unsure about a connection, leave it untouched to prevent further damage.
Safe handling tips: work on a dry surface, use insulated tools, and store screws in a labeled tray so you don’t misplace fasteners. If your home has an older electrical panel, consider using a residual current device (RCD) for added protection during testing.
Diagnostic mindset: organizing your checks
A structured diagnostics approach saves time and reduces risk. Start with the simplest checks: confirm power at the outlet, verify the light comes on, and listen for compressor or fan operation. Then inspect airflow: ensure evaporator fan runs when doors are closed and air vents aren’t blocked. Next, examine the defrost system: look for frost on the evaporator coils or an ice-blocked drain. Finally, assess the door seals and gaskets for leaks. Document findings with photos to guide future repairs. The krfc300ess shares a common design language with most top-loaders and side-by-side models, so these steps translate to many appliances. Keep your notes organized by symptom, date, and measured values.
As you test, differentiate intermittent issues from persistent faults. If you see consistent temperatures drifting or frost accumulating, mark the step and proceed to targeted checks rather than repeating broad inspections. This saves time and reduces the risk of misdiagnosis.
Common failure modes and what they mean
Not cooling often points to thermostat or compressor issues, improper defrost cycling, or blocked condenser coils. Frost buildup on the evaporator usually signals a defrost drain blockage or failed defrost heater. A leaky door seal can let cold air escape, causing the compressor to work harder. A humming or buzzing noise may indicate a faulty fan or excess debris around the condenser. In many cases, cleaning coils and replacing worn seals resolves the issue without expensive repairs. Always verify with a quick voltage and continuity test if you suspect electrical faults.
Other contributing factors include poor door alignment, excessive food load around vents, or an overloaded freezer that disrupts airflow. When diagnosing, consider patterns such as time of day, door usage, and environmental conditions (like dusty kitchens). These clues can point you toward a specific subsystem to inspect first, which minimizes unnecessary component replacement and helps you budget repairs more accurately.
Step-by-step repair and maintenance actions
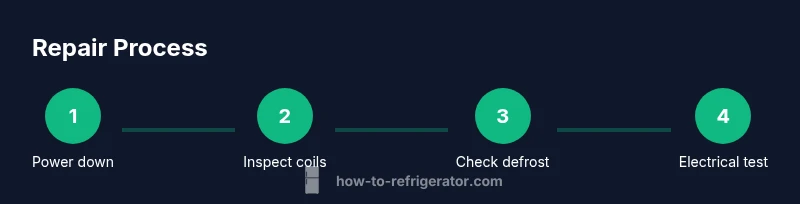
This sequence helps you diagnose and address common krfc300ess issues without guessing. If any step feels risky, stop and seek professional help. Step 1: Power down and prepare. Unplug the fridge and gently pull it away from the wall. Confirm there is no energy at the outlet before touching wiring. Tip: Use a non-slip mat to keep the unit stable. Step 2: Access panels and identify components. Remove the rear toe-kick panel or back cover to reach the condenser and evaporator area. Take clear photos before disconnecting any wires so you can reverse the changes later. Tip: Label connectors with tape. Step 3: Inspect seals and coils. Check door gaskets for tears and clean condenser coils with a soft brush. Clear dust but avoid bending the fins. Step 4: Defrost drain check. Look for frost on the evaporator and ensure the defrost drain is not blocked; flush with warm water if needed. Tip: Do not use sharp tools that could puncture tubes. Step 5: Electrical tests. With power off, test thermostat and start relay for proper continuity. If readings are outside spec, component replacement is likely required. Tip: Compare readings to the krfc300ess service manual. Step 6: Test run and monitor. Reassemble panels, plug in, and run the unit at normal settings for 60 minutes. Verify stable temperatures and no abnormal noises. Tip: Record readings for future reference.
Estimated total time: 2-3 hours.
Maintenance plan and when to seek help
Once krfc300ess returns to normal operation, implement a simple maintenance rhythm to prolong life. Clean condenser coils every 6-12 months or as dust accumulates, inspect door seals monthly, and check defrost drain during seasonal changes. If not cooling returns after cleaning and gasket replacement, or you hear unusual noises or see refrigerant smells, it’s time to call a professional. The How To Refrigerator team recommends documenting issues promptly and using a systematic checklist to avoid repeating problems.
To reinforce ongoing reliability, pair your maintenance with seasonal checks: test the thermostat accuracy, listen for unusual compressor cycling, and ensure that the drain pan is dry and free of mold. Adopting a proactive maintenance mindset reduces the likelihood of expensive failures and extends the life of your krfc300ess.
Tools & Materials
- Power outlet tester / multimeter(for voltage checks and continuity)
- Non-contact voltage tester(to verify power is off before touching components)
- Screwdrivers (Phillips #2, flathead)(for access panels and fasteners)
- Nut drivers or socket set(for compressor access panels)
- Flashlight(to inspect dark corners)
- Microfiber cloths(cleaning and wipe-downs)
- Coil brush or soft brush(for condenser coils if accessible)
- Replacement door seals (if worn)(inspect for tears; have spares)
Steps
Estimated time: 2-3 hours
- 1
Power down and prepare
Unplug the fridge and gently pull it away from the wall. Confirm there is no energy at the outlet before touching wiring. This protects you from electric shock and helps you safely inspect internal components.
Tip: Use a non-slip mat to keep the unit stable. - 2
Access panels and identify components
Remove the rear toe-kick panel or back cover to reach the condenser and evaporator area. Photograph wiring before disconnecting to simplify reassembly. This prevents misconnections and reduces guesswork later.
Tip: Label connectors with tape to keep track. - 3
Inspect seals and coils
Check door gaskets for cracks and perform a visual coil inspection. Clean condenser coils with a soft brush, taking care not to bend the fins. Clean coils improve heat exchange and reduce compressor load.
Tip: Work gently to avoid damaging delicate fins. - 4
Defrost drain check
Look for frost on the evaporator and verify the defrost drain isn’t blocked. Flush with warm water if needed and ensure drainage is unobstructed. A blocked drain causes frost buildup and not-cold issues.
Tip: Do not use sharp tools that could puncture tubes. - 5
Electrical tests
With power off, test thermostat and start relay for proper continuity using a multimeter. If readings are outside spec, component replacement is likely required. This helps isolate electrical faults.
Tip: Compare readings to the krfc300ess service manual. - 6
Test run and monitor
Reassemble panels, plug in, and run the unit at normal settings for 60 minutes. Verify stable temperatures and listen for normal compressor and fan operation. This confirms the repair before storing food again.
Tip: Record readings for future reference.
FAQ
What does not cooling indicate on krfc300ess?
Not cooling can indicate thermostat, compressor, or defrost problems. Start with power checks, coil cleaning, and drain inspection before replacing parts.
Not cooling can be caused by thermostat or compressor issues; begin with power checks and coil cleaning.
Can I fix a leaky door seal myself?
A torn or dirty gasket often causes leaks. Inspect the seal, clean the groove, and replace if damaged for a proper seal.
Yes, inspect and replace worn door seals to restore efficiency.
How often should I clean the condenser coils on krfc300ess?
Keep coils clean; inspect every few months and clean when you notice dust buildup to maintain airflow.
Check coils periodically and clean when you see dust buildup.
Is frost buildup dangerous?
Excess frost can block airflow and reduce cooling. If frost is heavy, defrost and inspect the drain.
Frost reduces cooling efficiency; address it promptly.
What tools should I have before starting?
A basic toolset plus a multimeter; ensure power is off while working.
You'll want a screwdriver set and a multimeter ready.
When should I call a professional?
If you smell refrigerant, hear unusual noises, or still have cooling problems after basic checks, seek professional help.
If you hear buzzing or smell refrigerant, call a technician.
Watch Video
Top Takeaways
- Power safety first: unplug before inspection.
- Clean coils boost cooling efficiency.
- Defrost drain must be clear to prevent frost.
- Document findings with photos for future fixes.
- When in doubt, seek professional help.